I’ll Be Home for Christmas…

Stampin-Up-I'll-Be-Home-Holiday-Card-Idea-Shannon-Jaramillo-stampinup-SU

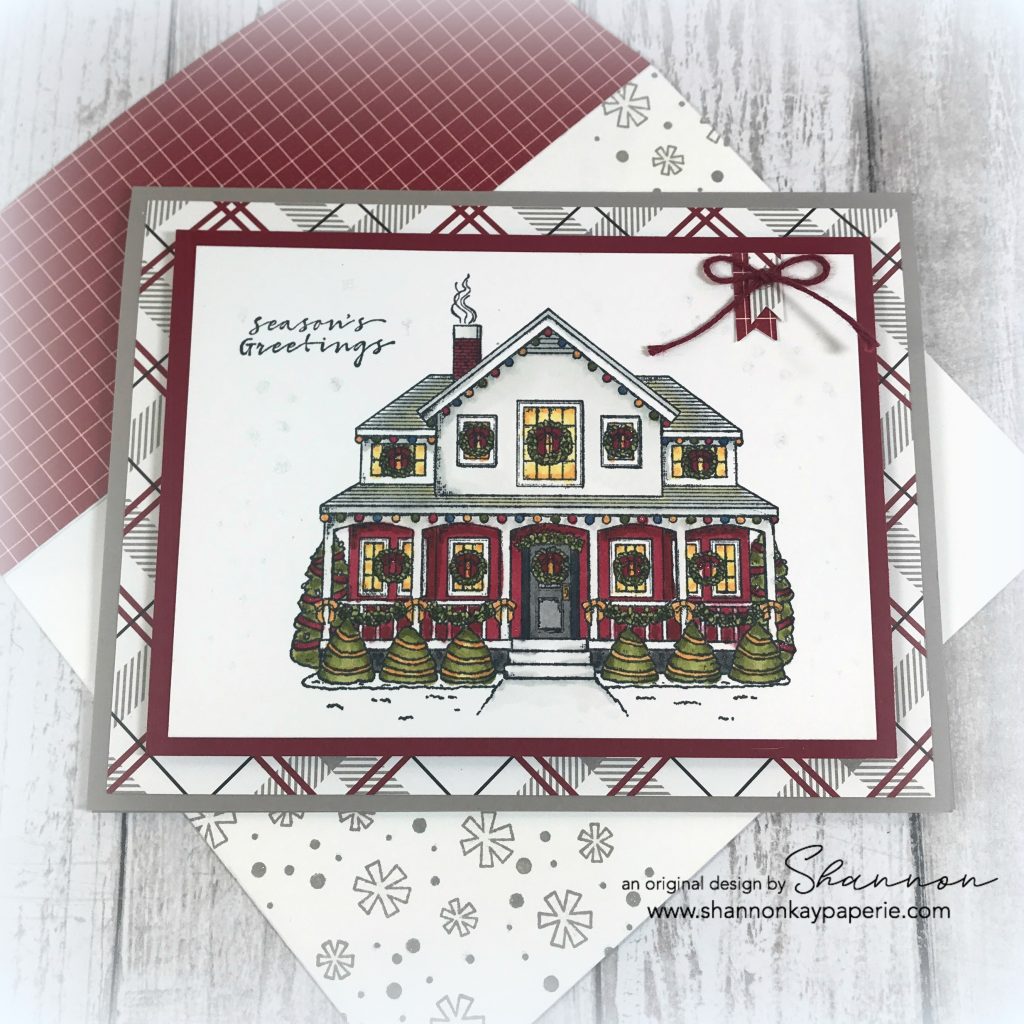
Isn’t this the quintessential “I’ll be Home for Christmas” house? I would LOVE to live there! Sadly, I live in Southern California so this is as close to this type of Christmas as I’ll get:)

Measurements:

  • Gray Granite Card Base 5 1/2″ x 8 1/2″ scored at 4 1/4″
  • DSP Layer 5 1/4″ x 4″
  • Cherry Cobbler Layer 4 3/4″ x 3 1/2″
  • Stamped Layer 4 1/2″ x 3 1/4″

Details:

  • I knew I wanted to color this image so I used Memento Tuxedo Black ink as that will not run when combined with alcohol markers
  • Then I jumped in, so excited to color this pretty image! But my coloring attempt was pitiful. Broke out new cardstock, stamped again and colored again. Still pitiful. At that point I knew I needed help so I googled this stamp set and found a colored image that really appealed to me so I stamped another clean image and tried again. This coloring attempt was MUCH better with all of the shadows included. I’m still learning how to add depth to my stamped images!

Stampin-Up-I'll-Be-Home-Holiday-Card-Ideas-Shannon-Jaramillo-stampinup-SU

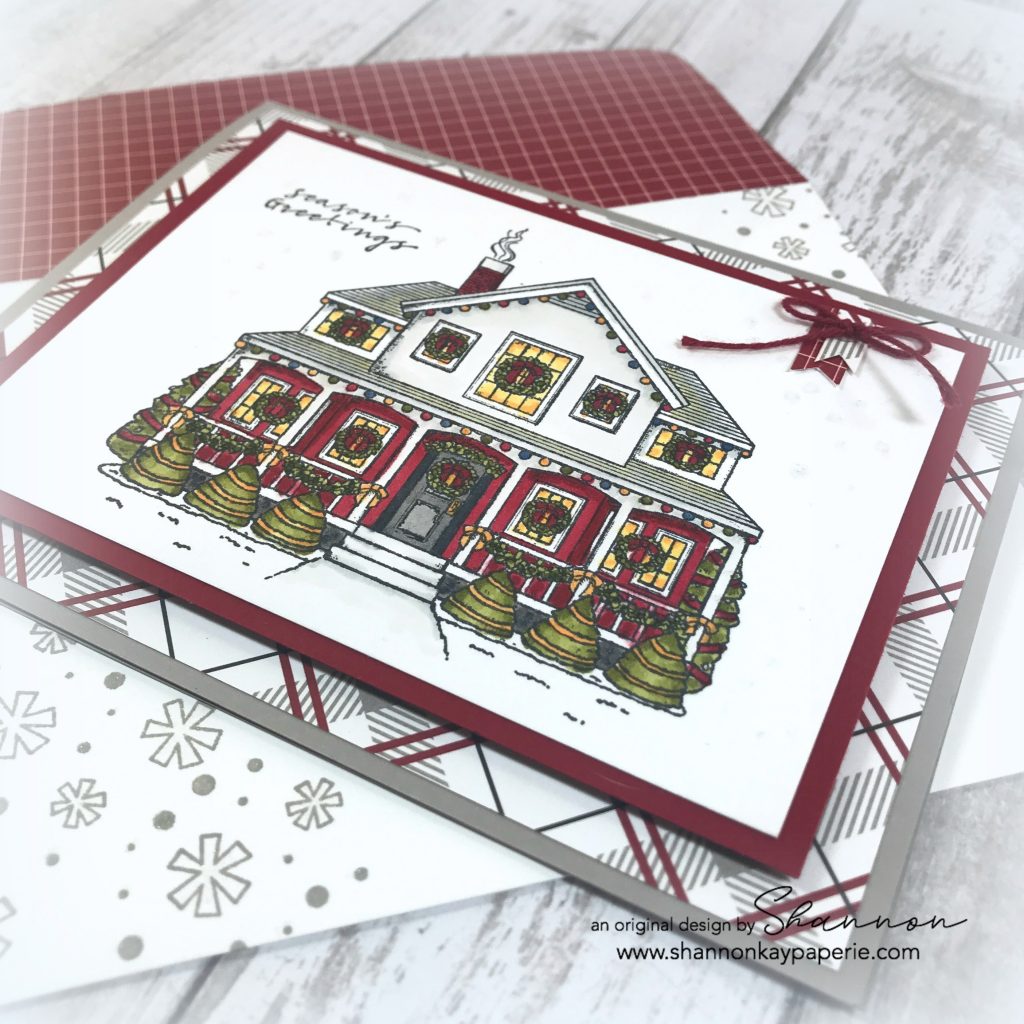
  • I layered this lovely Christmas house image onto Cherry Cobbler card stock, added a layer of white fun foam to the back to add dimension, and then layered THAT on to a lovely pattern from the Festive Farmhouse DSP.  I think the card base in Gray Granite really ties everything together.
  • When stamping, I realized that I didn’t leave myself very much room for a sentiment (and the sentiment from this stamp set is AWESOME) so I dug through my stamp sets until I found this itty bitty sentiment in the Wishing You Well stamp set…perfect size!!
  • I stamped snowflakes from the retired White Christmas stamp set in Versamark ink to add just a bit of ‘snow’ to my image and then added Wink of Stella to the snowflakes but it’s very hard to see here.
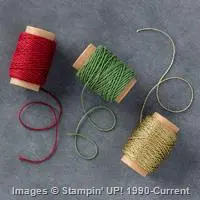
  • I layered tiny banners and a Cherry Cobbler bakers twine bow to the right side of my card to add a bit of balance.

Stampin-Up-I'll-Be-Home-Holiday-Cards-Ideas-Shannon-Jaramillo-stampinup-SU

  • A sentiment from the Merry Christmas to All stamp set was used on the inside of my card and the snowflakes on the envelope are a stamp from the Candy Cane Season stamp set.

Are YOU ready for the holiday? I’m definitely NOT, but I will be very soon!!

Thank you for stopping by today, Blessings!

Supplies:

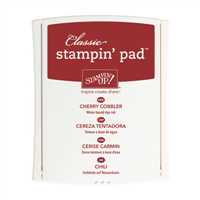
Card Stock: Gray Granite and Cherry Cobbler by Stampin’ Up! Stamper’s Select White by Papertrey Ink

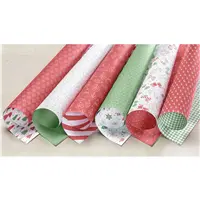
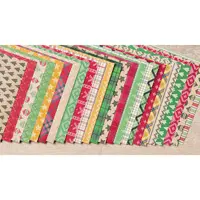
DSP: Festive Farmhouse by Stampin’ Up!

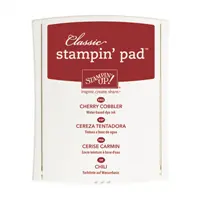
Ink: Memento Tuxedo Black and Gray Granite

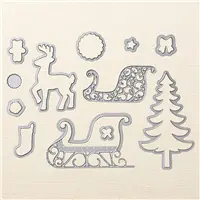
Stamps: I’ll Be Home, Wishing You Well, White Christmas (R), Merry Christmas to All, Candy Cane Season by Stampin’ Up!

Dies:  Envelope Liner Die (R) by Stampin’ Up!

Tools: Stampin’ Trimmer by Stampin’ Up!

Embellishments: Cherry Cobbler Twine from the Festive Farmhouse Cotton Twine bundle by Stampin’ Up!; Wink of Stella

Other: Whisper White Envelope by Stampin’ Up!

Christmas Wishes

Fun-Stampers-Journey-Christmas-Wishes-Christmas-Card-Idea-Shannon-Jaramillo-funstampersjourney

Hello there, my crafty peeps! It’s still a bit hot (okay, a lot hot) outside to think about Christmas, but it always sneaks up on me! I would like to send out unique Christmas cards to everyone on my list so I’d better get busy!!

I actually haven’t done much crafting this month, lots of new FSJ supplies meant that my room was overflowing and my storage system not working nearly well enough. I am making progress on it and finally found some mojo when I saw this sketch by fellow FSJ Coach Kazan Clark in the FB group ‘Journey Sketches‘ so I decided I wanted to play along!

Measurements:

  • Black Licorice Card Base 4 1/4″ x 11″ scored at 5 1/2″
  • Cozy Winters Pattern Paper 4″ x 5 1/4″
  • Whip Cream Layer 4″ x 2 1/4″

Details:

  • I started the creative process by looking through my pattern paper for inspiration. This bold black plaid pattern grabbed me and my mind went immediately to the delightful ATS image ‘Christmas Sprig’. I just love these sweet little stamp sets…they feature many different designs and styles and are at such a low price point, I find myself wondering who wouldn’t want all of them!?! Oh, and you can earn them for FREE too!

Fun-Stampers-Journey-Christmas-Wishes-Christmas-Card-Ideas-Shannon-Jaramillo-funstampersjourney

  • I recently acquired the Journey Color Splash Watercolor Pencils and decided to just dive in to them. To begin, I stamped the lovely poinsettia image in Black Licorice. And I don’t have to worry about choosing the right black ink, these hybrid ink pads can be used for everything without fear of bleeding 🙂
  • Once I had my image stamped, I colored the flower in with Candy Apple, the flower center with Lemon Drop, and the leaves with Fresh Forest. Then I dipped my Journey Blending Brush in water and carefully added just a touch of water to smooth my coloring out and to activate the color! So Pretty!! Once I was done adding color, I fussy cut the image out and then carefully added Journey glaze to the flower:

Fun-Stampers-Journey-Christmas-Wishes-Christmas-Cards-Ideas-Shannon-Jaramillo-funstampersjourney

  • Oh my goodness! The Journey Glaze dried quite quickly and REALLY makes the red flower pop right off of the card!!
  • I quickly stamped the sentiment, snipped out a few scraps of card stock to create the lines in the sketch, and added some Rainbow Drops!
  • I wanted just a bit ‘more’ on the left side of the poinsettia so I quickly snipped a few pieces of Special Day Organza Ribbon, daubed it with Black Licorice ink and brush on a bit of Sparkle Silk – yum!!

One Christmas card done!! I’m not going to really think about how many more I will make…I’m just going to savor this small accomplishment 🙂

Thank you SO much for visiting with me today, I appreciate you and love to hear from you!!

Supplies:

It’s the BEST Time of the Year – Freshly Made Sketches 306

Stampin-Up-Santa's-Sleigh-Christmas-Card-Idea-Shannon-Jaramillo-stampinup

I’ve been on a roll with fall cards and colors, and will go BACK to fall cards and colors, but I wanted to take a moment to remind us all that there are only 13 Fridays before Christmas! Eek! So if I only make one Christmas card a week from here on out, I will only have 13 made. That will NOT do at all…what is on YOUR to-do list? Anything yet?

Measurements:

  • Card Base 4 1/2″ x 11″, scored at 5 1/2″
  • Next layer 4″ x 5 1/4″
  • Top layer (DSP) 2 1/2″ (cut at 1 1/2″) x 4 1/2

Details:

  • I wasn’t sure about black as a Christmas card but have to say that after using this fabulous paper, I’m a convert! Basic Black and Old Olive look stunning together…very classy.

Stampin-Up-Santa's-Sleigh-Christmas-Card-Ideas-Shannon-Jaramillo-stampinup

  • I kept very close to the sketch with this card, simply changing out the rectangle on the left hand side for the Christmas Tree from Santa’s Sleigh. I stamped the tree in Tuxedo Black right onto a simple pattern from the Merry Little Christmas DSP pack, and then die cut the tree with the coordinating die.
  • The tree is popped up off of the simple black star pattern DSP, also from the Merry Little Christmas DSP pack, and next to it is a sweet sentiment from the Christmas in the Making stamp set. I stamped the sentiment in Tuxedo Black and then again in Versamark and then heat set clear embossing powder on it to make the sentiment really pop.

Stampin-Up-Santa's-Sleigh-Christmas-Cards-Idea-Shannon-Jaramillo-stampinup

  • Simple Black Baker’s Twine looped around the card and tied in a pretty bow give the card a nice balance of the three elements. Old Olive Enamel Dots are the perfect finishing touch!
  • I purposely kept all of the design elements clean, no layers or extras. This would be a good card to mass produce.
  • And isn’t the plaid pattern I used for the envelope liner fabulous?!? It’s so pretty, it’s hard to cut into!

Stampin-Up-Santa's-Sleigh-Christmas-Cards-Ideas-Shannon-Jaramillo-stampinup

  • I kept the inside simple as well with just a simple sentiment from the Snowflake Sentiments stamp set stamped in Tuxedo Black. The set also as this A-D-O-R-A-B-L-E little swirl which I stamped in Old Olive. I used my Stamp-A-Ma-Jig to get the placement I wanted.

Thank you to the Freshly Made Sketches design team for another outstanding and inspirational sketch! Without it this card would never have been born!

And remember, only THIRTEEN more Fridays until Christmas!!! 🙂

Supplies:

Card Stock: Stamper’s Select White by Papertrey Ink

Pattern Paper: Merry Little Christmas by Stampin’ Up!

Ink: Old Olive by Stampin’ Up! and Tuxedo Black by Memento

Stamps:  Santa’s Sleigh, Christmas in the Making and Snowflake Sentiments by Stampin’ Up!

Dies:  Santa’s Sleigh, Layering Circles and Envelope Liner Die (retired) by Stampin’ Up!

Tools: Big Shot, Heat Tool, Clear Embossing Powder, Embossing Buddy, Stamp-A-Ma-Jig by Stampin’ Up!; MISTI by My Sweet Petunia

Embellishments: Old Olive Enamel Dots and Basic Black Baker’s Twine by Stampin’ Up!

Other: Medium Whisper White Envelope by Stampin’ Up!

Christmas in July – Freshly Made Sketches 295

Stampin-Up-Santa's-Sleigh-Christmas-Card-Idea-Shannon-Jaramillo-stampinup

I know…you’re thinking “whhaaaattttt????” But it IS July and despite the fact that it was 106 degrees yesterday, we cannot hide from the fact that Christmas is only 170 days away! Time to start thinking about those beautiful handmade cards we promise ourselves we are going to create and send out every year…let’s make THIS the year we actually DO it!!

Details:

  • When I think of Christmas cards, I think of sending everyone a beautifully detailed, intricate one-of-a-kind Christmas card…and then I wake up and realize that the only way I will EVER get done is to mass produce! So…I make cards that can easily be recreated and for me that means simple and BOLD.
  • I absolutely adore this particular pattern from the Be Merry Designer Series Paper pack, it is SO striking! I originally had the entire background as this pattern paper but in the end relented, if only to follow the challenge sketch…so I added it as an envelope liner instead 🙂

Stampin-Up-Santa's-Sleigh-Christmas-Card-Ideas-Shannon-Jaramillo-stampinup

  • Are you wondering if those white splatters are a mistake?? Nope! The paper comes that way and I LOVE it! It adds such a fun texture to the design!
  • Simple stamps and their coordinating dies, both called Santa’s Sleigh, make an eye-catching focal point without a lot of fuss – always a plus in my book! Santa’s Sleigh is a carryover from last year’s holiday catalog and I am delighted to have another year to play with it!!
  • I have been pondering this Merry Christmas sentiment from the Better Together stamp set for a long time, trying to figure out what to use it with so it would look good…I think it works perfectly in this design, very graphic and clean!
  • The simple wreath, stamped in Garden Green, around the reindeer’s neck added a sweet pop of color to an otherwise monochromatic card. I stamped it, die cut it, and made a snip at the top so I could wrap it around the reindeer’s neck.
  • I added a small strip of Cherry Cobbler card stock at the top of the pattern paper. I thought it was a nice detail to have it popping out above the ribbon. The ribbon is retired, probably from last year, but I didn’t have any current ribbon in Cherry Cobbler and this ribbon is so soft and flexible, it makes a great looking knot!
  • The large enamel dot is retired product as well but I used it in conjunction with two other sizes of Cherry Cobbler Enamel Shapes for a fun detail that also goes along with the sketch. So cute!

Stampin-Up-Santa's-Sleigh-Christmas-Cards-Idea-Shannon-Jaramillo-stampinup

  • I used the coordinating stamp from the Better Together stamp set to stamp the inside of my holiday card. You could easily stamp directly onto the inside of the card without adding the Cherry Cobbler card stock frame…I just like layers 🙂

This sketch from Narelle of the Freshly Made Sketches design team was my jumping off point for my first Christmas card of the year:

A big THANK YOU to Narelle and the whole team for their inspiration week in and week out…you guys keep me stamping!!

I’m so glad you popped by today. I would love to hear if you have started your cards yet or when you plan on getting started!

Supplies:

Price: $110.00

Santa’s Sleigh in Black and Red – 30 Day Card Challenge, Day 10

Stampin Up Santa's Sleigh Christmas Card Ideas - Shannon Jaramillo Stampinup.jpg

Today I paired the Santa’s Sleigh Stamp and Thinlits Dies Bundle with the Warmth & Cheer Designer Series Paper Stack. This card has such a warm and cozy feel to me. It also fits perfectly with the challenge to use plaid over at Merry Monday so I’m playing along!

218

The Details:

  • This card has just a few(!) layers. Here are the dimensions of each layer from base to top:
    • Card Base 4 1/2″ x 11″, scored at 5 1/2″
    • Basic Black 4 1/8″ x 5 3/8″
    • Warmth & Cheer Designer Series paper 4″ x 5 1/4″
    • Basic Black 3 3/4″ x 5″ (this layer is popped up with Stampin’ Dimensionals)
    • Cherry Cobbler 3 5/8″ x 4 7/8″
    • Thick Whisper White 3 1/2″ x 4 3/4″
  • I was able to quickly turn scraps of paper into banners with the Triple Banner Punch. Baker’s Twine makes adding a pretty bow a snap!

Stampin Up Santa's Sleigh Christmas Cards Idea - Shannon Jaramillo Stampinup.jpg

  • Red and Black is an uncommon color combination to me, but wow, does it ‘POP” here! The whole card feels very classic and timeless.
  • The Santa’s Sleigh stamp set and coordinating dies are amazing as stand alone images (see this card here) but also have huge potential when paired together in a scene. I stamped both the reindeer and the wreath images in Tuxedo Black Memento Ink, die cut them both (note that there is a die to cut out the inside of the wreath) and paired them up, snipping through the wreath and wrapping it around the reindeer’s neck. The wreath looks so sweet and he looks so proud to be wearing it!
  • I used a Blender Pen and Stampin’ Markers in Garden Green and Cherry Cobbler to color the holly leaves and add in berries. If you don’t have Stampin” Markers, an alternative would be to pool some ink from your ink pad into the lid, and then dip the blender pen into that to pick up ink. The wreath sparkles with Wink of Stella.
  • I couldn’t resist using the eye from the Owl Builder Punch to add Rudolph’s nose. And it sparkles! I do so love Wink of Stella!!

Stampin Up Santa's Sleigh Christmas Cards Ideas - Shannon Jaramillo Stampinup.jpg

  • Two sentiments from the Santa’s Sleigh stamp set grace this card. One on the front and the other on the inside. I love to add card stock in coordinating colors on the inside as well. It’s totally not “necessary” but I love the look and heft of the card with all the layers. All told, this card has 9 layers!! Eek!! Extra postage for sure, lol. The little stars are from the Stitched with Cheer stamp set. I love the added detail. And sparkle. Because of course they sparkle 🙂

What do you think? This card is technically clean and simple, but really falls more into the clean and layered category. I love them both!

Supplies:

Price: $110.00