Let Your Dreams Take Flight – CAS(E) This Sketch #362

Fun-Stampers-Journey-Blue-Skies-Congratulation-Card-Idea-Shannon-Jaramillo-Shannon-Kay-Paperie

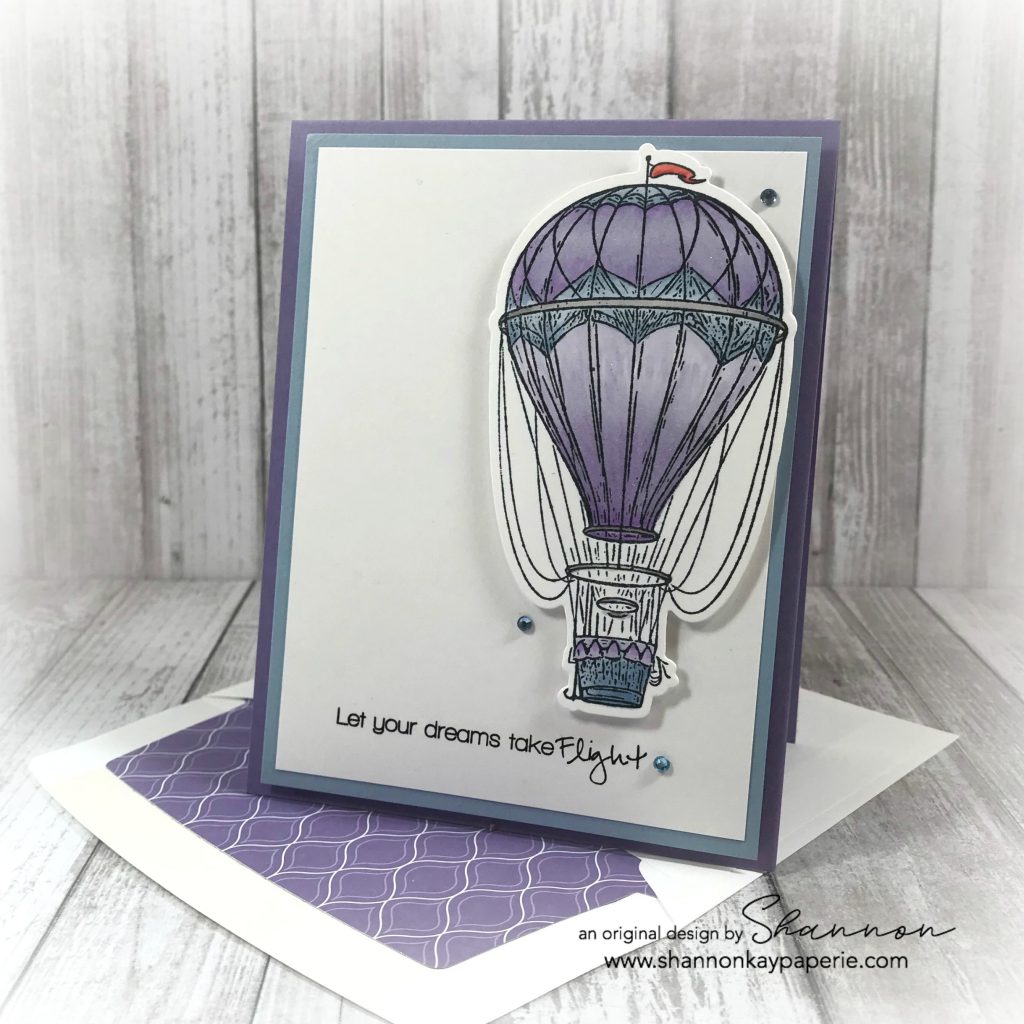
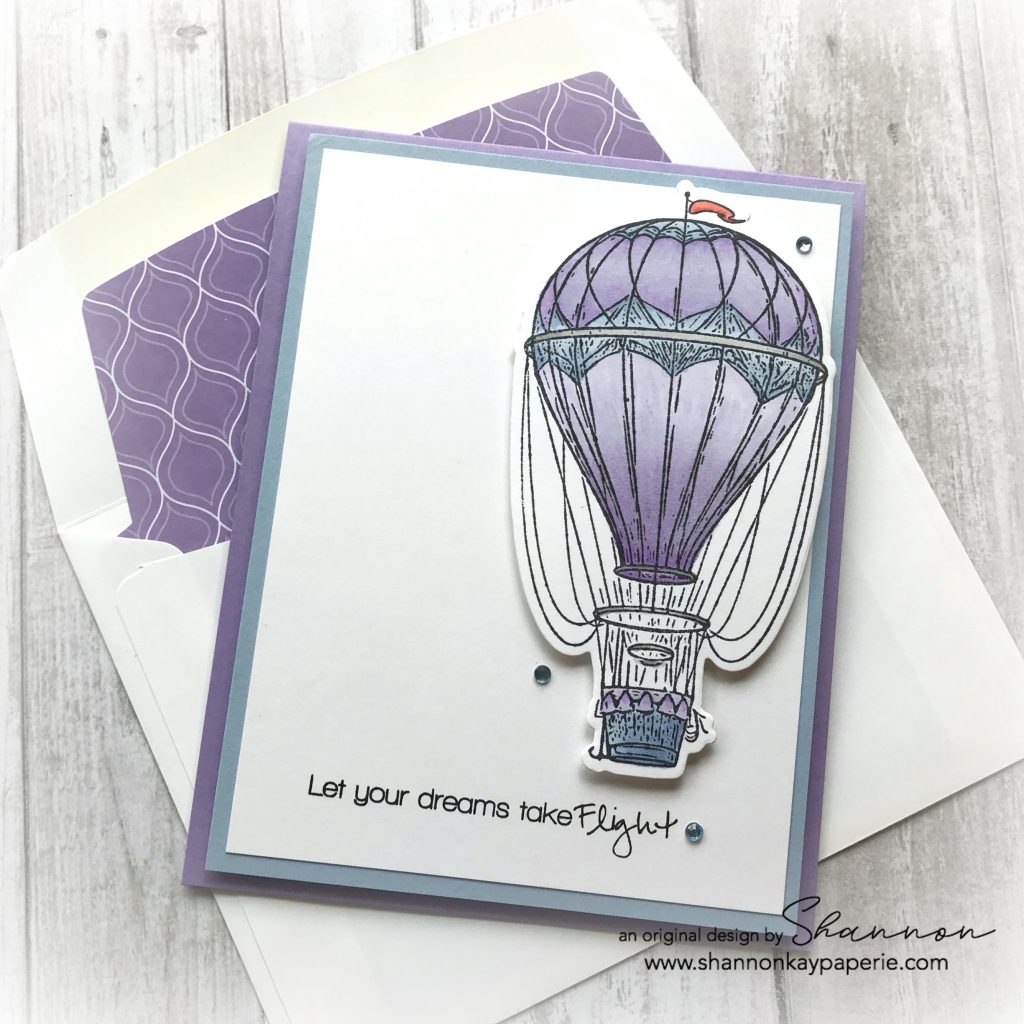
What?!? Purple AGAIN?? Absolutely!! I am over the moon for the combination of Highland Heather and Seaside Spray! Isn’t it delightful? It’s raining today in Southern California and I think the rain outside has affected my color choices 🙂

Measurements:

  • Highland Heather Card Base 4 1/4″ x 11″ scored at 5 1/2″
  • Seaside Spray Card Stock 4″ x 5 1/4″
  • White Card Stock 3 3/4″ x 5″

Details:

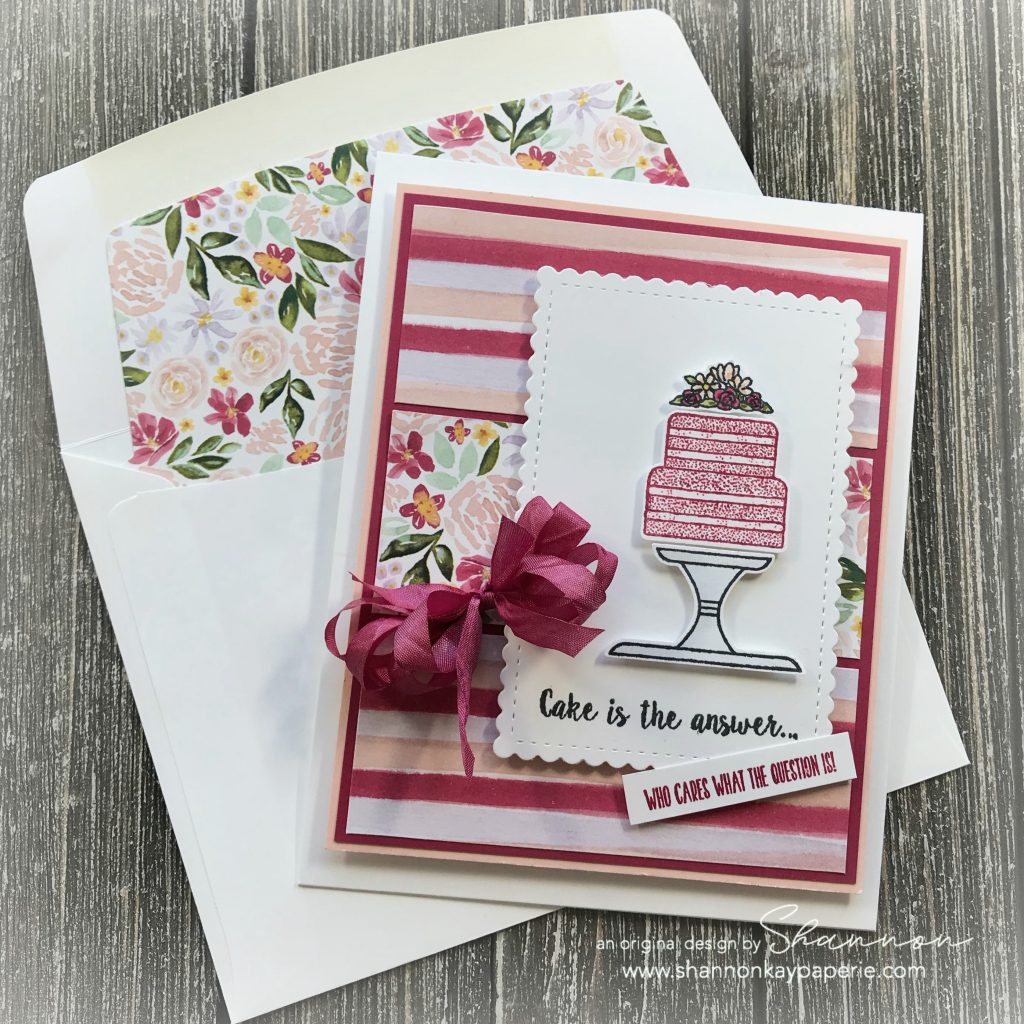
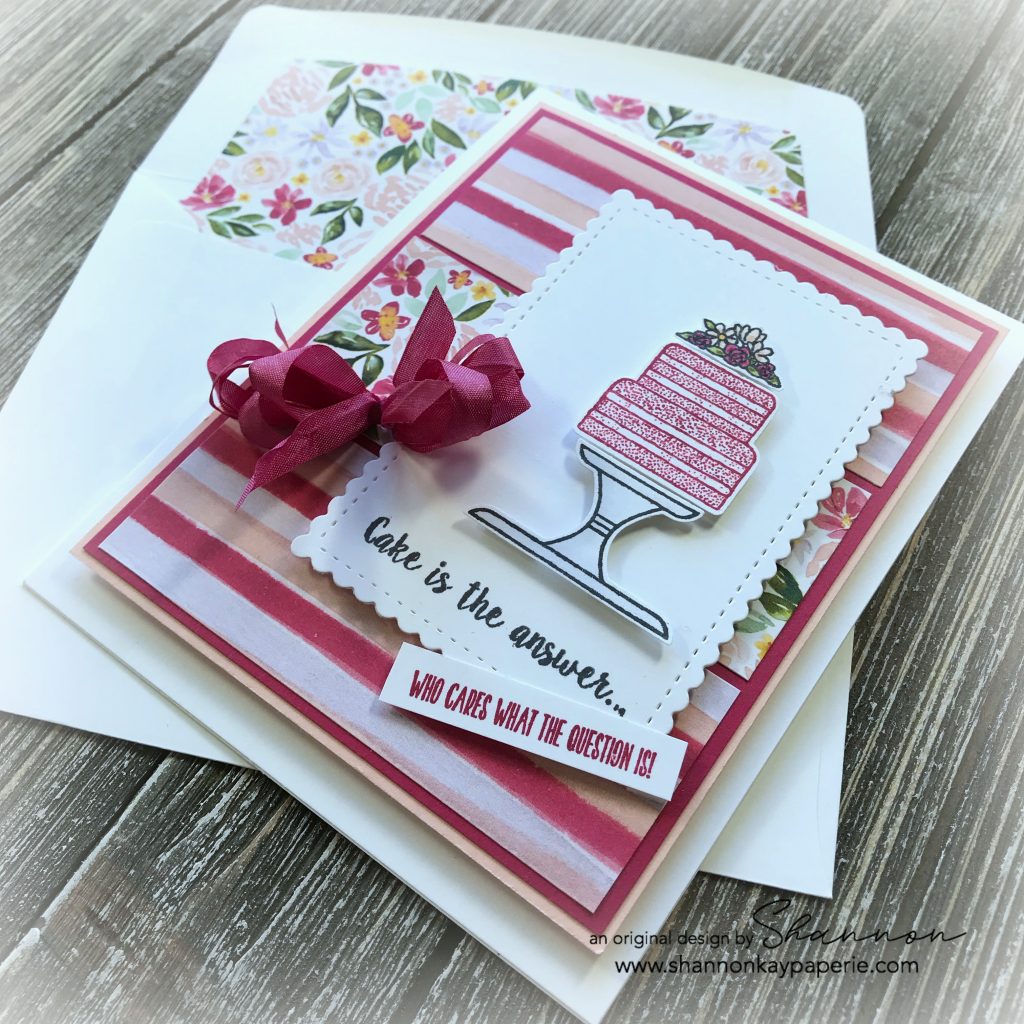
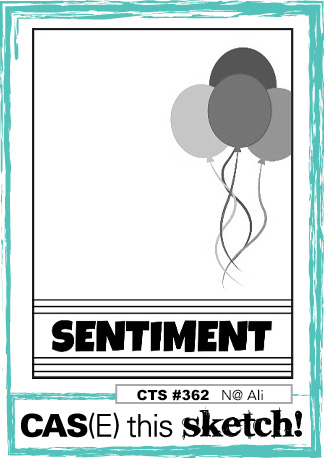
  • Super simple design today for the CAS(E) This Sketch challenge today! I came across this darling hot air balloon and KNEW it was THE one! I have used it before here and I really wanted to color it again, this time with alcohol markers. It was SO quick and easy to color!!

Fun-Stampers-Journey-Blue-Skies-Congratulation-Card-Ideas-Shannon-Jaramillo-Shannon-Kay-Paperie

  • Honestly, I went through every.single.stamp. I own to find the right sentiment for the sketch! But I’m very happy with the one I finally decided on. It’s from a very old set (I think) that I purchased secondhand, in a jumble of sets actually, by a company I have never heard of, but it was hot air balloons so I kept it and I’m so glad I did!
  • Once again, I have used gems from Honeybee Stamps. They really have a fantastic selection of colors!!

Fun-Stampers-Journey-Blue-Skies-Congratulation-Cards-Idea-Shannon-Jaramillo-Shannon-Kay-Paperie

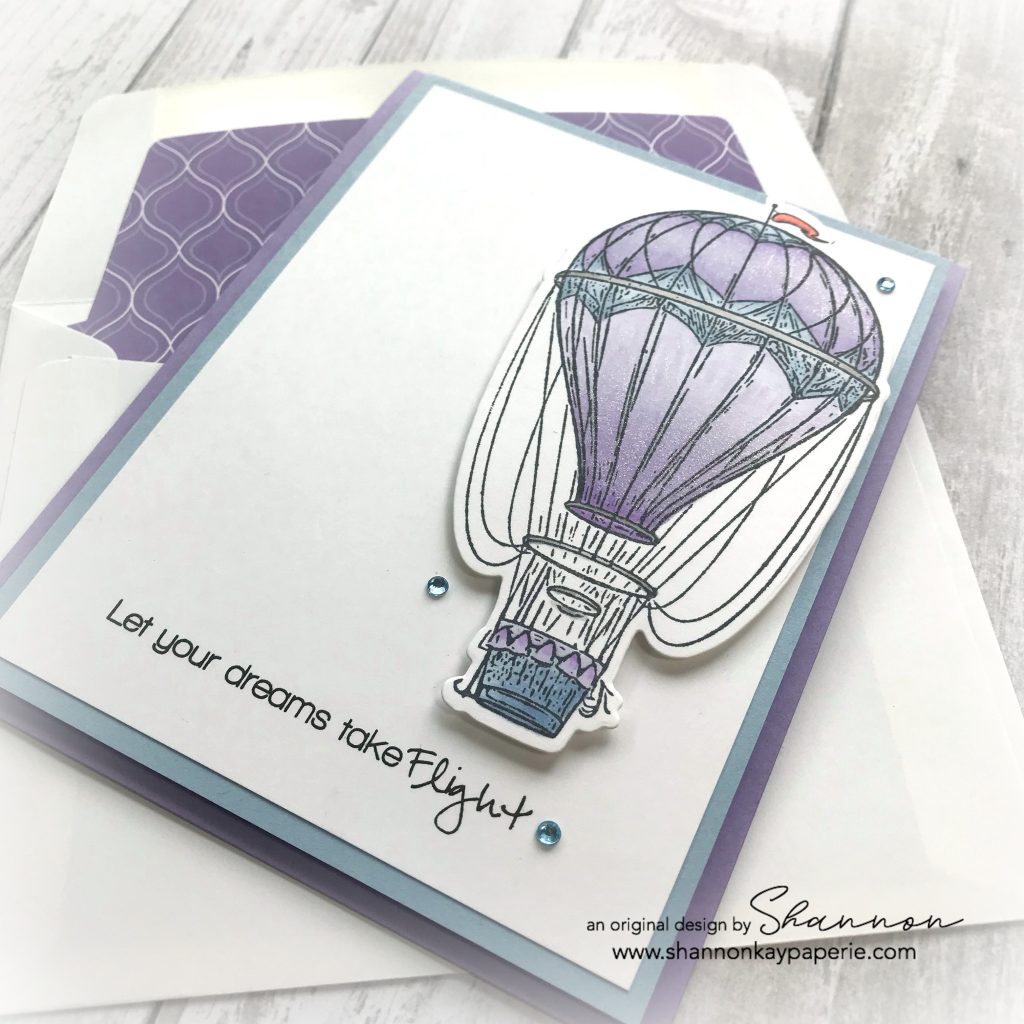
  • Mmmm, I added Wink of Stella to the base and top of the balloon for a soft shimmer (which you can only just barely see, but it’s there!). And an itty Bitty Calypso Coral banner up top!

Fun-Stampers-Journey-Blue-Skies-Congratulation-Cards-Ideas-Shannon-Jaramillo-Shannon-Kay-Paperie

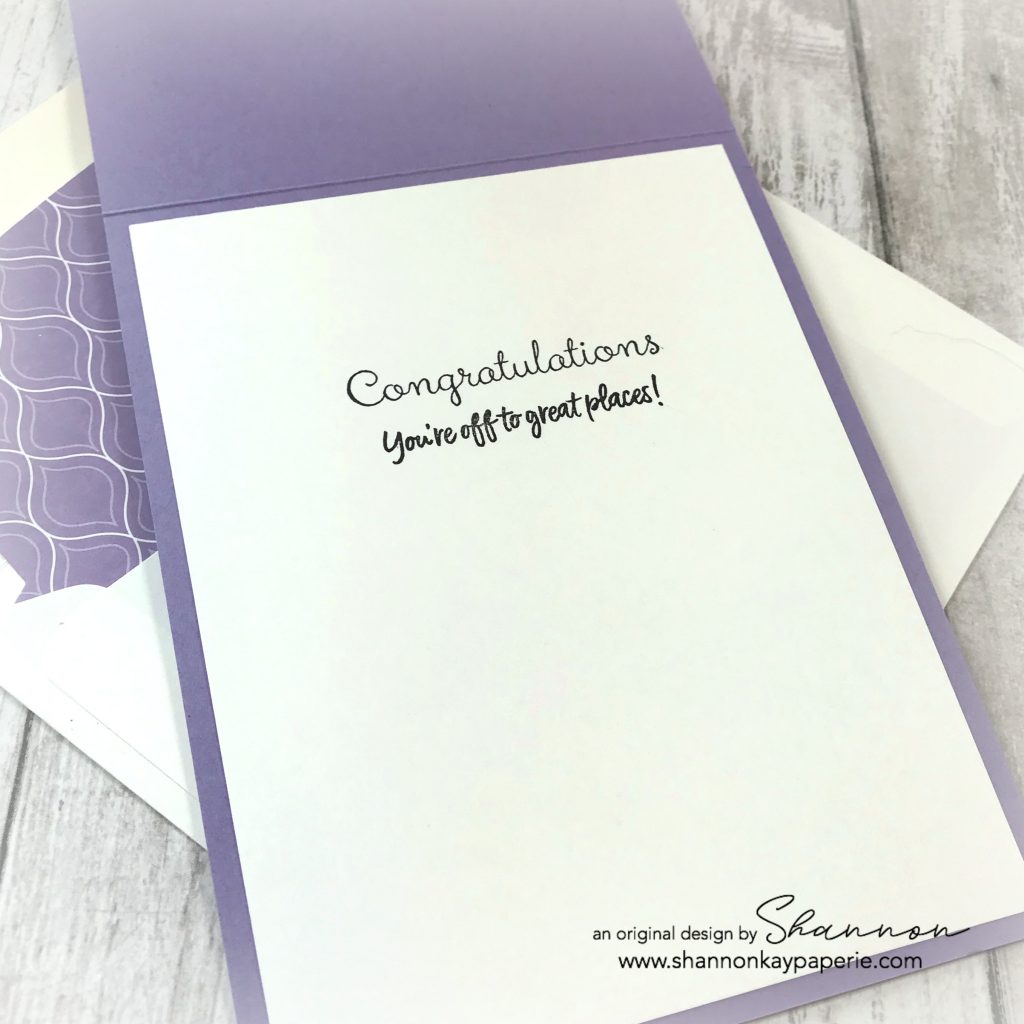
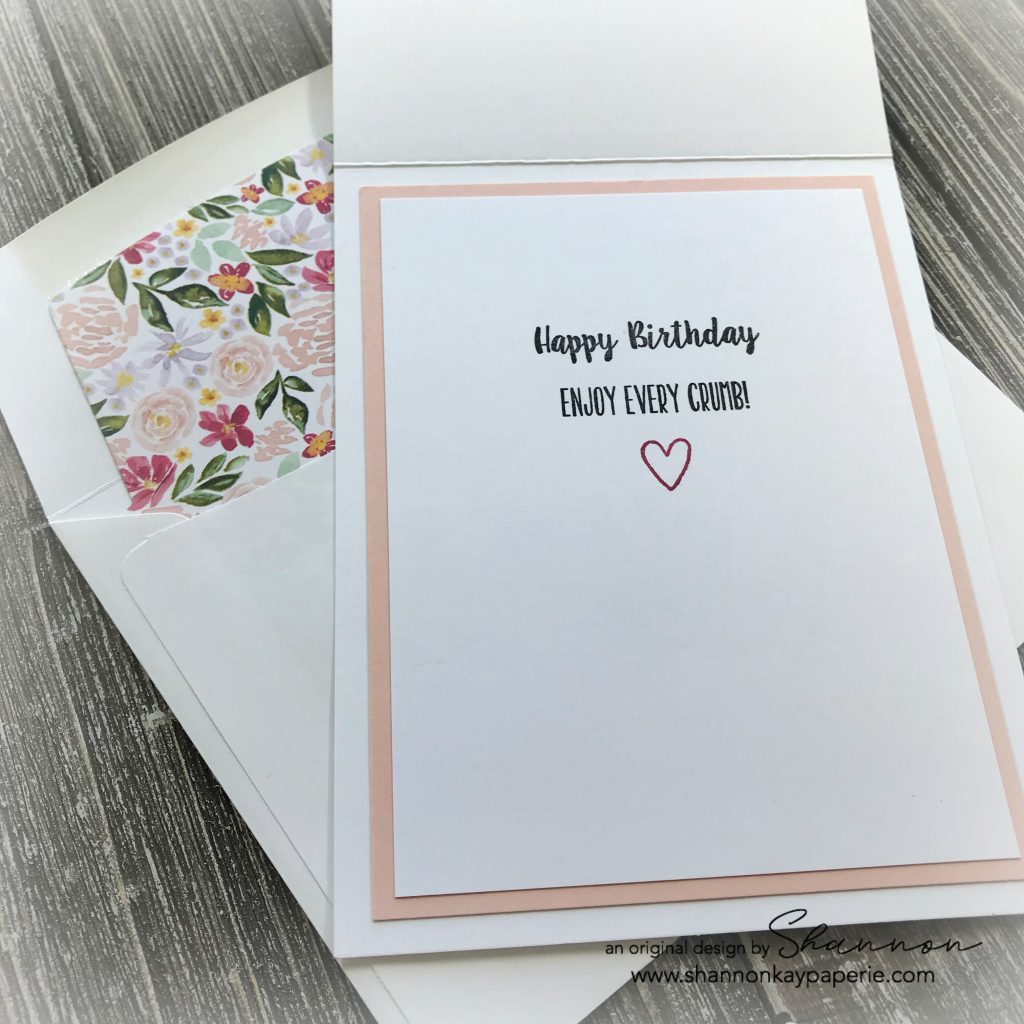
  • A quick peek at the inside sentiments, which I think would work wonderfully for a graduation, a job change, or even a move to a new city!

Thank you to the CAS(E) This Sketch design team for their wonderful inspiration this week! It’s been a bit since I played – so glad I jumped in this week!!

Blessings to you!!

Supplies (all Stampin’ Up! unless otherwise noted):

Card Stock: Highland Heather, Seaside Spray;  Neenah Solar White Classic Crest Cover 80#

DSP: All Occasions in Highland Heather

Specialty Paper: None

Ink: Versamark Onyx Black

Stamps: Blue Skies by Fun Stampers Journey; Love in the Air by Our Craft Lounge (front sentiment); Special Celebrations & Above the Clouds by SU (inside sentiments)

Dies: Blue Skies by Fun Stampers Journey and Envelope Die (retired)

Markers: P145 Pale Lavender – Shin Han Twin Touch; Stampin’ Blends – Light & Dark Seaside Spray, Light Highland Heather, Light & Dark Gray Granite and Light & Dark Calypso Coral

Tools: Big Shot, Stampin’ Trimmer (both retired)

Embellishments: Wink of Stella; Ocean Breeze Gem Stickers by Honeybee Stamps

Other: Whisper White Envelope

Cute Boots – Tic Tac Toe Challenge #54

I love this week’s Tic Tac Toe Challenge board – thank you Joanne for such a fun one! My starting point for this challenge turned out to be “Rain” so I chose to use the Left Column this week – Punch, Rain, Gingham/Check. I am SO very much looking forward to what YOU choose to use!

Fun-Stampers-Journey-Cute-Boots-Love-and-Encouragement-Card-Idea-Shannon-Jaramillo-stampinup-SU

Measurements:

  • Rococo Rose Card Base 4 1/4″ x 11″ scored at 5 1/2″
  • Granny Apple Green Card Stock  4″ x 5 1/4″
  • Mango Melody DSP 3 3/4″ x 5″

Details:

  • Oh my goodness, look at those colors! This girl is apparently ready for Spring! lol. I began this challenge by going through my stamps. I have quite a few spring/Easter related and I want to make sure they see ink this year. The first set I came to was Cute Boots by Fun Stampers Journey. I purchased it last year because of this little cutie!
  • I admit to googling this stamp set for ideas on how to color the image. I pretty much followed Laura Looloo’s lead, she’s got SUCH a knack for bright colors! I colored with Stampin’ Blends and kept it pretty simple with blending only on the rain boots and rain jacket.

Fun-Stampers-Journey-Cute-Boots-Love-and-Encouragement-Card-Ideas-Shannon-Jaramillo-stampinup-SU

  • There’s a lot going on here with the scollops, gingham, and flowers so I kept everything else very simple, only popping up one line of the sentiment. I think we should ALL wear cute boots. 🙂
  • I pulled out a very retired punch for today’s project – I have always loved the cute punched flowers it creates! I scrunched the sides up around a single Artisan Pearl.

Fun-Stampers-Journey-Cute-Boots-Love-and-Encouragement-Cards-Idea-Shannon-Jaramillo-stampinup-SU

I kept the inside simple as well, repeating the colors on the front and adding a bit of fun detail to the gingham DSP with the Decorative Ribbon Border Punch.

I hope you have enjoyed today’s project, be sure to visit the Tic Tac Toe Challenge blog to see more yummy inspiration from our design team! Can’t wait to see you over in the challenge!

Blessings!

Supplies (all Stampin’ Up! unless otherwise noted):

Card Stock: Rococo Rose and Granny Apple Green; Neenah Classic Crest Cover Solar White (80 lb)

DSP: All Occasion DSP Stack (Mango Melody)

Ink: Memento Tuxedo Black and Versamark Onyx Black

Stamps: Cute Boots by Fun Stampers Journey

Coloring Tools: Stampin’ Blends – Mango Melody Light & Dark (rain boots); Rococo Rose Light & Dark (rain jacket); Balmy Blue Light & So Saffron Light (dress); Balmy Blue Light (puddle & rain); Highland Heather, Rococo Rose, Calypso Coral, Granny Apple Green – all light (umbrella); Light & Dark Granite Gray (umbrella handle & top); Ivory (skin)

Dies: Stitched Mini Scalloped Retangles Dies by MFT Stamps 

Tools: Big Shot; Itty Bitty Shapes Flower Punch (retired); Decorative Ribbon Border Punch

Embellishments: Petal Pink Artisan Pearls

Other: Whisper White Envelope


Cake is the Answer – The Paper Players 479

Stampin-Up-Piece-of-Cake-Birthday-Card-Idea-Shannon-Jaramillo-stampinup-SU

Cake is the answer – who cares what the question is! Right, lol?!? My favorite is COSTCO chocolate with chocolate frosting. I can lose my MIND around COSTCO chocolate cake. It’s a good thing I don’t encounter it very often now that I am retired! 🙂 Do you have a favorite?

Measurements:

  • White Card Base 4 1/4″ x 11″ scored at 5 1/2″
  • Petal Pink Card Stock Layer 3 7/8″ x 5 1/8″
  • Lovely Lipstick Card Stock Layer 3 3/4″ x 4 3/4″
  • 3 DSP Rectangles 3 5/8″ x 1 1/2″

Details:

  • Today’s project was built around this darling pattern paper (or DSP) Best Dressed from Stampin’ Up!. I love that one side of the DSP coordinates with the Dressed to Impress stamp set and that the reverse prints coordinate with the Beautiful Friendship stamp set.
  • Lovely Lipstick is the color that jumped out at me so I used it on the birthday cake, part of the sentiment and for the beautiful bow as well.
  • I have to admit struggling with using this cake image from the Piece of Cake stamp set. I kept stamping in with Tuxedo Black Memento Ink and then coloring it, using different combinations of colors each time. That’s when I realized that the image would be best stamped in a colored ink and voila! Love it! (Is it just me or does the cake stamp look like two macarons stacked one on top of the other?)
  • Do you recognize the ribbon I used? No? Well, that’s because the ribbon was originally WHITE and I colored it with my Dark Lovely Lipstick Stampin’ Blend alcohol marker! It’s a trick I learned long ago but with re-inker as the coloring agent. I MUCH prefer the alcohol marker method as it’s not quite as messy and dries almost instantly. The bit of ribbon I used here was from a product share I participated in and I definitely want to purchase a whole roll of this lovely ribbon – it’s a very nice width and SO easy to color! (If you want some as well, get it ordered pronto as it’s already on backorder and there’s always a chance it could sell out, it’s been very popular)

Stampin-Up-Piece-of-Cake-Birthday-Card-Ideas-Shannon-Jaramillo-stampinup-SU

  • Don’t you just love the sentiment? I wanted it to stand out so I stamped it in Lovely Lipstick and then cut it out and adhered it at a candy angle. Who CARES what the question is?!? Makes me giggle every time I read it!
  • I stamped the cake stand in Tuxedo Black Memento Ink and then colored it in using a combination of COPIC and Shin-Han markers in very soft gray tones. I added shading with the darker color. The floral cake topper (which I thought coordinated very nicely with the floral pattern paper) was colored with a combination of Stampin’ Blends and Stampin’ Write Markers and then fussy cut it out. All three pieces were popped up on Stampin’ Dimensionals onto a die cut scalloped rectangle, also popped up with Stampin’ Dimensionals.
  • To create the bow, after coloring it with my Stampin’ Blend marker, I wrapped it around three of my fingers, scrunched it up in the middle, and then wound another smaller piece of ribbon around it and pulled it tight into a knot. Super easy to do and makes quite an impression! Of course, it will get a bit smushed when put into an envelope, but even smushed, I think it will look quite lovely.

Stampin-Up-Piece-of-Cake-Birthday-Cards-Idea-Shannon-Jaramillo-stampinup-SU

  • I used more sentiments from the same stamp set, as well as a heart, for the card inside and framed them out in Petal Pink.

Thank you to Ms. Leanne over at The Paper Players for her delightful sketch this week. I had SO much fun playing along! 

Have a great rest of your week!

Supplies (all Stampin’ Up! unless otherwise noted):

Card Stock: Lovely Lipstick and Petal Pink;  Neenah Solar White Classic Crest 80# and 110#

DSP: Best Dressed

Specialty Paper: None

Ink: Lovely Lipstick; Versamark Onyx Black & Memento Tuxedo Black

Stamps: Piece of Cake

Alcohol Markers: Light & Dark Lovely Lipstick, Light Old Olive, Light Petal Pink, COPIC C00 & Shin-Han Twin Touch CG1

Dies: Stitched So Sweetly, Stitched Rectangle and Envelope Die (retired)

Tools: Big Shot, Stampin’ Trimmer (both retired); Cake Builder Punch, Old Olive and Petal Pink Stampin’ Markers

Embellishments: Whisper White 1/4″ Crinkled Seam Binding Ribbon; Wink of Stella 

Other: Whisper White Envelope

Oh My Gostrich! – Freshly Made Sketches 423

MFT-Stamps-Oh-My-Gostrich-Birthday-Card-Idea-Shannon-Jaramillo-stampinup-SU

Whattttt??? Is this the CUTEST little guy ever?!! So cute, he needs a name! Stanley! That’s it! I spent ALL day yesterday going through some family old papers and my brain was pretty fried so when I saw this darling stamp set with Stanley and his ADORABLE perky little face, I knew he was the perfect choice to shake off the melancholy.

Measurements:

  • Crumb Cake Card Base 4 1/4″ x 11″ scored at 5 1/2″
  • Layer of Old Olive Card Stock  4″ x 5 1/4″
  • Birthday Bonanza DSP 3 3/4″ x 5″

MFT-Stamps-Oh-My-Gostrich-Birthday-Card-Ideas-Shannon-Jaramillo-stampinup-SU

Details:

  • I built a little scene with the ostriches in keeping with the sketch layout and pulled out a whole slew of Stampin’ Blends to color Stanley and his companion (who’s pretending if we can’t see him, it can’t possibly be his birthday). I started with Light Gray Granite and then worked in layers of Light and Dark Crumb Cake and Light and Dark Soft Suede for their bodies. Legs and necks were a combination of Light Petal Pink and a Shin-Han Twin Touch Marker in Straw Yellow for the shading. Stanley’s beak is a base of Light Gray Granite with Light Pumpkin Pie layered over it and just a bit of Dark Pumpkin Pie for depth. I added strawberries to Stanley’s cheeks with Dark Petal Pink.
  • Oliver (it’s his birthday) is hiding his head in a pool of water stamped in Pool Party. Stanley is standing in Sahara Sand sand and the little flecks of grass were die cut in Old Olive, colored over with Light Gray Granite and touches of Wink of Stella at the tips.

MFT-Stamps-Oh-My-Gostrich-Birthday-Cards-Idea-Shannon-Jaramillo-stampinup-SU

  • I used Honeybee Stamp’s Sentiment Banners to help me get my stamped sentiment stamped correctly (and straight), and then cut the banner ends off – they were too distracting. I added another strip in Pretty Peacock to stay with the sketch and to bring out the pretty DSP. I also stamped a companion ostrich on the envelope – hey, I needed coloring practice! – as well as another on the inside of the card:

MFT-Stamps-Oh-My-Gostrich-Birthday-Cardss-Idea-Shannon-Jaramillo-stampinup-SU

  • I layered the white panel over a SUPER pretty piece of Tropical Oasis DSP, stamped the sentiment and ostrich, and then, because I just happened to have a scrap of the DSP from the front of the card laying around, I added it to the inside as well. I love that the scrap was cut in such a way that the candles are perfectly displayed!

I can’t even stop smiling at Stanley and Oliver, they are SO stinking’ cute! I purchased this stamp set on a whim simply because I had an email in my inbox a few weeks ago from MFT Stamps with a pop up sale on a few retiring items – I’m so happy that I indulged in this set! Thank you Kim for your awesome sketch this week over at Freshly Made Sketches – it made my stretch my comfort zone a bit and design a scene instead of just using one image! And a BIG thank you to Amy for picking my card last week!

MFT-Stamps-Oh-My-Gostrich-Birthday-Cardss-Idea-Shannon-Jaramillo-stampinup-SU

Thank you for stopping by!!

Supplies (all Stampin’ Up! unless otherwise noted):

Card Stock: Crumb Cake, Old Olive, Pretty Peacock;  Neenah Solar White Classic Crest 80#

DSP: Birthday Bonanza and Tropical Oasis

Specialty Paper: None

Ink: Versamark Onyx Black & Memento Tuxedo Black; Pool Party and Sahara Sand

Stamps: Oh MY Gostrich by MFT Stamps

Alcohol Markers: Light Gray Granite, Light & Dark Crumb Cake, Light & Dark Soft Suede, Light & Dark Petal Pink, Light and Dark Pumpkin Pie; Shin-Han Twin Touch Y223 Straw Yellow

Dies: Sentiment Banners & Grass Border by Honeybee Stamps; Pierced Circles by MFT Stamps

Tools: Big Shot, Stampin’ Trimmer (both retired)

Embellishments: Wink of Stella 

Other: Whisper White Envelope

Inspiring Iris Thank You – Tic Tac Toe Challenge #52

Hello and welcome! I have a brand new Tic Tac Toe Board for your crafting pleasure today! Our designer this week is Amy – I have so much fun deciding which row or column to choose each challenge and then seeing what all the participants decide to use and HOW they use the elements…we are all so uniquely different in our interpretation! This week I chose to use the top row: Die Cut, CAS (clean and simple); Purple.

Stampin-Up-Inspiring-Iris-Thank-You-Card-Idea-Shannon-Jaramillo-shannonkaypaperie

Using purple takes me back to my high school days and Prince. Everything in my life was purple – even my ball point pen! Most teachers refused to let me use it but Mrs. King, bless her heart, let me use it, even though all of those biology notes in purple HAD to be difficult on her eyes! In adult life I rarely use purple for anything – except the flowers I choose to plant in the yard. My hubby was the one who noticed that they were all purple and suggested I chose a different color once in awhile! 🙂 Anyhoo, card making…

Measurements:

  • Highland Heather Card Base 4 1/4″ x 11″ scored at 5 1/2″
  • Strip of Granny Apple Green Card Stock  2 7/8″ x 5 1/2″
  • Strip of White Card Stock 2 3/4″ x 5 1/2″

Details:

  • I tend to fuss a bit with my cards so it’s refreshing to take a clean and simple viewpoint once in awhile. Purple gingham, a circle die cut, one stamp set and three inks. Simple!
  • I used the stamp set Inspiring Iris today. It’s a layering stamp set so achieving this look could not be any easier. The outline image was stamped in Versafine Onyx Black, for the the flower image stamp I used Highland Heather and then Granny Apple Green for the stem and leaves image. A total of three stamps and no coloring experience required! I added a simple sentiment from the same stamp set in Versafine Onyx Black as well and that was it!

Stampin-Up-Inspiring-Iris-Thank-You-Card-Ideas-Shannon-Jaramillo-shannonkaypaperie

  • I layered the white card stock onto a Granny Apple Green layer. With just a bit peeking out from either side it adds interest without overwhelming the card with color. I added the gingham circle die cut because, well…gingham. Yumminess in every color!
  • And then the card was done but I couldn’t just stop there. I pulled out my little jar of unused bows, actually looking for a twine one to go with the clean and simple concept but found this white beauty instead. I adhered it with a glue dot. Love the sheer organdy, it’s such a clean look!

Stampin-Up-Inspiring-Iris-Thank-You-Cards-Ideas-Shannon-Jaramillo-shannonkaypaperie

  • My goal with each card is to use up one 6 x 6 sheet of DSP. I used a quarter of a sheet for the die cut circle, and a large strip of it for the envelope flap but had enough to add a thin strip down the side on the card interior. There’s still lots of room for a note and the gingham is so cheery, no one can resist smiling when they see it!
  • I do have a square of DSP left over – rats! I’ll have to leave it out so that it gets used up soon!
  • I used a few different bloom stamps from the same set to decorate the front of the envelope. No naked envelopes please! lol

I hope you enjoyed today’s creation and have a minute to pop on over to the Tic Tac Toe Challenge blog to be inspired by the rest of the design team! Can’t wait to see what you create!

Blessings!

Supplies (all Stampin’ Up! unless otherwise noted):

Card Stock: Highland Heather and Granny Apple Green; Neenah Classic Crest Cover Solar White (80 lb)

DSP: All Occasion DSP Stack

Ink: Highland Heather and Granny Apple Green; Versamark Onyx Black

Stamps: Inspiring Iris

Coloring Tools: none

Dies: Stitched Shapes & SU’s Envelope Die (retired) 

Tools: Big Shot

Embellishments: White Organdy Ribbon & Wink of Stella

Other: Whisper White Envelope