To Love What We Do and Share What We Love


Blooming-Basket-Inspiration-Card-Idea-Shannon-Jaramillo-stampinup

“To LOVE what we do and SHARE what we love, as we help others enjoy CREATIVITY and worthwhile accomplishments…in this we make a DIFFERENCE.” This is Stampin’ Up!’s Statement of the Heart and reflects who we are as demonstrators and why we do what we do.

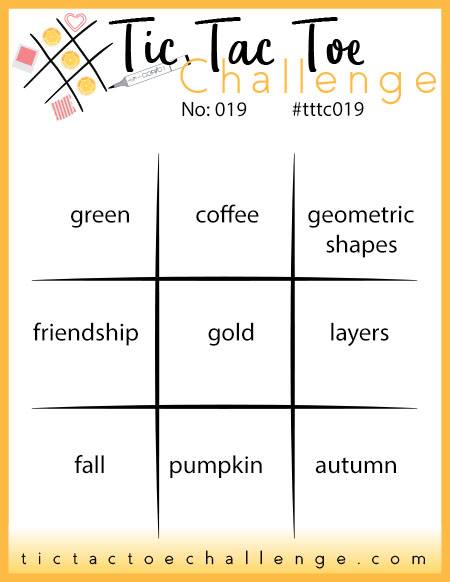
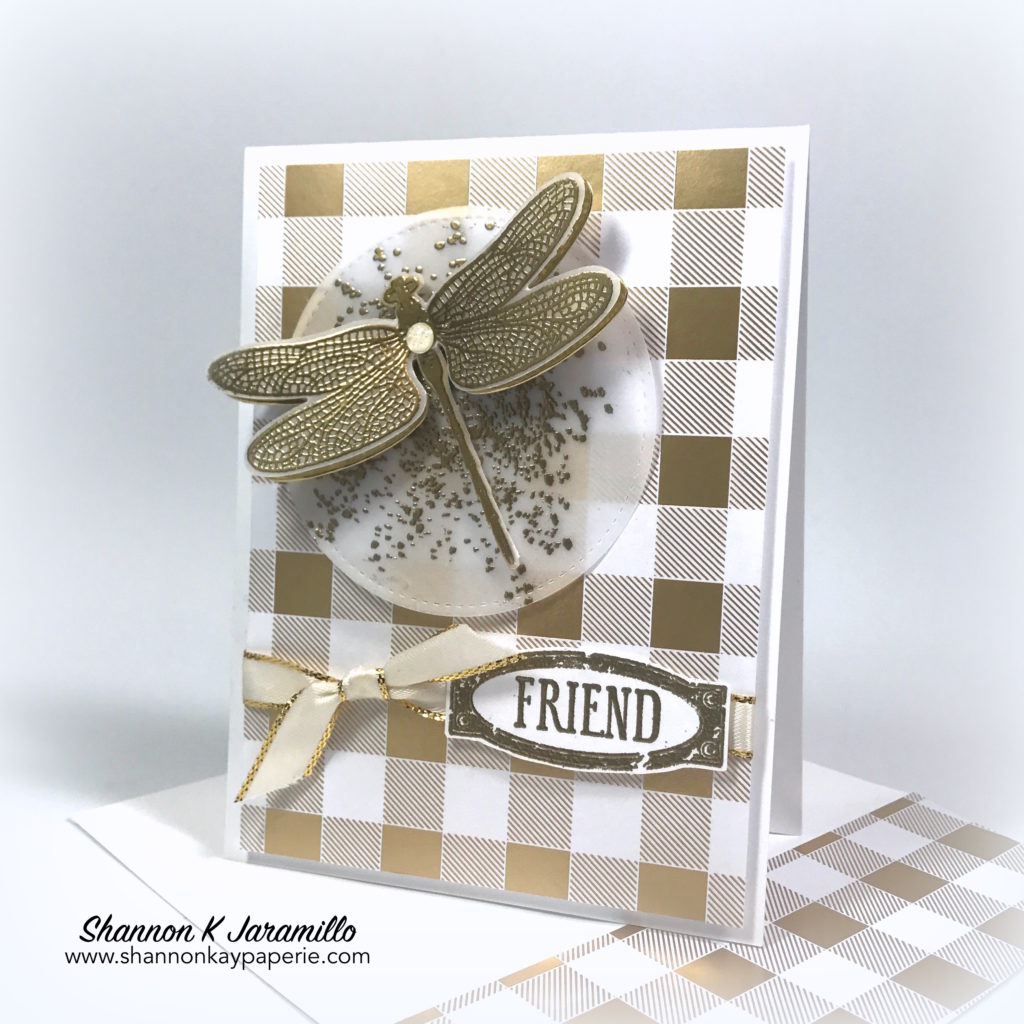
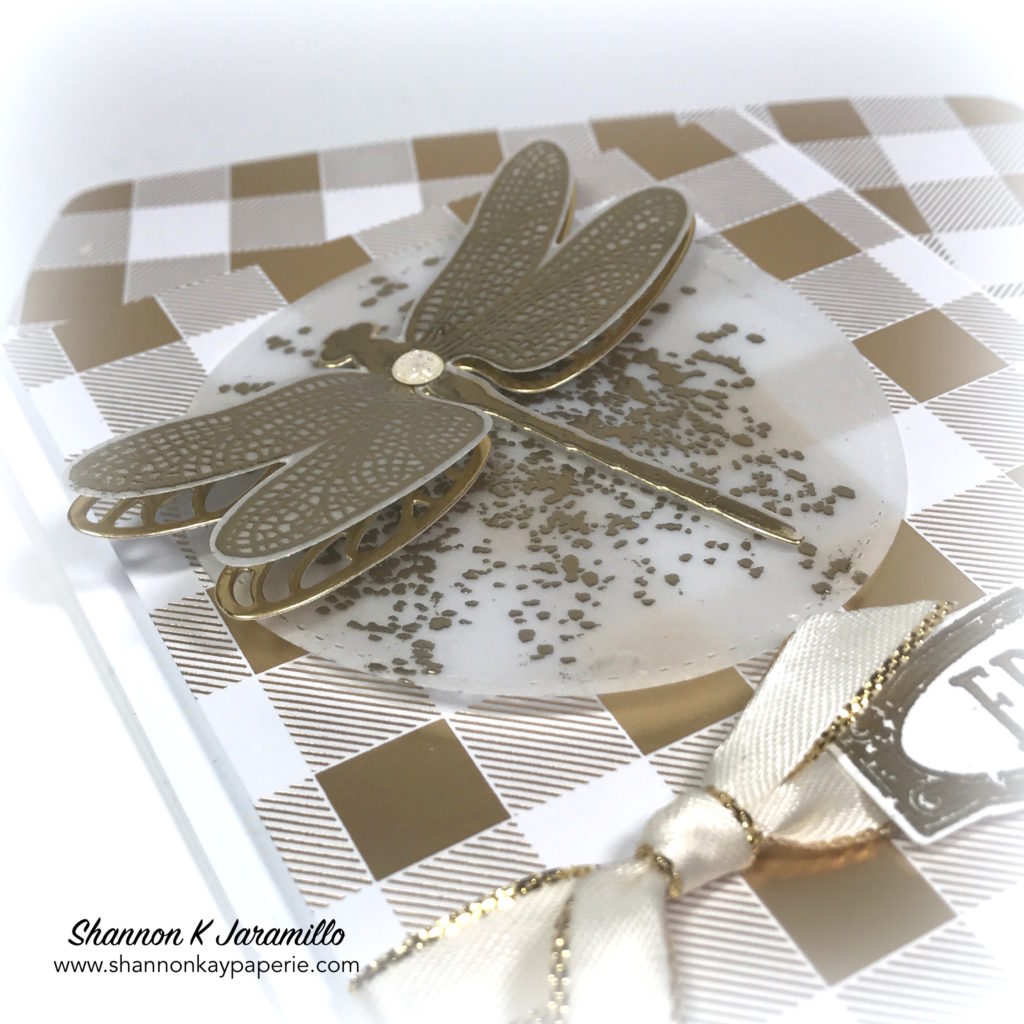
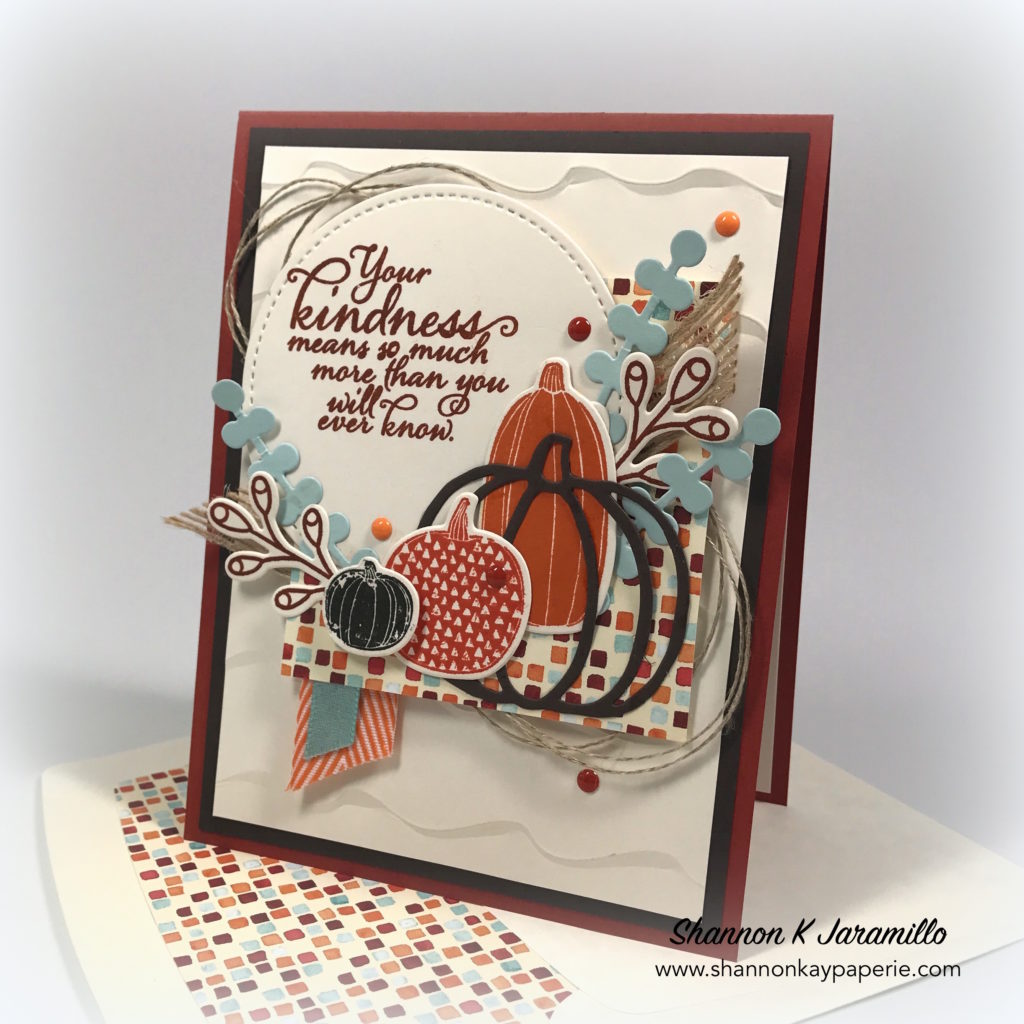
I adore this basket of flowers, which is FREE with any $50 purchase, and I thought it would fit perfectly with the newest Freshly Made Sketches challenge. But then I saw the statement of the heart stamp, which I recently acquired secondhand for $1, and wanted to use it as well. Since I couldn’t decide which one to use, I used them both!

While I was creating this card I received a message from someone who had reached out to me recently. Her message to me this evening was to share with me how much she appreciated my time and patience with her. It didn’t seem like much at the time, but I tonight I realized how fitting this statement of the heart is. I shared my time and love of stamping, perhaps helped her a bit in the process, and it made a difference to her. It really made this statement hit home and resonate with me. I made a difference. I’m so glad I had the opportunity!

Blooming-Basket-Inspiration-Card-Ideas-Shannon-Jaramillo-stampinup

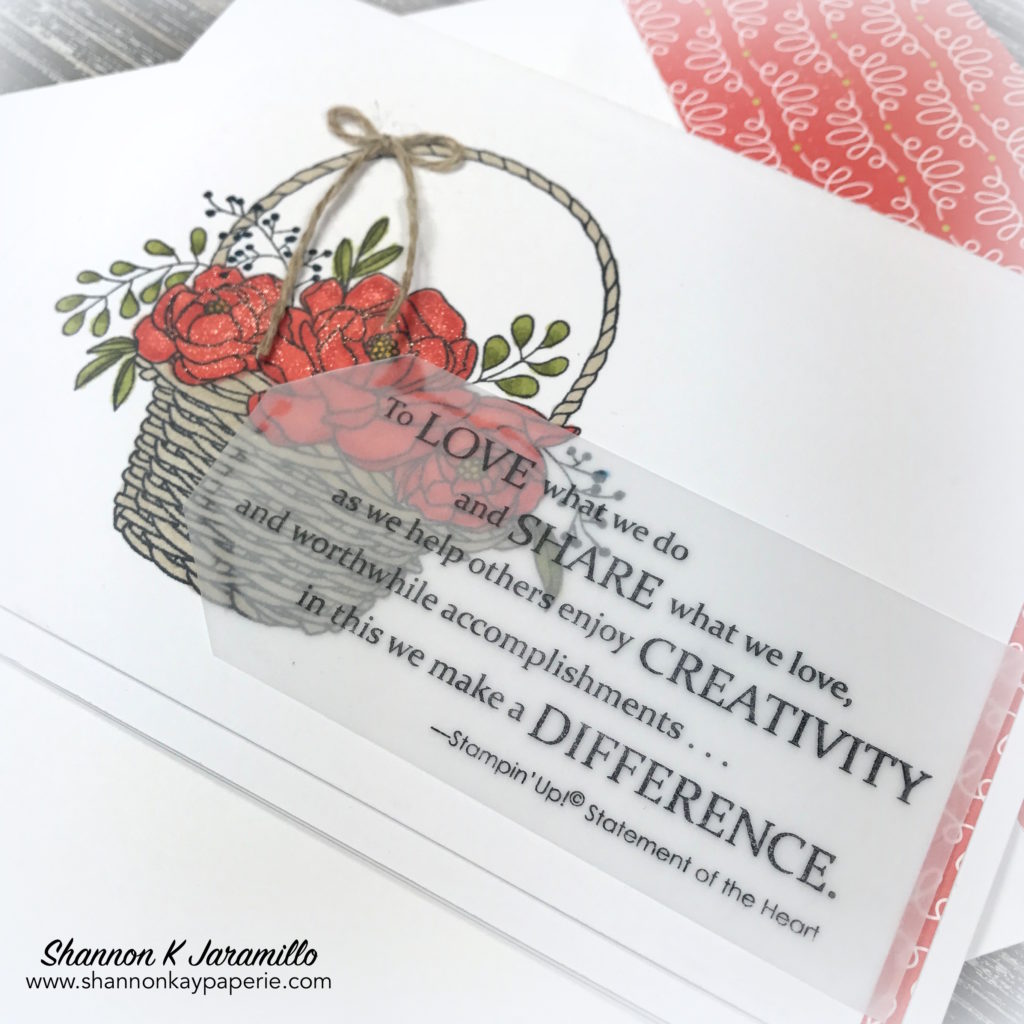
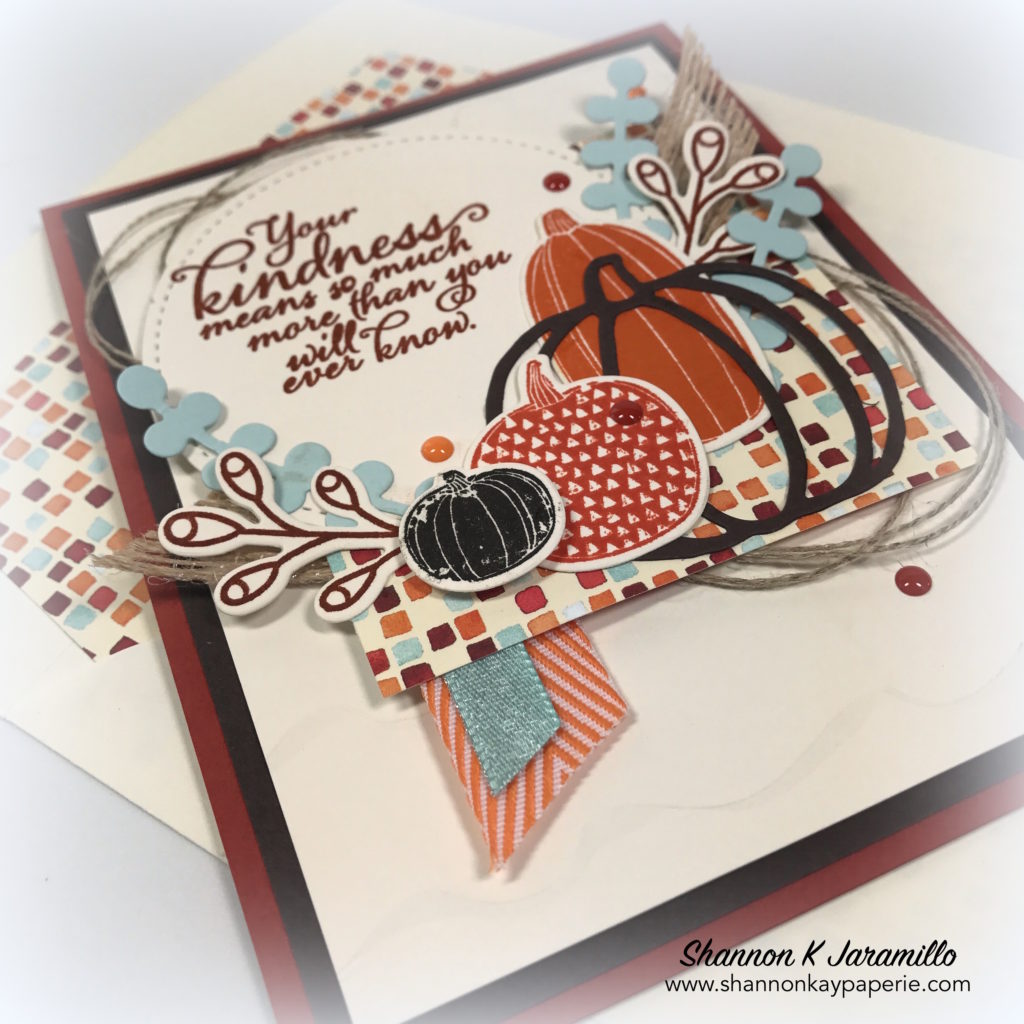
I stamped this darling basket from the Blooming Basket stamp set with Tuxedo Black Memento Ink, then colored with Stampin’ Blends in Crumb Cake, Light and Dark Calypso Coral and light and dark Old Olive. I added a bit of Fresh Fig marker to the berries and finished the basket off with a simple bow. Of course I added Wink of Stella to the flowers…it’s a huge ‘wow’ in person!

The statement of the heart was stamped with Staz-On ink and adhered using Ranger Multi Medium matte liquid glue which dried clear underneath the vellum except for where I adhered it over areas colored with alcohol markers. You still really can’t see the glue so I’ll take it since adhering vellum can be quite the challenge!

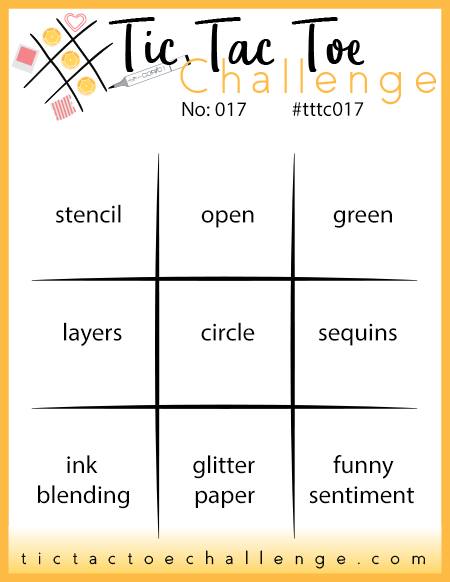
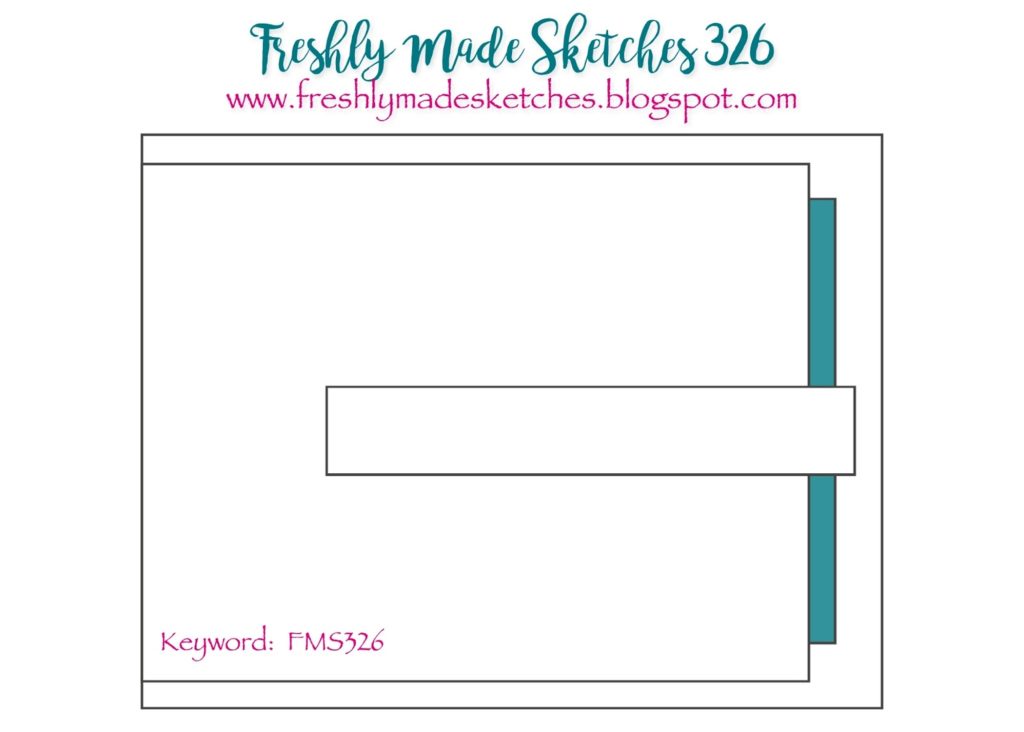
Here is the sketch from Freshly Made Sketches that inspired today’s project:

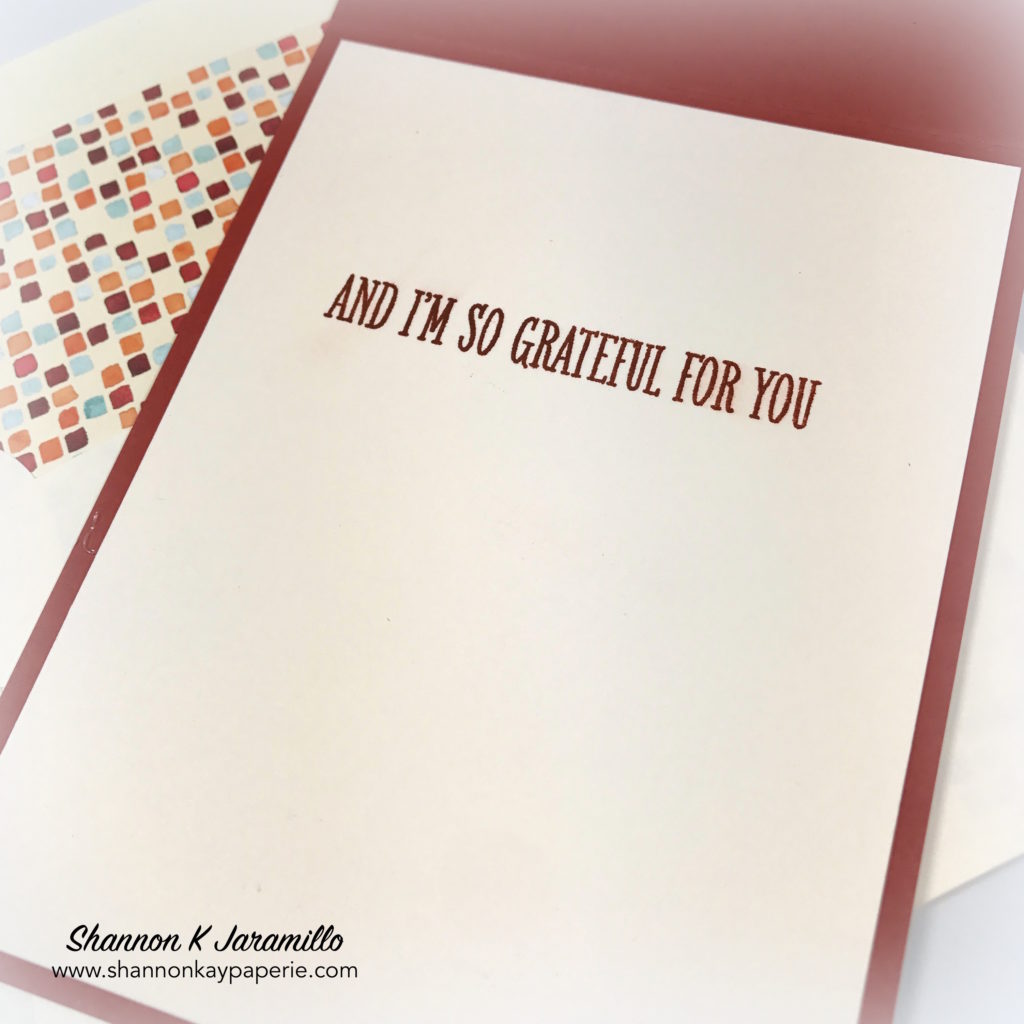
Thank you again for sharing a bit of your day with me, I hope you like the card…

Blessings,


Fun with Flowers – Tic Tac Toe Challenge 033

Simon-Says-Stamp-Blooming-Day-Thank-You-Card-Idea-Shannon-Jaramillo-simonsaysstamp

Hello there my crafty peeps! Funny story about this card…I started it last Sunday for last week’s Tic Tac Toe Challenge and ran to of time, so it sat until yesterday when I was able to finish it up and still be able to meet the criteria for this week’s challenge! So fun! Here’s the challenge board:

I went with the middle row: Flowers (Free); Die Cut; Sequins. These boards are so flexible and easy to play along with!

Measurements:

  • Card Base 4 1/2″ x 11″, scored at 5 1/2″
  • DSP Layer 3″ x 5 1/2″
  • White Layer 4 1/4″ x 5 1/2″, the cut with the die

Details:

  • I have a stash of make-your-own-bouquet type of flower sets, lots and lots of them actually, but it takes time to dream up a bouquet so lots of times I just pass on by them. This time I decided to take my time and just play.
  • I built the card around this darling Eyelet Arch Borders die by Simon Says Stamp. It’s sweet and dainty so I choose a pattern paper in that same vein. The color of the paper determined my color palette: Soft Sky; Pool Party; Pistachio Pudding; Mint Macaron and Sahara Sand.

Simon-Says-Stamp-Blooming-Day-Thank-You-Cards-Idea-Shannon-Jaramillo-simonsaysstamp

  • The pretty ‘thank you’ die cut is by Right at Home Stamps. It has a coordinating stamp and the die has a shadow around it. The two words cut out independently so you can use them with the shadow die, or use them the way I have here. I die cut the words twice in Pistachio Pudding (yes, that’s co-odinations case stock, I’m trying to use it up!) and one layer of Mint Macaron on the bottom and slightly offset to make it stand out better.
  • I stamped the flowers and leaves free hand, just adding as I went along and following the curve of the eyelet die.
  • The sentiment is from Stampin’ Up’s Cottage Greetings stamp set. I had intended for the stamp to be directly on the pattern paper but I smooshed (that’s a technical term :)) the stamp and ended up with a messy image, so…Lil ‘Inker’s Pinking Edge Sentiment Flags die to the rescue!
  • Medium size moonstones were added to the flower centers and then I stamped and die cut a few of the itty bitty flowers and added them for balance.

Simon-Says-Stamp-Blooming-Day-Thank-You-Card-Ideas-Shannon-Jaramillo-simonsaysstamp

  • The yellow pattern paper I used for the envelope liner is from the same pack as the bluish polka dots and I thought it set off the colors of the card perfectly.

I hope you have enjoyed today’s project! If you have a chance, please pop on over to the Tic Tac Toe Challenge site and see the beautiful cards the designers have for you!

Blessings!

Supplies:

Card Stock: Stamper’s Select White by Papertrey Ink

Pattern Paper: Simple Life by Echo Park

Ink: Memento Tuxedo Black; Coastal Cabana (R), Mint Macaron (R), Pistachio Pudding (R), Pool Party, Sahara Sand and Soft Sky by Stampin’ Up! 

Stamps:  Blooming Day by Simon Says Stamp; Script Greetings by Right at Home; Cottage Greetings (R) by Stampin’ Up!

Dies: Blooming Day by Simon Says Stamp; Script Greetings by Right at Home; Pinking Edge Sentiment Flags by Lil ‘Inker

Tools: Big Shot and Stampin’ Trimmer by Stampin’ Up!

Embellishments: Moonstones by Simon Says Stamp

Other: Medium Whisper White Envelope by Stampin’ Up!

Dragonfly Dreams Friendship Card – Tic Tac Toe Challenge #19

Welcome to a brand new Tic Tac Toe challenge! This week’s board comes to us courtesy of Felicita and is sure to provide inspiration!

This week I decided to choose the middle row across; friendship, gold, layers. What will you choose?

Stampin-Up-Dragonfly-Dreams-Friendship-Card-Idea-Shannon-Jaramillo-stampinup

Details:

  • This dreamy paper is from the Year of Cheer Specialty Designer Series Paper pack. I love when paper can be multi-functional. This DSP is actually holiday paper but this gorgeous plaid can be used all year round! I layered a 4″ x 5 1/4″ piece of DSP over the card base and used Stampin’ Dimensionals to add depth and give me a little extra space to attach a piece of Gold 3/8″ Metallic-Edge Ribbon.
  • I ran a piece of Vellum Cardstock through the Big Shot and the largest circle from the Stitched Shapes Framelits Dies. I then stamped the circle with a background splatter stamp from the Touches of Texture stamp set using Versamark Ink. I heat set it carefully with Gold Embossing Powder, using tweezers to hold the vellum for me so as to not burn fingers!
  • The dragonfly from the Dragonfly Dreams stamp set was stamped in Versamark Ink and heat set with Gold Embossing Powder and then run through the Big Shot with the coordinating Detailed Dragonfly Thinlits Dies.

Stampin-Up-Dragonfly-Dreams-Friendship-Cards-Idea-Shannon-Jaramillo-stampinup

  • A second dragonfly was die cut using a different die from the Detailed Dragonfly Thinlits Dies and Gold Foil Sheets. Can you see it peeking out from underneath? Just another layer of gold…it’s so amazingly pretty in person!
  • I glued the two dragonfly dies together with the Fine-Tip Glue Pen and then popped them up off the circle of vellum using the edges of a sheet of Stampin’ Dimensionals. By using the edges I was able to snip some long thin lines of adhesive along the body and wings of the dragonfly and keep them hidden. I popped the vellum circle up off the DSP using stripes of Stampin’ Dimensionals as well.
  • I had a wrinkle in the dragonfly’s body from not gluing the layers together properly but a single Glitter Enamel Dot in the very palest shade of Crushed Curry covered that easily and adds more sparkle!

Stampin-Up-Dragonfly-Dreams-Friendship-Card-Ideas-Shannon-Jaramillo-stampinup

  • The frame for the sentiment and the sentiment can be found in the Awesomely Artistic stamp set. I stamped both in Versamark Ink and heat set with Gold Embossing Powder. I then quickly snipped the framed sentiment with Paper Snips and attached it to my card with Stampin’ Dimensionals (a stampin’ girl’s best friend!)
  • I adhered a 2 1/4″ x 6″ strip of matching DSP to my envelope by running SNAIL adhesive along the outside edges of the envelope flap, gently pressing the DSP to adhere it, and snipping off the extra with my Paper Snips, using the edge of the envelope flap as my guide. An easy way to dress up an envelope!

Thank you so much for stopping by today, please pop over and see more inspiration from the rest of the Tic Tac Toe design team and I hope you have a chance to play along with us this week!

Blessings!

Supplies:

Card Stock: Stamper’s Select White by Papertrey Ink

Pattern Paper: Year of Cheer Specialty Designer Series Paper by Stampin’ Up!

Specialty Paper: Gold Foil Sheets and Vellum Cardstock by Stampin’ Up!

Ink: Versamark Ink

Stamps:  Awesomely Artistic, Dragonfly Dreams and Touches of Texture by Stampin’ Up!

Dies:  Stitched Shapes Framelits Dies, Detailed Dragonfly Thinlits Dies and Envelope Liner Die (retired) by Stampin’ Up!

Tools: Embossing Buddy, Heat Tool and Gold Embossing Powder by Stampin’ Up!; MISTI by My Sweet Petunia (for the sentiment)

Embellishments:  Gold 3/8″ Metallic-Edge Ribbon and Glitter Enamel Dots by Stampin’ Up!

Other: Medium Whisper White Envelope by Stampin’ Up!


A Harvest Bouquet of Gratitude

Stampin-Up-Pick-a-Pumpkin-Thank-You-Cards-Ideas-Shannon-Jaramillo-stampinup

I was feeling very “Fall” inspired when I made this card, in spite of the Santa Ana winds blowing which drive the temperatures up into the 90’s. That’s Southern California life for you!

Measurements:

  • Card Base 4 1/2″ x 11″, scored at 5 1/2″
  • Early Espresso Layer 4″ x 5 1/4″
  • Vanilla Layer 3 3/4″ x 5″
  • Vanilla Circle 3″
  • DSP Square 3″ x 3″

Details:

  • The Early Espresso die cut pumpkin, which together with the Soft Sky sprigs are stand alone dies from the Patterned Pumpkins Thinlits Dies, was the basis for this card and everything developed around it. I adore the pumpkin die cut and have a few more ideas for it, so look for it to turn up again here on my blog!
  • All of the stamped images you see here, pumpkins and floral stems, are from the Pick a Pumpkin stamp set and you can get both products bundled up in the Pick a Pumpkin bundle at a 10% savings! Say THAT three times fast!! lol
  • The DSP I used is the Painted Autumn DSP and the pattern I chose to highlight has Cajun Craze, Tangerine Tango and Soft Sky in it. When stamping though, I also threw in Pumpkin Pie and Early Espresso for a little more fun and contrast.
  • The pretty sentiment is from the Painted Harvest stamp set and is such an appropriate sentiment, no matter the season!

Stampin-Up-Pick-a-Pumpkin-Thank-You-Card-Ideas-Shannon-Jaramillo-stampinup

  • I arranged my circle (die cut with the Stitched Shapes Framelit Dies) together with a square cut from DSP to for the base for my harvest bouquet. I then stamped and die cut images and shapes and arranged them all around the Early Espresso pumpkin (love) (I had to say it again).
  • I then took bits and pieces of the 5/8″ Burlap Ribbon, Linen Thread, 3/8″ Classic Weave Ribbon in Soft Sky, and some retired Pumpkin Pie chevron ribbon (I didn’t have any current Pumpkin Pie ribbon!) and added them to the bouquet, looped around the focal piece and even as banners!
  • Lastly were some Cajun Craze and Pumpkin Pie enamel shapes to add that last detail.
  • Wait – did you see the layer of cream is embossed with the Ruffled Dynamic Textured Impressions Embossing Folder? It adds such a sweet soft detail to the design 🙂

Stampin-Up-Pick-a-Pumpkin-Thank-You-Cards-Ideas-Shannon-Jaramillo-stampinup

  • I kept the inside simple with just a sentiment from the Remarkable You stamp set, stamped in Cajun Craze.

Honestly, I don’t think I’ve ever had as much fun with the color Cajun Craze as I did today! What do you think? Is it a color, or a collection of colors, that speaks to you?

Blessings!

Supplies:

Card Stock: Vintage Cream by Papertrey Ink; Cajun craze, Early Espresso, Soft Sky by Stampin’ Up!

Pattern Paper: Painted Autumn Designer Series Paper by Stampin’ Up!

Ink: Cajun Craze, Early Espresso, Pumpkin Pie, Tangerine Tango by Stampin’ Up!

Stamps:  Pick a Pumpkin, Painted Harvest and Remarkable You by Stampin’ Up!

Dies:  Patterned Pumpkins Thinlits Dies, Stitched Shapes Framelits Dies and Envelope Liner Die (retired) by Stampin’ Up!

Tools: Big Shot, Ruffled Dynamic Textured Impressions Embossing Folder and Stampin’ Trimmer by Stampin’ Up!

Embellishments: Cajun Craze and Pumpkin Pie Enamel Dots, 5/8″ Burlap Ribbon, Linen Thread, 3/8″ Classic Weave Ribbon in Soft Sky, and some retired Pumpkin Pie chevron ribbon by Stampin’ Up!

Other: Medium Very Vanilla Envelope by Stampin’ Up!

Counting My Blessings – Tic Tac Toe Challenge #17

Hello!! It’s time for another Tic Tac Toe Challenge! I have so much fun deciding which row or column to choose each challenge and then seeing what all the participants decide to use and HOW they use the elements…we are all so uniquely different in our interpretation! This week I went straight across the center: Layers, Circle, Sequins.

As you will see, I have no trouble with the layers element – I believe I have EIGHT! 🙂

Count-My-Blessings-Love-and-Friendship-Card-Idea1-Shannon-Jaramillo-stampinup

Measurements:

  • I’m so sorry, I’ve already used this card and I forgot to measure first!

Details:

  • I mentioned that I would swing around back to an Autumn theme and the Painted autumn DSP – isn’t this a fun pattern? It looks so sweet when complimented with Crushed Curry and Cajun Craze.
  • This delightful sentiment is from the Count My Blessings stamp set. Such a pretty font and saying! (I gave this card to my hubby!)
  • I must be missing a Stampin’ Up! circle punch because I used the Layered Circles to die cut the sentiment and the Cajun Craze scallop underneath it but had to pull out my Nestabilities Circles for the Crushed Curry circle. I don’t want you to be struggling to figure it out if you decide to use this layout – or perhaps it will be easy for you because you have the correct circle punch!

Count-My-Blessings-Love-and-Friendship-Cards-Idea1-Shannon-Jaramillo-stampinup

  • I used the layout from last week’s Freshly Made Sketches challenge as it was a fun one and this just popped into my head.
  • Did you notice the embossing on the cream layer? It’s the Layered Leaves Embossing Folder, such a pretty background.
  • A little Crushed Curry ribbon and bow and three perfectly positioned Metallics Sequins finish the card off.

Count-My-Blessings-Love-and-Friendship-Cards-Ideas1-Shannon-Jaramillo-stampinup

  • I had die cut some leaves from the Seasonal Tags Framelits Dies and then didn’t use them on the card front, so I found a way to brighten up the inside!

I hope you find inspiration in my project and the challenge board and that I see you over at the Tic Tac Toe Challenge playing along. Please visit the rest of the design team for more projects!

Design Team

Felicita Johnson

Rosanne Mulhern

Peggy Noe (on vacation this week)

Teresa DeWitt-Pierce

Blessing to you!

Supplies:

Card Stock: Vintage Cream by Papertrey Ink; Crushed Curry and Cajun Craze by Stampin’ Up!

Pattern Paper: Painted Autumn by Stampin’ Up!

Ink: Early Espresso by Stampin’ Up!

Stamps:  Count My Blessings by Stampin’ Up!

Dies:  Seasonal Tags Framelits Dies, Layering Circles Framelits Dies, Envelope Liner Die (retired) by Stampin’ Up! and Nestabilities Circles

Tools: Big Shot; Layered Leaves Embossing Folder

Embellishments: Crushed Curry 3/8″ Mini Chevron Ribbon and Metallics Sequin Assortment by Stampin’ Up!

Other: Medium Very Vanilla Envelope by Stampin’ Up!