Daisies & Dragons

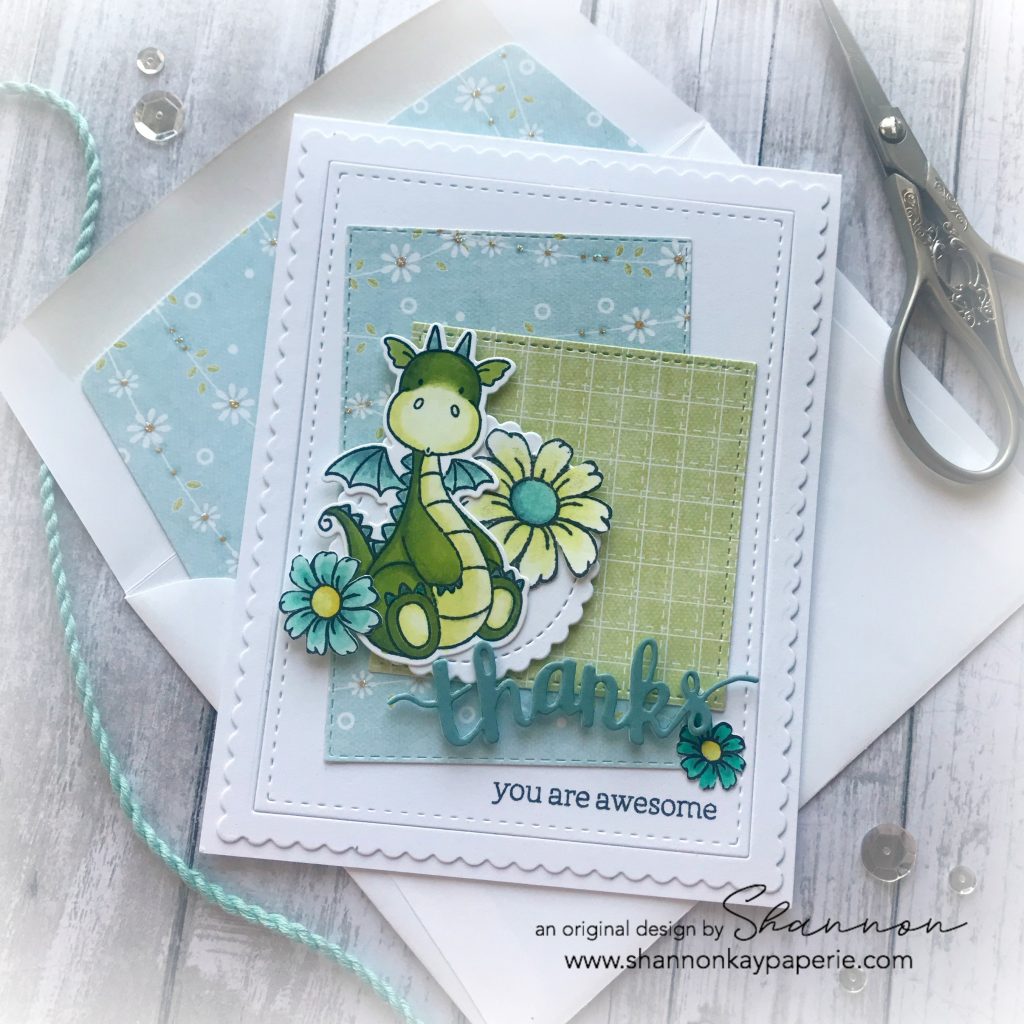
Daisies and dragons, sigh. What could be better? Pairing them up with a fanciful color combination, that’s what! I came across this darling paper while going through some old supplies and fell in love. Then my mind connected it to the Magical Dragons stamp set by MFT Stamps that I had recently purchased and a card idea was born!

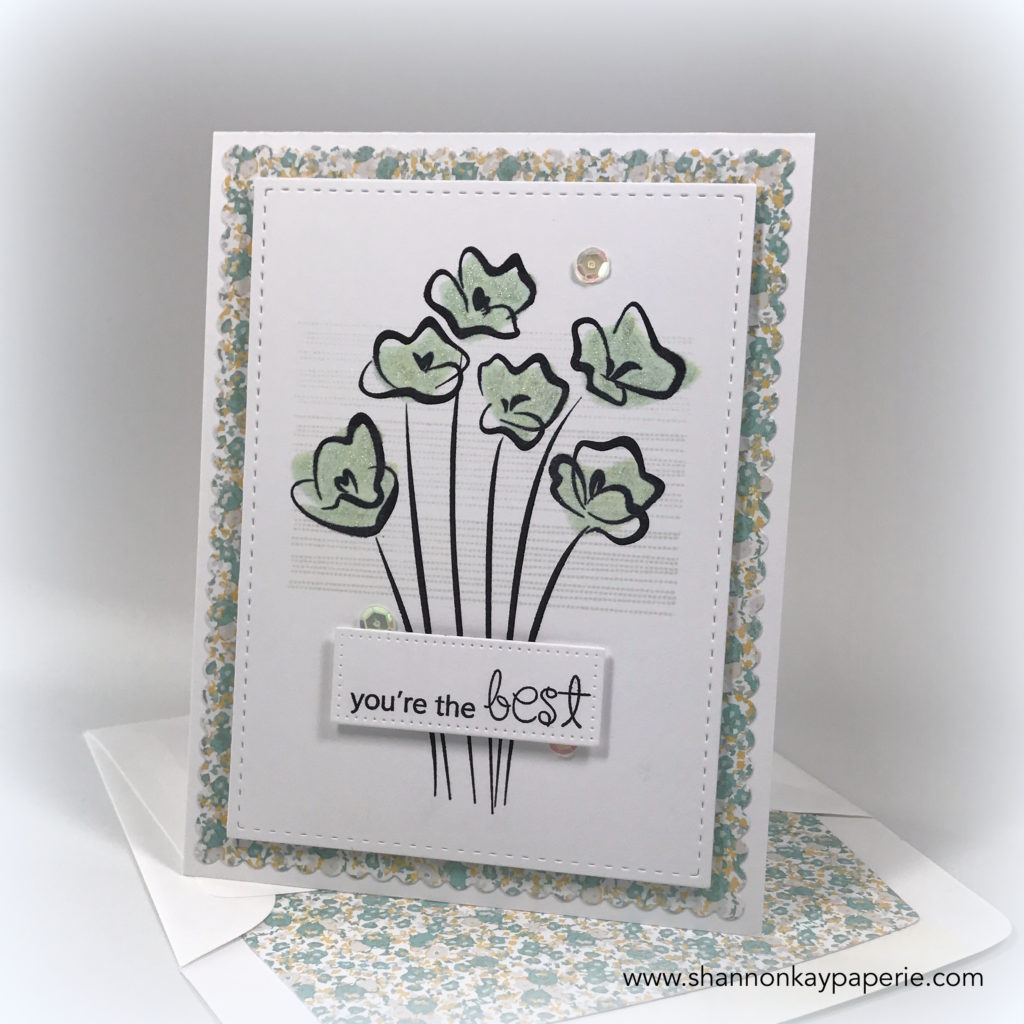
As you can see, I used dies to create just about everything so no measuring involved! I began with a base of Mama Elephant’s Femme Frames and added some stitched die cut pattern paper shapes.

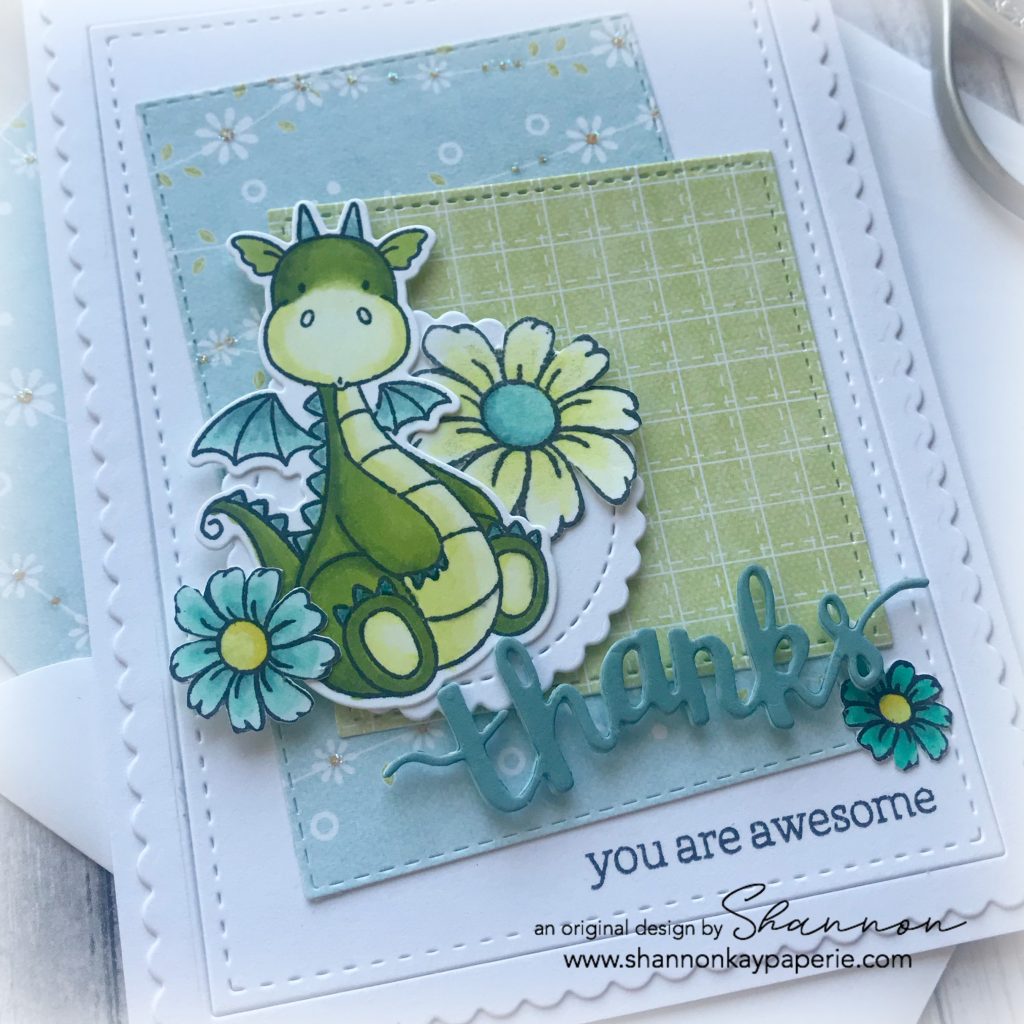
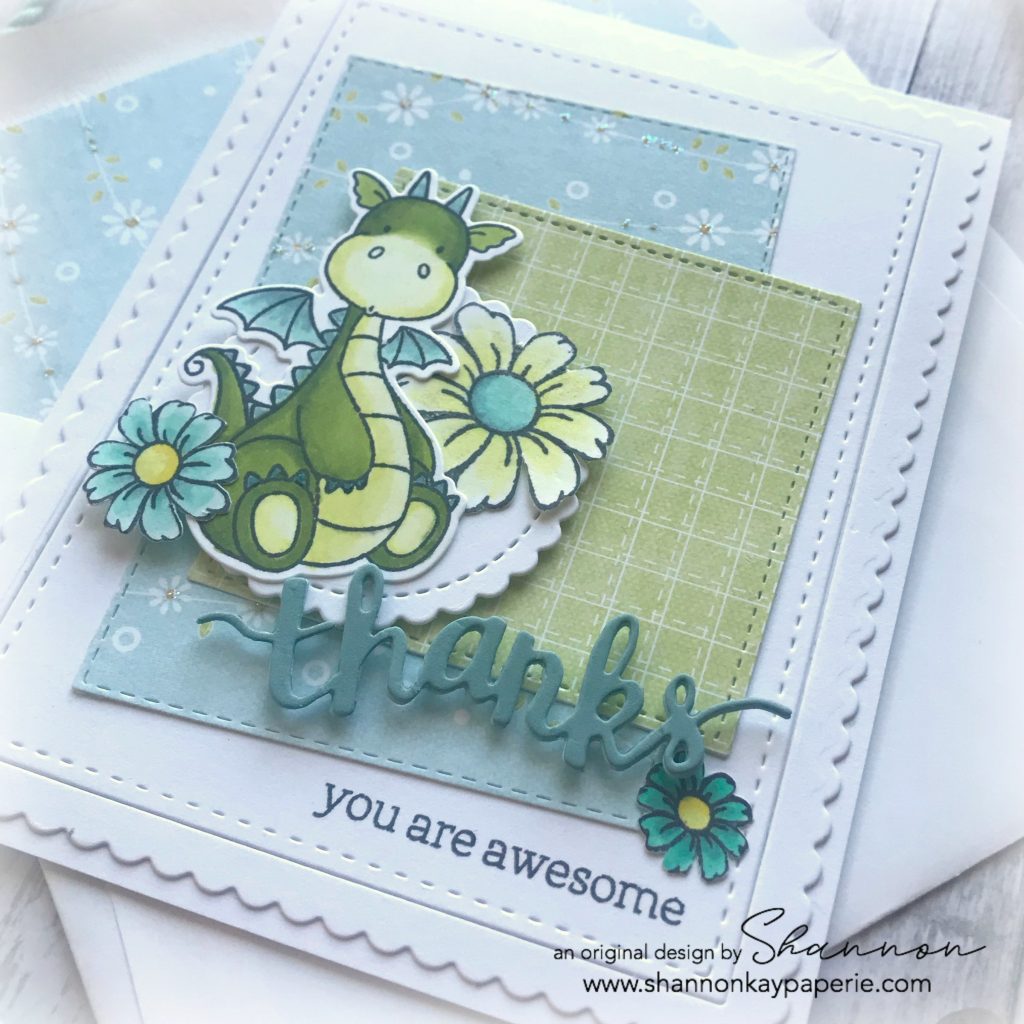
I stamped the dragon (I named her Isabella) in Versafine Onyx Black and colored her with a combination of Copic, Shin-Han, and Stampin’ Blends alcohol markers. I also stamped some darling daises  from Whimsy Stamps (those are fussy cut, no dies) and arranged everything onto a popped up stitched scalloped circle. Another die, this one by Hero Arts, and coordinating sentiment complete this whimsical card.

The daisies have had a subtle sparkle added to them with Wink of Stella around the petal bases and did you notice the tiny sparkles? If you zoom in on the blue pattern paper you can see the tiny sparkles all over it – swoon!

I had SO much fun creating this card – thank you for stopping by to take a peek!

2020-01-06 MFT Stamps-Daises-and-Dragons-Thank-You-Card-Idea-Shannon-Jaramillo-shannonkaypaperie.com

Supplies (all Stampin’ Up! unless otherwise noted):

Card Stock: Stamper’s Select White & Ocean Tides by Papertrey Ink

DSP: 12 x 12 For Peep’s Sake – Drapin’ Daisies by Imaginisce (from 2008!)

Specialty Paper: none

Ink: Versafine Onyx Black

Stamps: Magical Dragons by MFT Stamps; A Girl’s Best Friend by Whimsy Stamps and Thanks Stamp & Cut by Hero Arts

Dies: Magical Dragons and Stitched Mini Scalloped Circles by MFT Stamps; Femme Frames by Mama Elephant; Thanks Stamp & Cut by Hero Arts and Stitched Rectangle Dies by Stampin’ Up!

Tools: Big Shot; Copic , Shin-Han and Stampin’ Blends alcohol markers

Embellishments: Wink of Stella

Other: Whisper White Envelope

Bloomin’ Buttercups – Freshly Made Sketches 273

Bloomin' Buttercups Card Idea - Shannon Jaramillo

The bright and beautiful weather outside today has inspired my color palette today! Can’t help but be happy when the sun is shining and the windows are open!

When I peeked at the Freshly Made Sketches challenge today, I was so inspired by Jen Mitchell’s card. We seem to have an affinity for Rubbernecker Stamps and seeing her card made me just HAVE to pull one out! And it’s never seen ink before…even better!

Bloomin' Buttercups Card Ideas - Shannon Jaramillo

As quite often happens, today’s card started life in a completely different state but a funny accident happened along the way! I had stamped the flowers in a Sunshine ink, which is a bright yellow (buttercups, of course!) and then added the background elements and realized I should have started with the stripes first. So, I started over but by the time I got to the flowers I had added the background paper so I decided to stamp the flowers in blue instead. I chose Sea Glass by Simon Says Stamp which is a soft blue, but the flowers came out this most unexpected green-y blue!  I was surprised but in love!! Then I had to start over again (I forget why) and this time when I stamped my flowers using Sea Glass, they were a completely different shade of blue than they were the first time….WHAT?!?

It turned out that I had forgotten to clean the stamp after stamping it in Sunshine ink so when I stamped it the second time in Sea Glass ink, I made a new color! Which was the PERFECT shade of blue, but now I had to re-create it! Ackkk!! Luckily I managed it. It’s so funny how things happen…

Bloomin' Buttercups Cards Idea - Shannon Jaramillo

When I saw Karren’s sketch and looked through my stamps, I KNEW this was the stamp I had to use. But I couldn’t figure out how to incorporate the three horizontal elements. After much agony, I decided to use this background element stamp by Papertrey Ink. I stamped with the same stamp three times in Soft Stone, just moving my paper up as I went and stamping over twice for the middle stripe and three times for the bottom stripe to create a graduated effect. I love how they play off of the same soft color in the patterned paper…

By the time I got to the sentiment I realized that I should have masked the stems off to leave space for the sentiment (oops) so I went with Plan B and used a pierced rectangle die to die cut it and then popped it up. And I just realized that the outside border is stitched, not pierced…sigh. Getting back into the swing of things can be challenging but no matter, I still love the way this turned out!!

I added Wink of Stella to the buttercups and I’m thrilled that it actually showed up in the photographs! I LOVE the sparkle!! I threw in some sequins just because…

Thank you Karren and the Freshly Made Sketches design team for getting me going this morning!

Products Used:

Card Stock: Stamper’s Select White by Papertrey Ink

Pattern Paper: Happy Day by My Mind’s Eye

Ink: Black, Sea Glass and Sunshine by Simon Says Stamp; Soft Stone by Papertrey Ink

Stamps:   Buttercups #910 by Rubbernecker Stamps; Ombre Builders by Papertrey Ink and Pretty Petals by Clearly Besotted Stamps

Dies: Femme Frames by Mama Elephant and Pierced Rectangle STAX by MFT Stamps

Tools:  MISTI; Big Shot and Envelope Liner Framelit Dies by Stampin’ Up!

Embellishments: Sequins – Unknown Source (from my stash)

Other – Envelope – Stampin’ Up!

Painted Butterflies – Sunday Stamps 101

Hello there, my stamping friends! Welcome to my second post of the day, this one is a card I designed for the Sunday Stamps design team, which I am very excited to announce that I am now a member of!!

I’m looking forward to this next year’s journey with the Sunday Stamps Challenge Blog, they have wonderful challenges so I hope you will check them out and play along!

Today’s challenge is a color challenge! And just look at these fun colors!!:

11124703_10203930582493636_4555210559932385677_n

I know, you totally want to play along, right?? I know I did! Here’s what I came up with:

SKP Watermarked Photos3-085I was in a butterfly mood and thought that these colors would work really well for this new (to me) stamp set called Painted Butterflies by Altenew. Aren’t they gorgeous?? Each butterfly has three stamps to be layered together to create the final image…thank heavens for the MISTI!! I’m not sure I would attempt so much layering without it!

Wouldn’t it be fun to make a whole bunch of these cards in different colors for gift sets? Just change out the sentiment…easy peasy!

SKP Watermarked Photos3-086And if you’re wondering where the grey color is…it’s in the ink splatters in the background! I used Stampin’ Up!’s Gorgeous Grunge stamp set for the ink splatters…it’s my go to stamp for that sort of thing. I also stamped off once before stamping onto my cardstock to create a soft splatter effect.

And there you have it! I used Mama Elephant’s Femme Frames to die cut the scallop layer as well as the interior rectangle, and then used the interior rectangle again to die cut my white cardstock and inlaid it to keep the layers minimal for mailing 🙂

I hope you will hop over and check out the inspiration from the rest of the Sunday Stamps design team and I hope to see you over there!!

Wishing you joy and blessings!

Products Used:

Cardstock: Vintage Cream by Papertrey Ink; Island Indigo by Stampin’ Up!

Pattern Paper: Lost & Found: Portabello Road by My Mind’s Eye

Ink: Tuxedo Black by Memento Ink; Basic Grey, Island Indigo and Pool Party by Stampin’ Up!

Stamps:   Painted Butterflies by Altenew; Inside & Out: Well Wishes by Papertrey Ink

Dies: Femme Frames by Mama Elephant and Envelope Liner Die by Stampin’ Up!

Tools:  MISTI by My Sweet Petunia

Embellishments: 4mm Marshmallow Sequins by Pretty Pink Posh

Love Story

Watermarked Blog Posts-087

I came across this color challenge from The Color Throwdown and was immediately intrigued:

swatch+323

I have been in Christmas card mode but quickly changed gears when I realized that try as I might, this was not a Christmas combination for me. AND, another stamp had caught my eye and after that, it was all over.

Watermarked Blog Posts-091

This sentiment just pulls at my heart. It’s from an amazing set called Love Story by My Favorite Things. I stamped it in Crumb Cake ink. I layered my colors by stamping off my leaves (stamped in Spring Moss) before stamping onto my Rustic White Cardstock. Next, I added the pretty little flower sprays in Blushing Bride ink. I pulled out my favorite little dot stamp from the Rustic Wreath stamp set and stamped randomly in Autumn Rose ink.

I used the Femme Frames Die to cut out both the stitched top layer and the scalloped base. I love, love, love their look but in the end decided I need to add a pop of color. I added both Autumn Rose and Spring Moss cardstock mats and am soooooo happy with how it turned out!

I hope you can see that the scalloped layer and up is popped off of the card base. I use Stampin’ Dimensionals from Stampin’ Up! to achieve this effect. I wanted to share exactly how I use them to economize:

Watermarked Blog Posts-086

I cut them in half and then space them evenly along the border with a few in the middle to keep my layers from ‘sagging’. Oh…and go ahead and use the flip side of your card to experiment…it won’t bleed through with Papertrey cardstock.

I was having so much fun creating the card that I continued on the inside:

Watermarked Blog Posts-090

I was so inspired by this color combination!!

Tomorrow I will be back with more Christmas cheer. My shopping is done and I am enjoying the festive season. I hope you are as well!

Wishing you joy and blessings…

Watermarked Blog Posts-089

Products Used:

Cardstock: Rustic White, Autumn Rose, Classic Kraft and Spring Moss by Papertrey Ink

Pattern Paper: Bow and Arrow by Kaiser Kraft

Ink: Spring Moss and Autumn Rose by Papertrey Ink, Blushing Bride and Crumb Cake by Stampin’ Up!

Stamps: Love Story by My Favorite Things; Kinda Eclectic and Million-Dollar Moments (retired) by Stampin’ Up!; Rustic Wreath by Papertrey Ink

Dies:  Femme Frames by Mama Elephant

Embellishments: None

Other: Envelope and Envelope Liner Die by Stampin’ Up!