White Christmas – Freshly Made Sketches 213

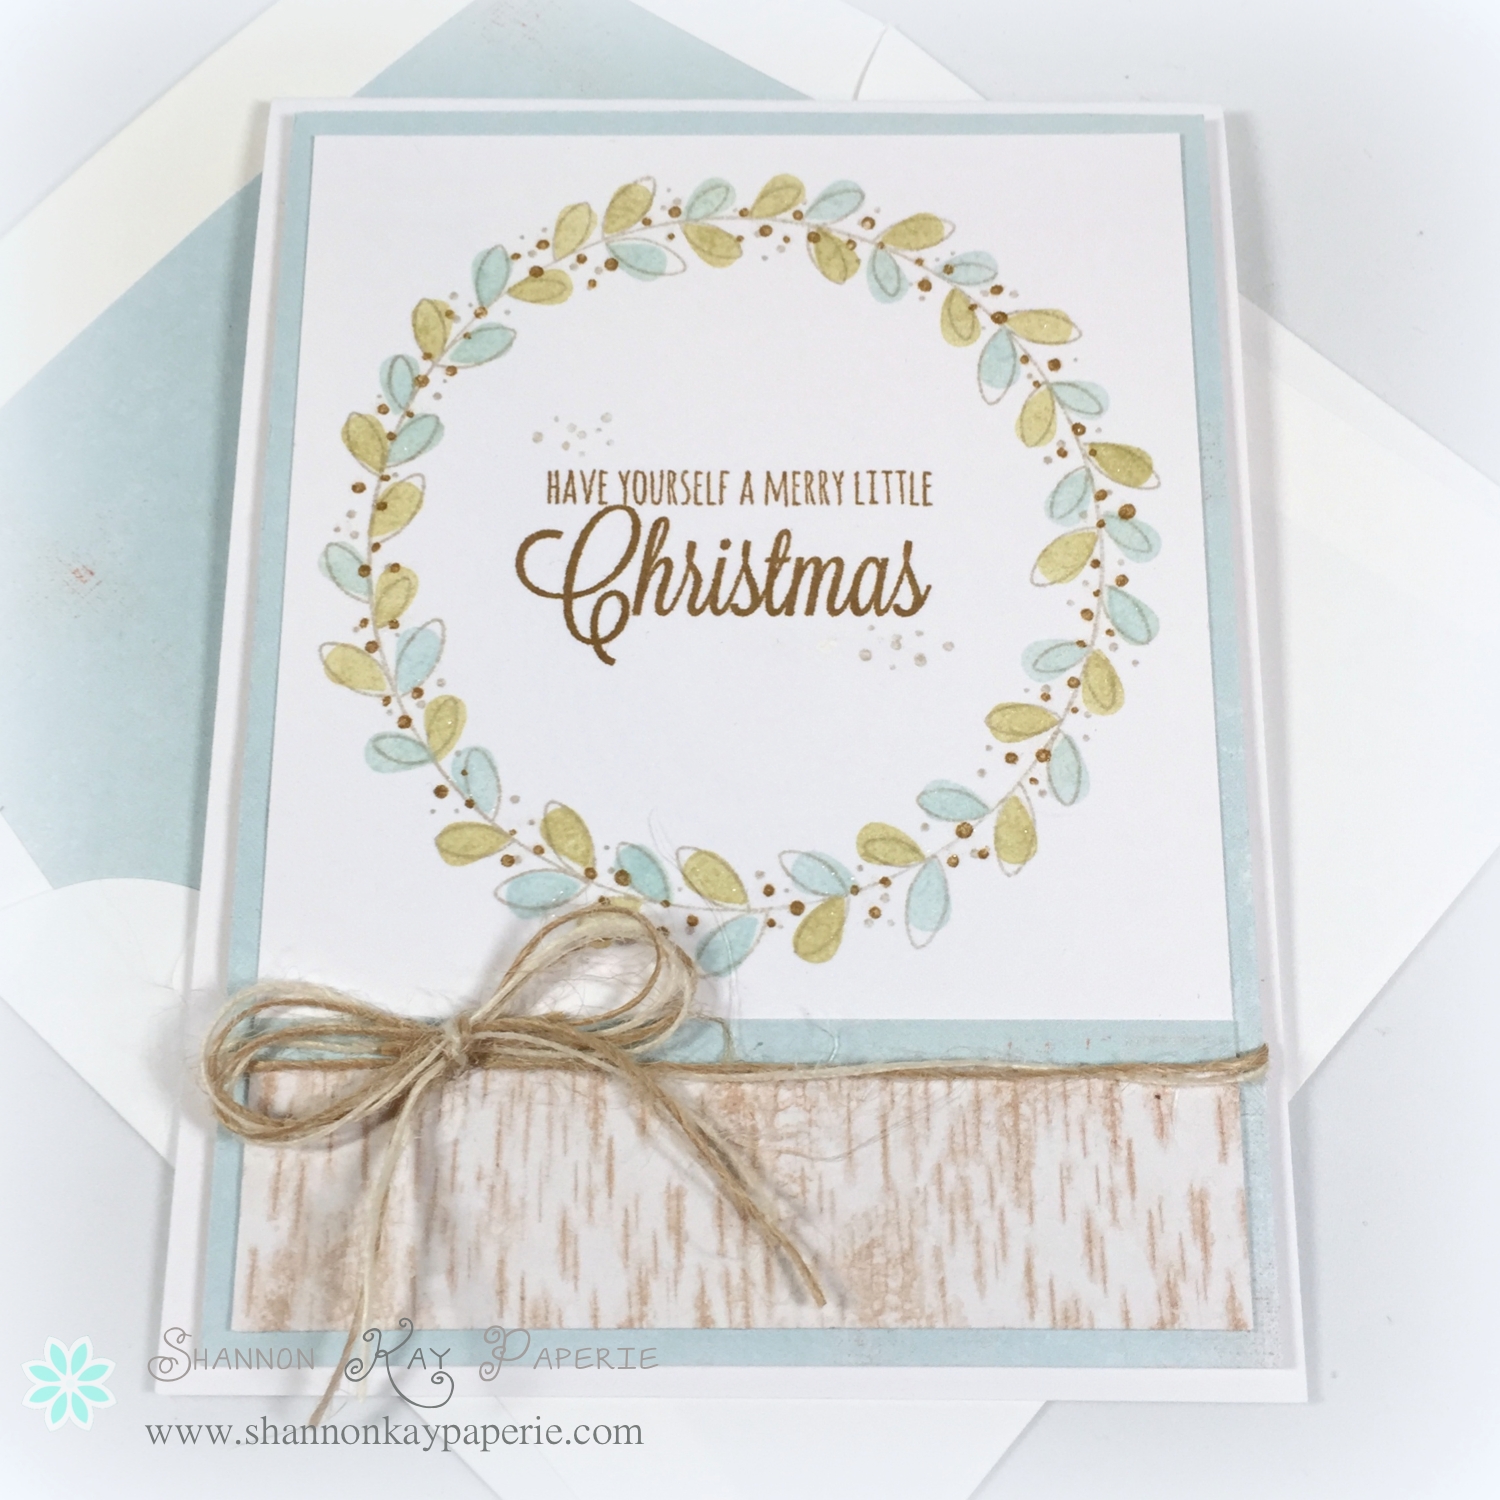
When I saw the sketch this morning for the Freshly Made Sketches challenge, I could hardly wait to get home and get stamping…

FMS Final 213-001Right??!

The other day I mentioned that I was having trouble with my ScanNCut and couldn’t get it to work so I had to resort to fussy cutting (the horror!). Well…a FB group I’m part of gave me some pointers, one of them being to clean the glass on the scanner. The machine has only been used a few times so I didn’t really think that was the problem, but I turned the machine over and what did I see?? A runaway die stuck to the bottom of the machine where the scanner was!!! O.M.G. That was it, after I removed the die…perfect scans!!! Hooray because I was able to do what I wanted to do on this card!!

White Christmas - Freshly Made Sketches 213
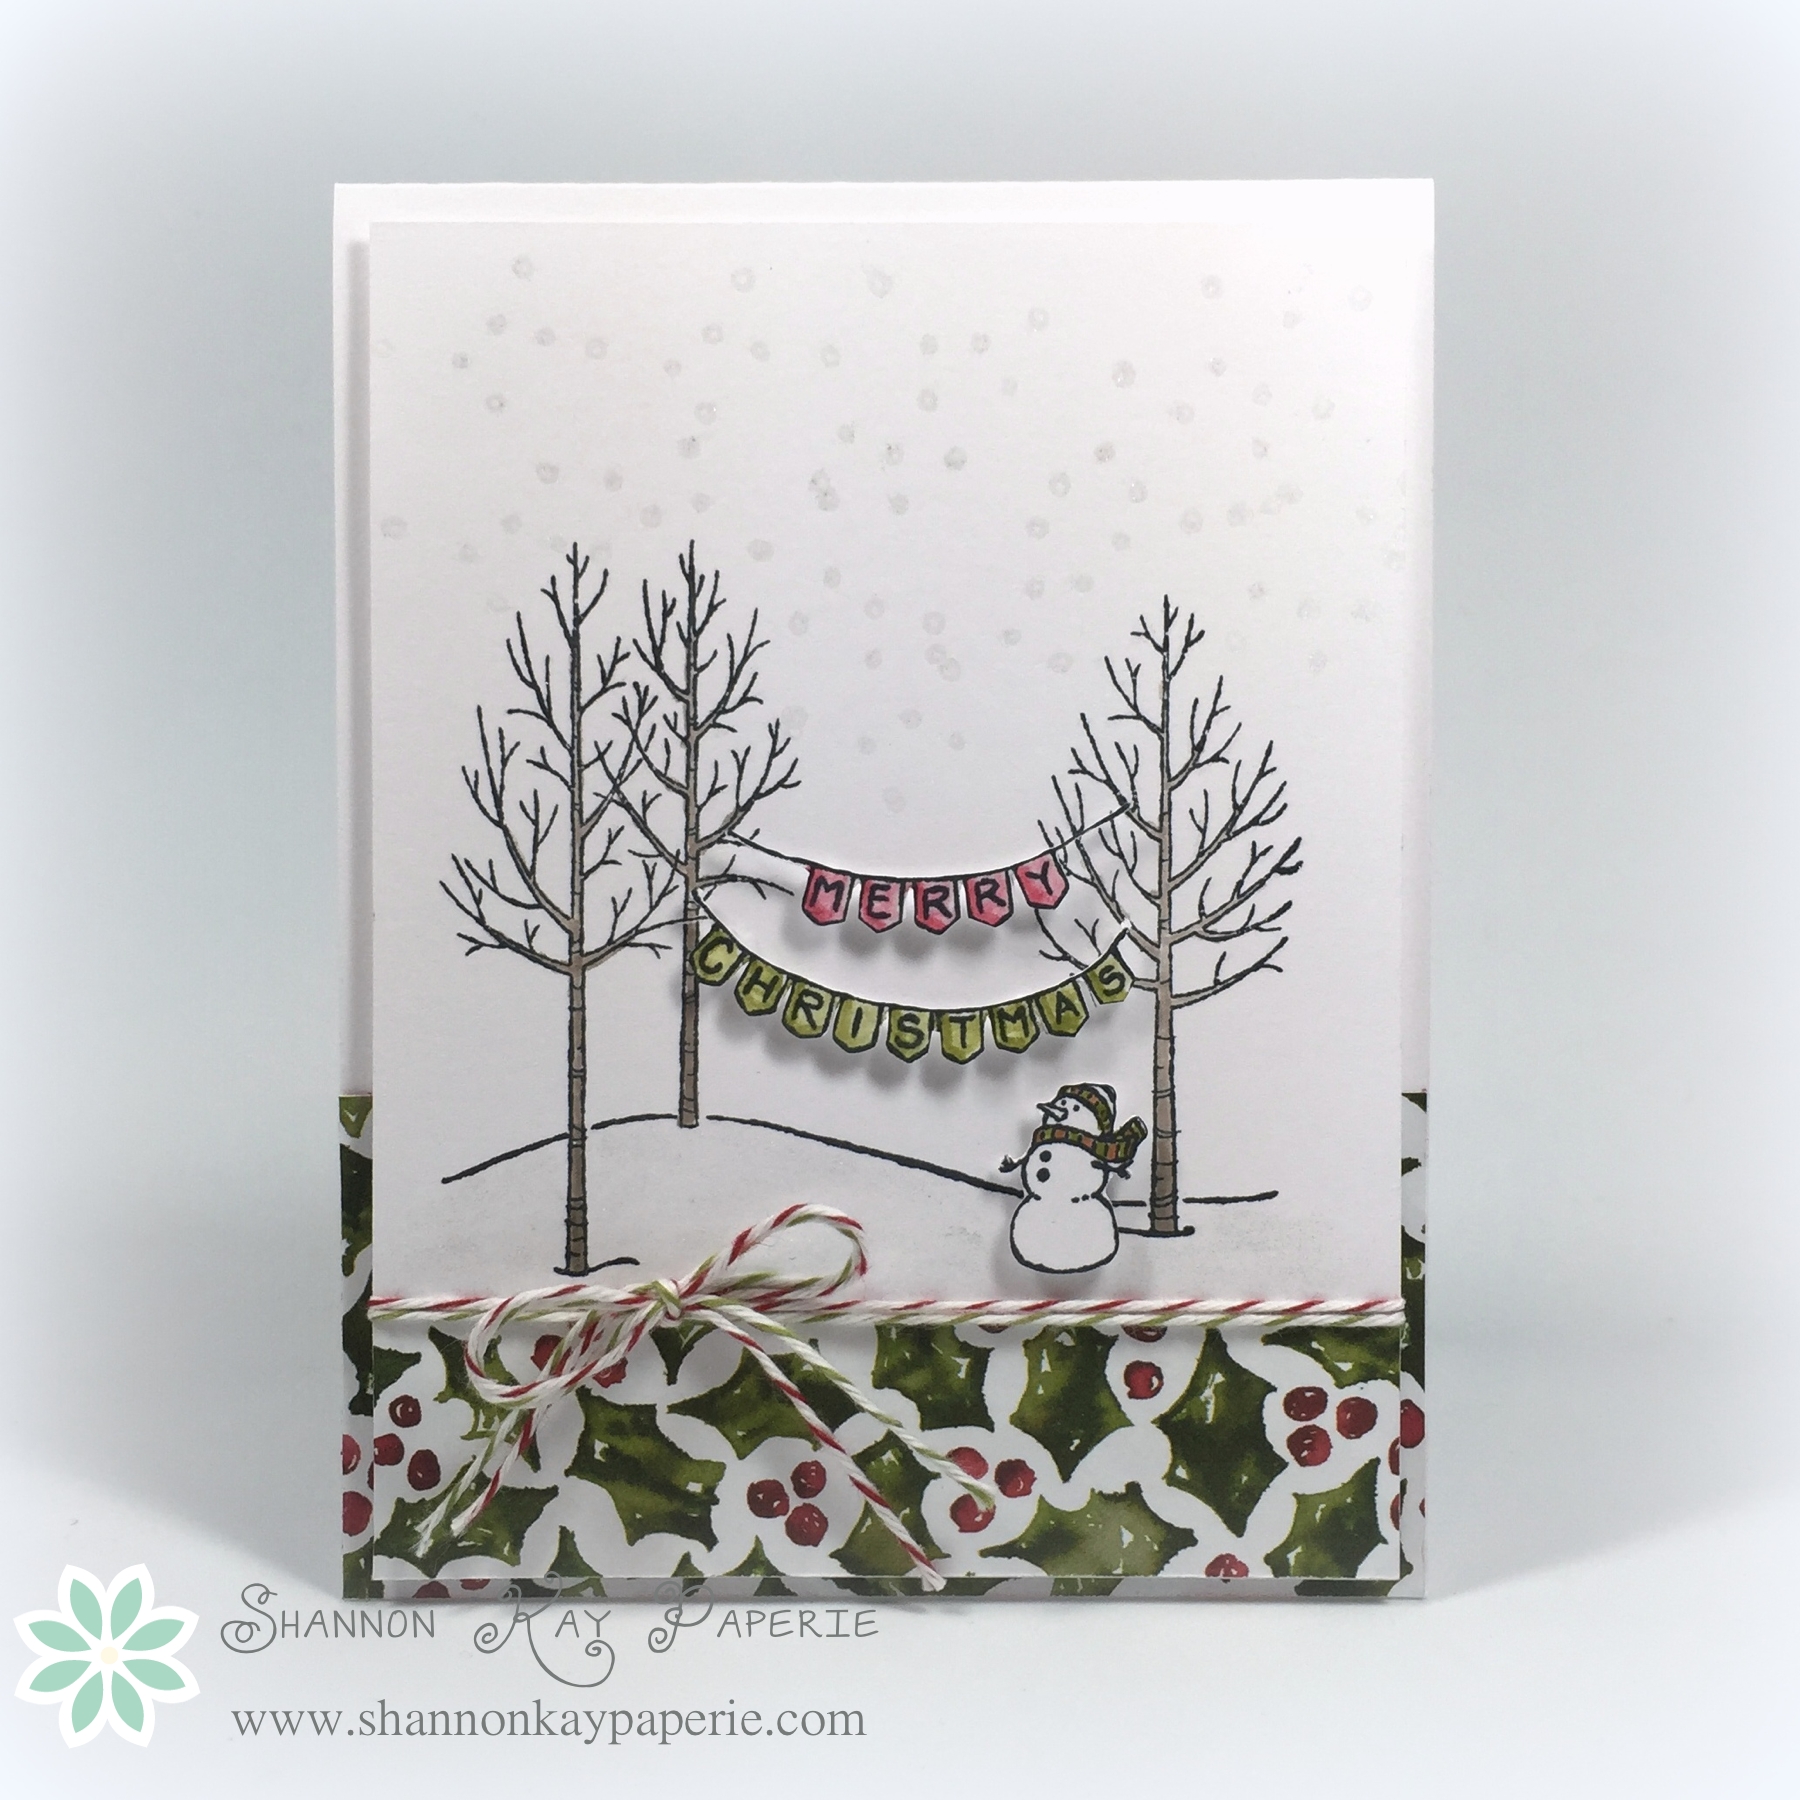
See the banner??? And the snowman??? Totally cut out with my ScanNCut, set to no border. Seriously Amazing!!! So I totally cased the Stampin’ Up! catalog in coloring my banner, but it was so fun!! I used a blender pen direct to the ink pad to pick up my color and then brush it over scratch paper until I had the shade I wanted. So easy!!

White Christmas - Freshly Made Sketches 213
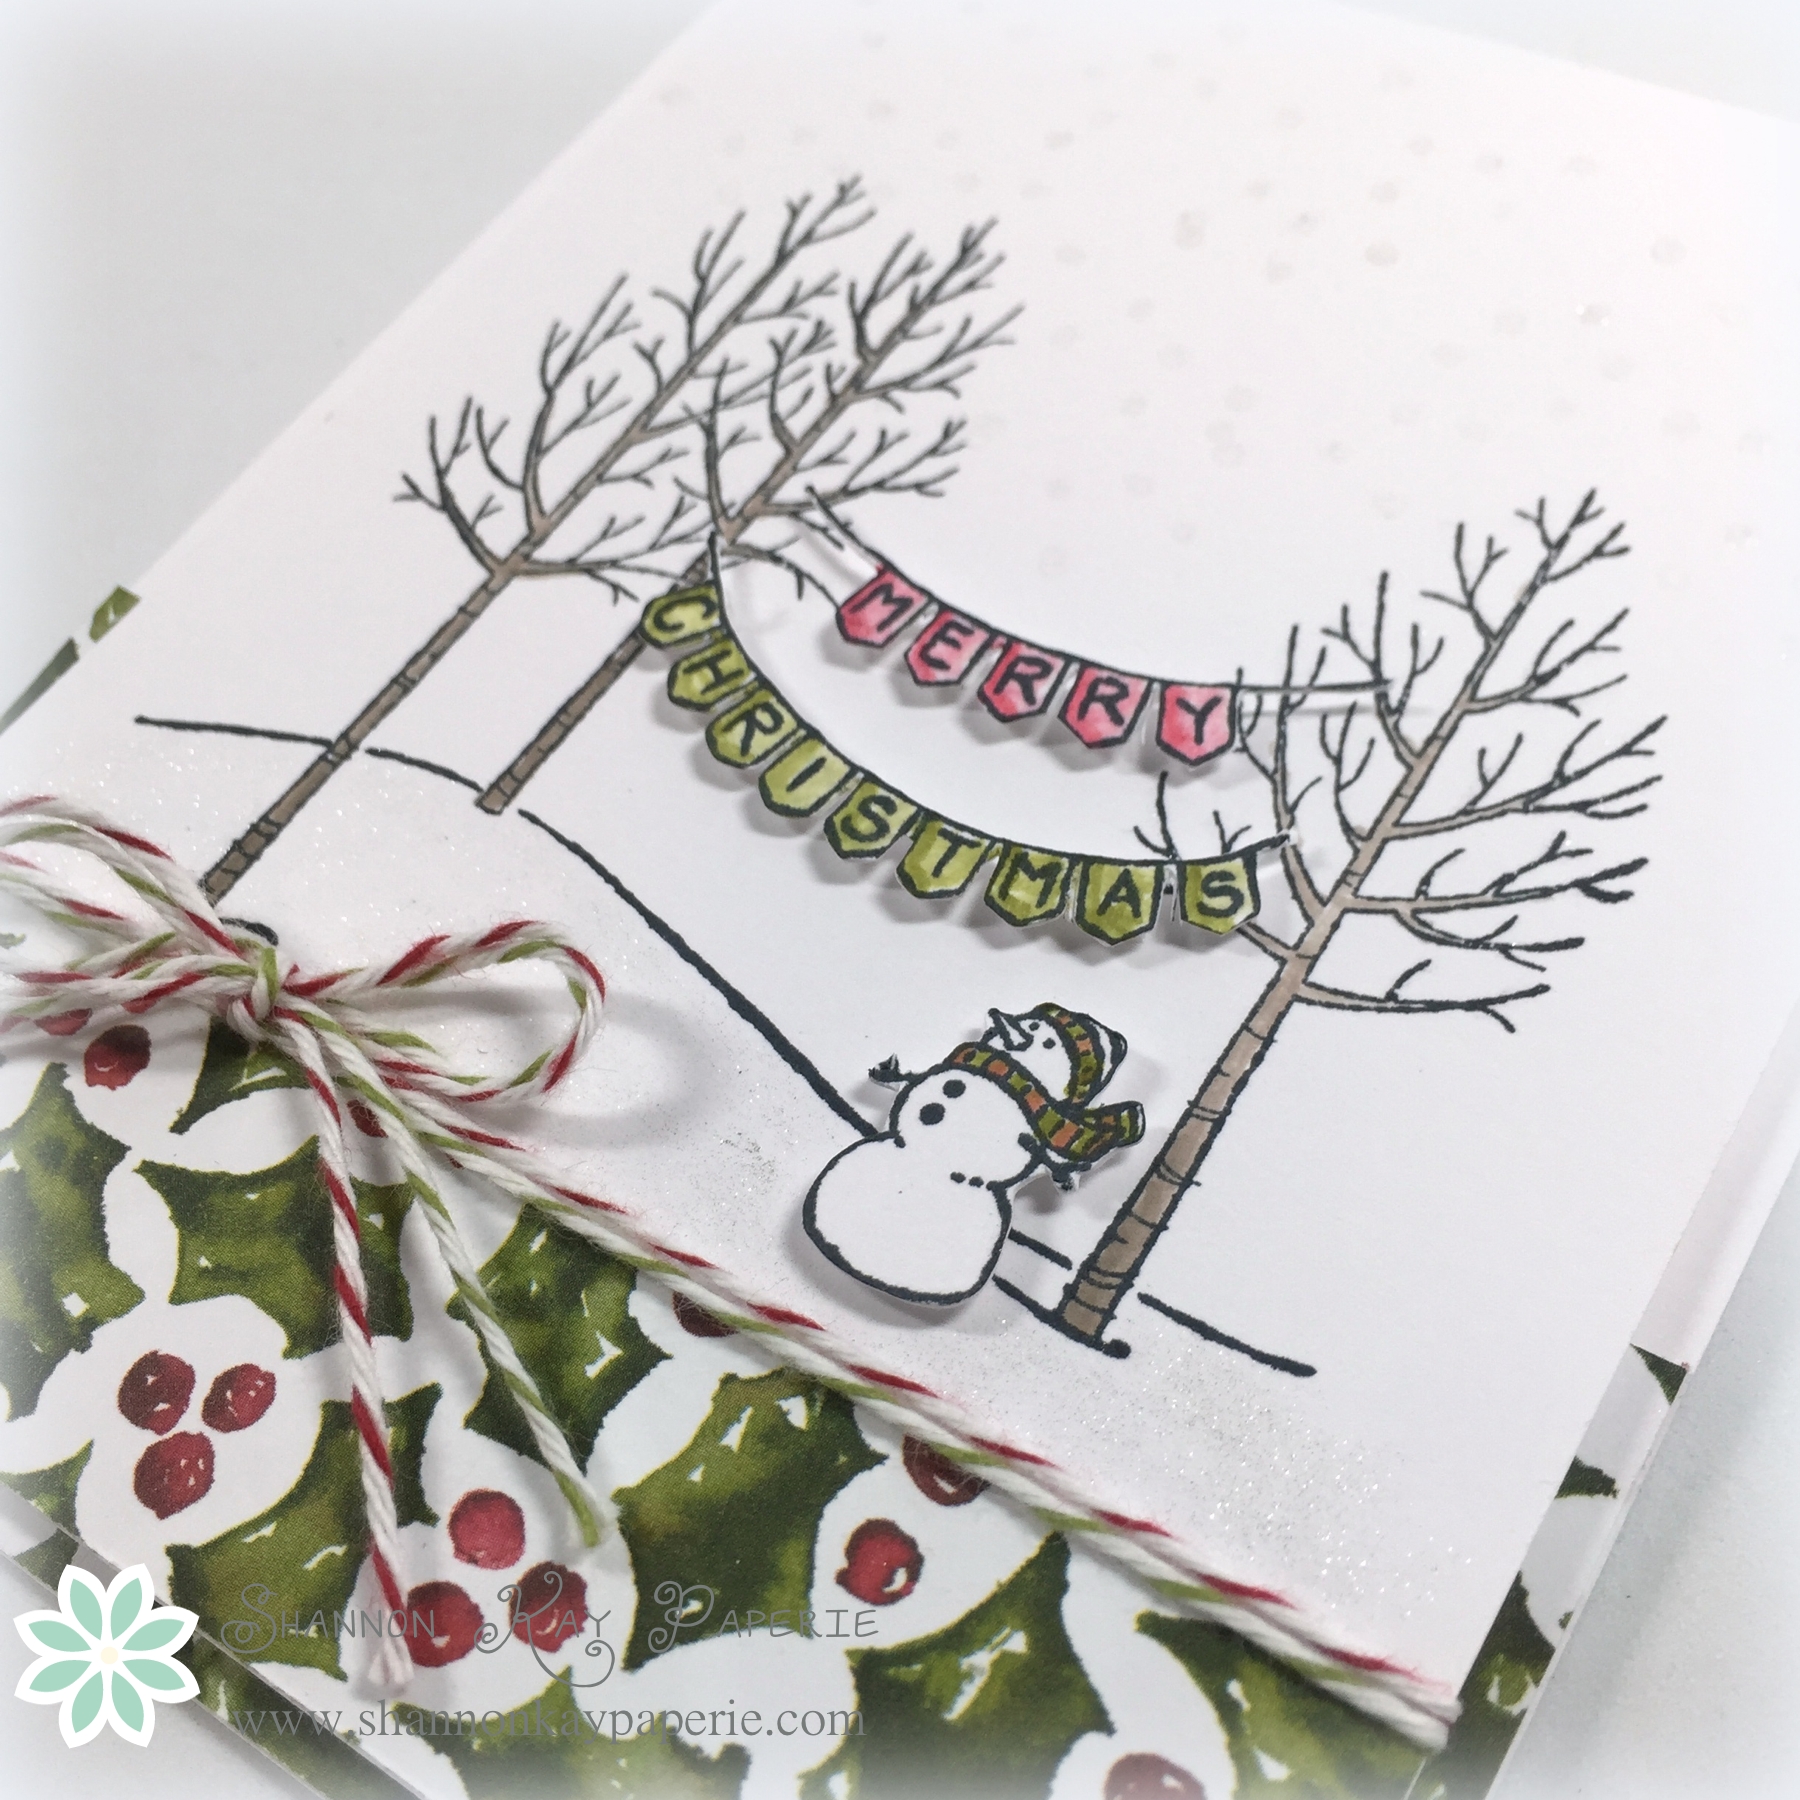
When I colored the trees, I started with the most ink at the bottom and worked my way up, so that the color would fade out as I went up. I love it. And yes, the banner is popped up on teeny tiny bits of Stampin’ Dimensionals…that was fun (fun not fun) but I love the effect!!

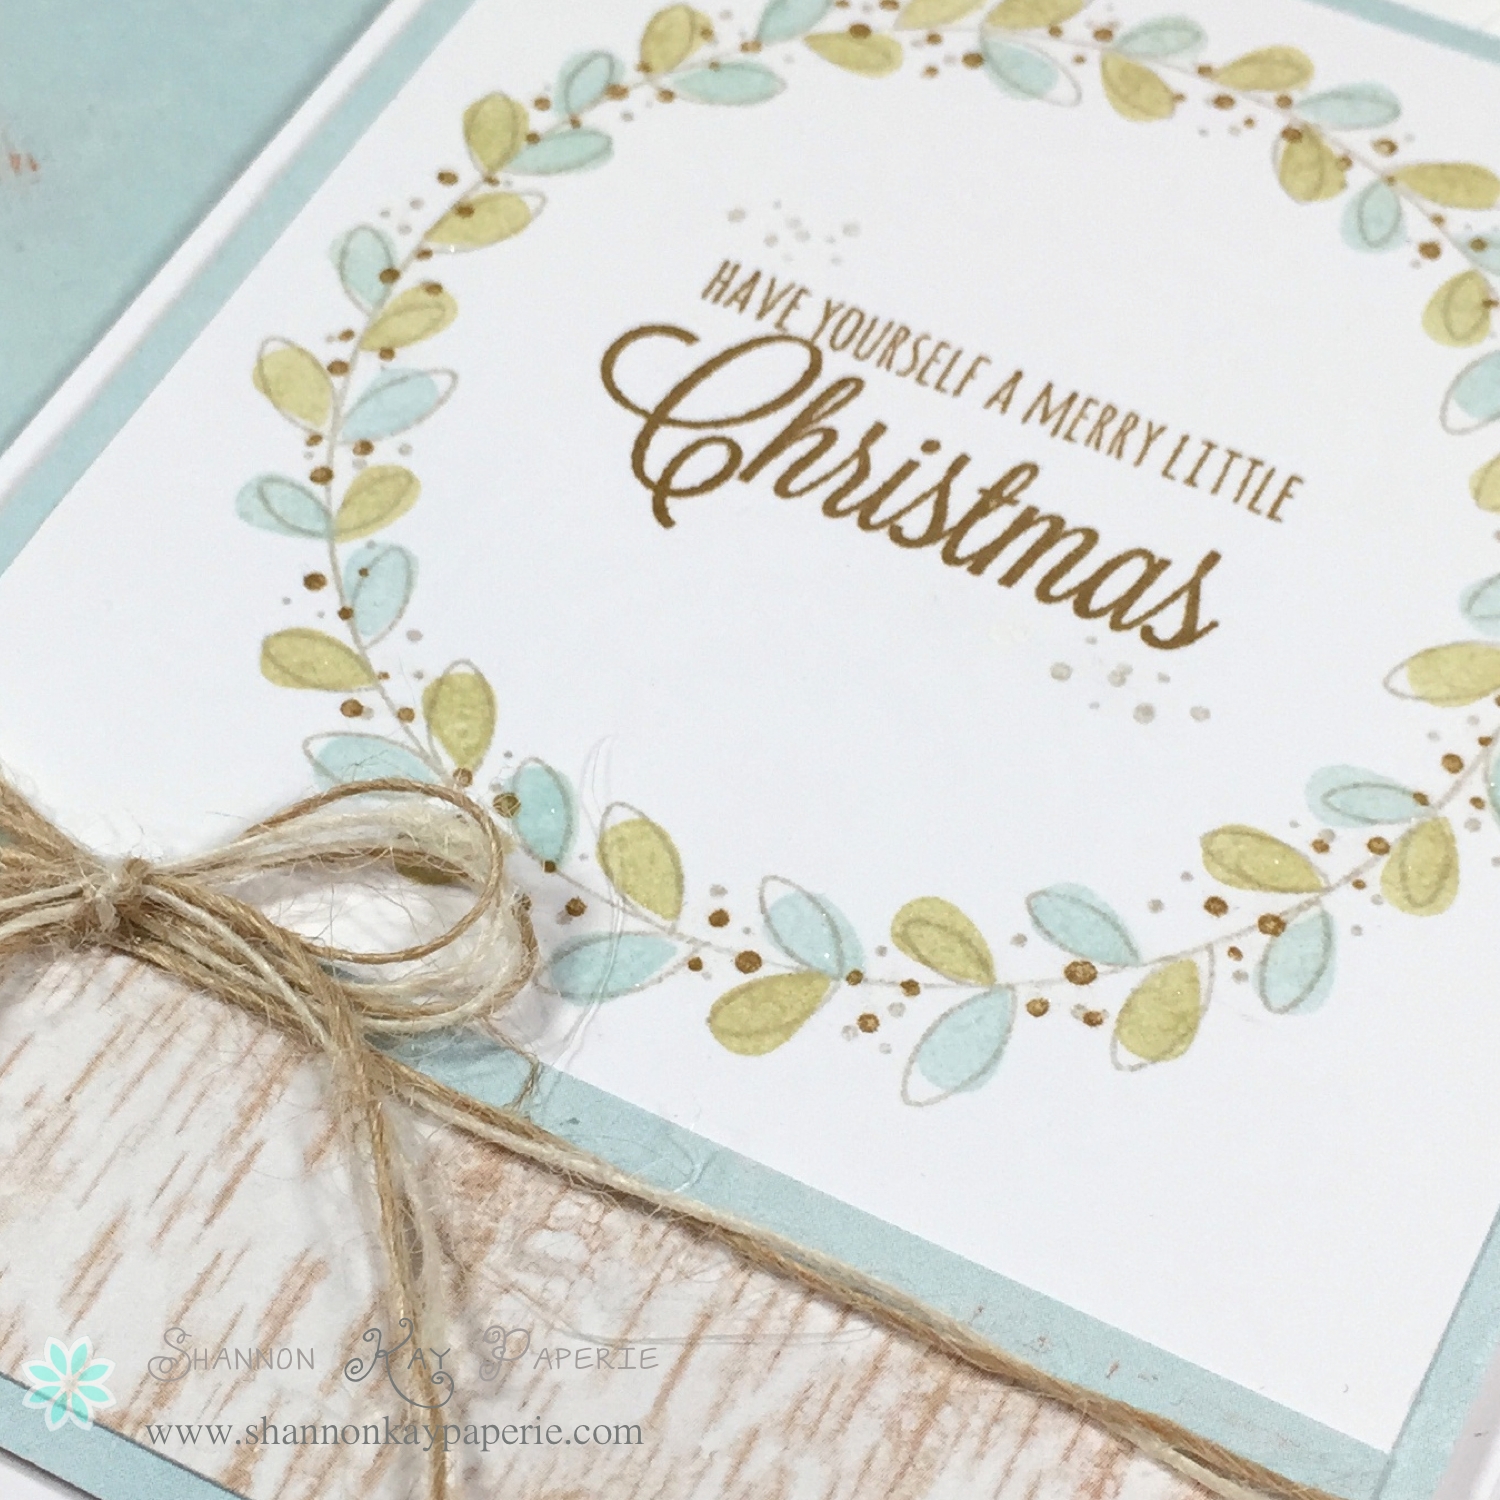
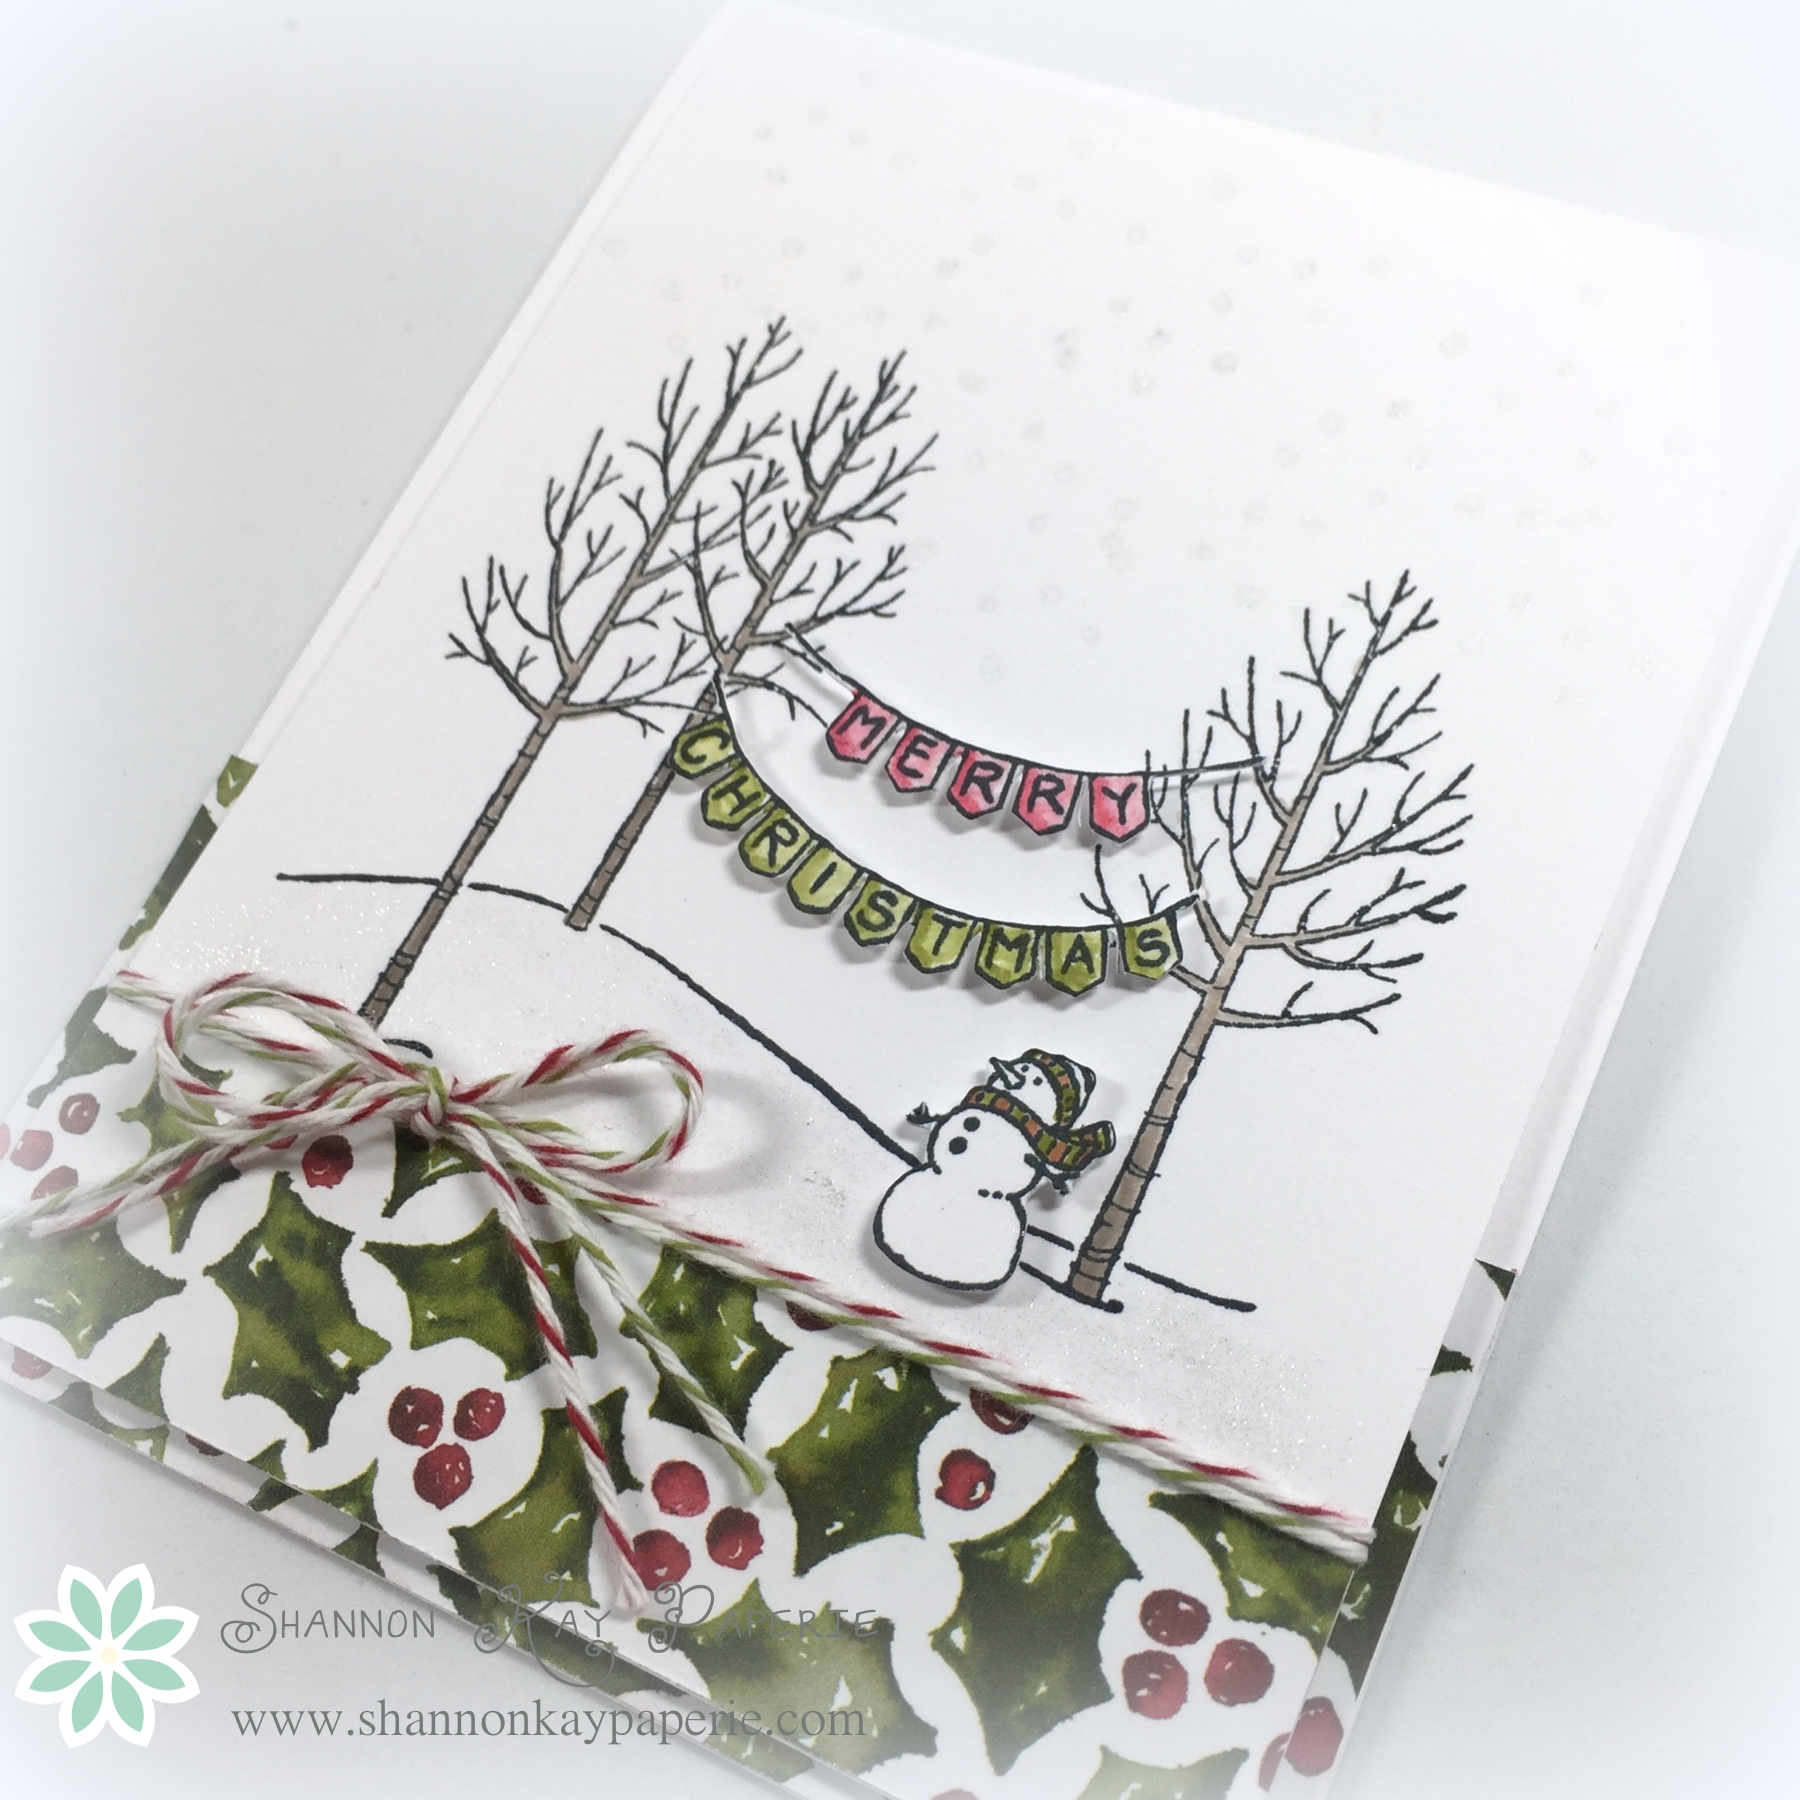
I then stamped falling snow over the top of my card in Versamark Ink, added clear embossing powder and used my heat tool to emboss. Then I added Wink of Stella to them. Here’s a better view:

White Christmas - Freshly Made Sketches 213I also added Wink of Stella to my snowdrifts as well as the tree tops…is there a line in a Christmas carol about glistening treetops? I can’t remember for sure but that was where that idea came from!

I love the snowman, he’s so stinkin’ cute!!

I did stray from the sketch a bit, but not intentionally, I just got involved in stamping and forgot to look at the sketch again 🙁 I hope they don’t throw me out (wink, wink).

I’m also linking up to the Simon Says Stamp Wednesday challenge which is “Christmas”! Perfect!!

wednesdayblog-logoThanks for stopping by and a huge thank you for all the love you have left for me in the comments…they mean SO much to me!! xx

*After reading this post back to myself, I can see where you, the reader, might think I had had too much caffeine, but no, I’m just soooo excited about my die cuts!! Silly I know, but I don’t think I’ll be able to sleep tonight with all the possibilities running through my head!! 🙂

Products Used:

Cardstock: Thick Whisper White by Stampin’ Up!

Pattern Paper: Season of Cheer Designer Series Paper Stack by Stampin’ Up!

Ink: Versamark & Real Red, Old Olive, Tip Top Taupe by Stampin’ Up!

Stamps:  White Christmas by Stampin’ Up!

Dies: None

Tools:  ScanNCut; MISTI; Blender Pen; Embossing Buddy, Clear Embossing Powder, Heat Tool

Embellishments: Old Olive and Cherry Cobbler Baker’s Twine by Stampin’ Up!

Spring Flowers – The Challenge #29

SKP Watermarked Photos3-051

Good Morning and Happy Hump Day to you!! Midway through the week, I hope yours is going well!! I’m a happy camper because I was able to stamp again last night. Woohoo!

Last week I promised another card using Rubbernecker Stamps and a technique that the owner/designer demonstrated for easy stamp alignment and the sketch this week over at The Challenge provided the perfect backdrop for my stamp!

New Banner-002

The stamp I chose for today’ project is the Layered Flower 2 stamp by Rubbernecker Stamps. It’s a three step stamp, and here’s how the owner demonstrated lining all three stamps up without the use of any extra tools:

Here’s what the stamp set looks like straight out of the package:

SKP Watermarked Photos3-046

The image on the packaging is a life size image of the stamp, so take the flower stamp with the larger petals and place it over the flower image on the packaging, like so:

SKP Watermarked Photos3-047

Then take your clear block and place it over the stamp, being careful to line the right and bottom edges up with the packaging, like so:

SKP Watermarked Photos3-048

Then, layout the panel you want to stamp on:

SKP Watermarked Photos3-049

Then, ink your stamp up with the lighter petal ink and stamp on your panel, being careful to once again line the clear block up with the right and bottom edges of your panel. Repeat this process with the smaller flower stamp and then finally with the outline stamp, and you will wind up with a wonderfully aligned image!

SKP Watermarked Photos3-050

And as I was reminded, the image is designed to NOT be perfect so don’t stress over it too much!

SKP Watermarked Photos3-053

I had a bit of fun with this stamp and some new papers. I wanted the flowers to really pop so I stamped the lighter image in Melon Berry ink by PTI and then the darker image in Calypso Coral ink by Stampin’ Up!. I used a fun sentiment in a new to me set called Sentiment Sampler by Paper Smooches. I think the sweet font of the sentiment goes well with the sweet paper.

SKP Watermarked Photos3-054

I received happy mail yesterday from Winnie & Walter and was so surprised when I found the stamps wrapped up with twine, a nice note, and a little bag of free sequins…how sweet is that! I posted a picture of it over on my Instagram account if you would like to see it. Even sweeter was the fact that some of the sequins were the perfect blue to add a bit of pizzazz to my card!

A generous coating of Wink of Stella was applied to the Calypso Coral part of the flowers as well as to the sentiment, they shimmer so prettily in person!

I thought the sentiment tag needed a little something so I fussed a bit with that, deciding finally on a tiny punched flower and a little bow tied with twine. Please let me know what you think, the jury’s still out on whether or not to leave the extra bits:)

In addition to playing along with The Challenge, I am also playing along with Just Us Girls, their challenge this week is Spring, as well as the Simon Says Stamp Wednesday Challenge which is Spring Flowers:

Screen Shot 2015-03-12 at 7_32_13 PM

wednesdayblog-logo

Thank you so much for stopping by! I appreciate your visit and love hearing from you!!

Wishing you joy and blessings!

Products Used:

Cardstock: Rustic Cream by Papertrey Ink

Pattern Paper: Simple Life by Echo Park

Ink: Melon Berry by Papertrey Ink; Calypso Coral and Soft Suede by Stampin’ Up!

Stamps:  Layered Flower 2 by Rubbernecker Stamps and Sentiment Sampler by Paper Smooches

Dies: Pierced Retangle STAX Dies by MFT Stamps and Envelope Liner Die by Stampin’ Up!

Tools:  MISTI by My Sweet Petunia (for the sentiment)

Embellishments: Sequins by Winnie & Walter


Special Delivery – MFTWSC219 & SSS Wednesday Challenge

I know I’m a bit late with today’s post, but I haven’t been able to stamp for the past few days and this card has been percolating in my head since Wednesday night…it needed to get onto paper, lol!

SKP Watermarked Photos3-001The inspiration for this project was actually two challenges, the My Favorite Things Wednesday Sketch Challenge:

219and the Simon Says Stamp Wednesday Challenge which this week is Things That Fly.

wednesdayblog-logoHow fun is that?!? When I started through my stamps for something that flies, I came across this set, Special Delivery by Clearly Besotted Stamps, almost immediately and thought it was a cute variation on the theme, yes, it’s a bird, but it’s a stork, we don’t see that one everyday!!

SKP Watermarked Photos3-003I have oodles and oodles of paper, but finding the right one for this card was tough. My mind set was baby theme, but I tend to shy away from the typical blue and pink, I wanted something a bit different. I fell in love with this subtle pattern paper but had a devil of a time deciding which color to pair it with! I finally settled on Pistachio Pudding ink color and I think it works very well here.

SKP Watermarked Photos3-004I added in a bit of blue with my enamel dots and then was beyond tickled to find a pattern paper for my envelope liner that is JUST the right shade of blue to compliment the card and the dots…so fun!!

Thank you for stopping by today, I will be back tomorrow with a new challenge from The Paper Players!

Wishing you joy and blessings!

Products Used:

Cardstock: Rustic White by Papertrey Ink

Pattern Paper: Blink of an Eye My Mind’s Eye

Ink:  Pistachio Pudding by Stampin’ Up! and Tuxedo Black by Memento Ink

Stamps:  Special Delivery by Clearly Besotted Stamps

Dies: Special Delivery by Clearly Besotted Stamps, Blueprints 14 by MFT Stamps and Envelope Liner Die by Stampin’ Up!

Tools:  MISTI by My Sweet Petunia

Embellishments: Limeade and Swimming Pool by Doodlebug Designs

A Merry Little Christmas

Watermarked Blog Posts-094

Greetings! Today’s card was inspired by this awesome inspiration board over on the Simon Says Stamp Wednesday Challenge Blog:

icy-moodboard-sss

The challenge is winter and I’m a bit low on snowflake and snowman stamps (I live in Southern California) so I decided to use Christmas as my winter theme.

Watermarked Blog Posts-096

I pulled out my Rustic Wreath stamp set again and used it this time without the die. I also pulled out my one petal stamp from the stamp set Pretty Petals by Clearly Besotted Stamps…it is SO useful! I inked the wreath base up in Sahara Sand ink and the petals in River Rock (retired) and Soft Sky. I am so very pleased with how it turned out!

Watermarked Blog Posts-098

I used a small piece of wood themed pattern paper to incorporate that element from the inspiration photos. Also, a bit of twine reinforces that rustic vibe. I actually took two different twines and wrapped them together, just for added rustic-ness (is that even a word?).

It’s all layered on some blue aged pattern paper (more of the rustic element) and then popped up off the card base with Stampin’ Dimensionals. I love Stampin’ Dimensionals!

And though you can’t see it, I’ve decorated the whole wreath with Wink of Stella for a beautiful sparkle!

And while I was at it, I decorated the inside as well:

Watermarked Blog Posts-099

Only two more sleeps until the big day! I’ve got just a few more days to ink up all of my pretty Christmas stamps before it’s time to put them away so guess what I have in store for you tomorrow! lol

Thanks so much for stopping by, your support means so very much to me!

Wishing you joy and blessings!

Products Used:

Cardstock: Stamper’s Select White by Papertrey

Pattern Paper: Cozy by Authentique

Ink: Sahara Sand, River Rock (retired), Soft Sky and Baked Brown Sugar by Stampin’ Up!

Stamps:  Rustic Wreath by Papertrey Ink, Wondrous Wreath by Stampin’ Up!

Dies:  None

Embellishments: Wink of Stella

Other: Envelope by Stampin’ Up!