Welcome to a brand new Tic Tac Toe challenge! This week’s board comes to us courtesy of Felicita and is sure to provide inspiration!
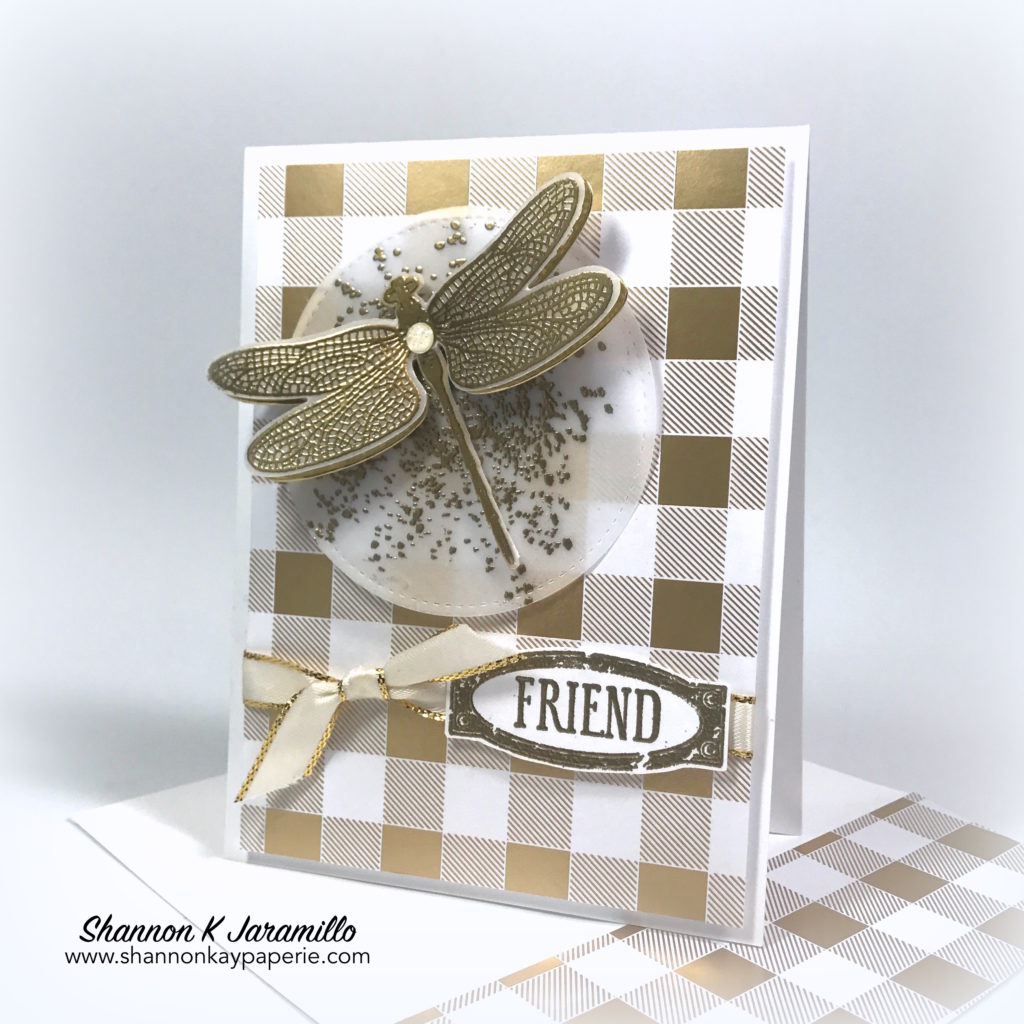
This week I decided to choose the middle row across; friendship, gold, layers. What will you choose?
Details:
- This dreamy paper is from the Year of Cheer Specialty Designer Series Paper pack. I love when paper can be multi-functional. This DSP is actually holiday paper but this gorgeous plaid can be used all year round! I layered a 4″ x 5 1/4″ piece of DSP over the card base and used Stampin’ Dimensionals to add depth and give me a little extra space to attach a piece of Gold 3/8″ Metallic-Edge Ribbon.
- I ran a piece of Vellum Cardstock through the Big Shot and the largest circle from the Stitched Shapes Framelits Dies. I then stamped the circle with a background splatter stamp from the Touches of Texture stamp set using Versamark Ink. I heat set it carefully with Gold Embossing Powder, using tweezers to hold the vellum for me so as to not burn fingers!
- The dragonfly from the Dragonfly Dreams stamp set was stamped in Versamark Ink and heat set with Gold Embossing Powder and then run through the Big Shot with the coordinating Detailed Dragonfly Thinlits Dies.
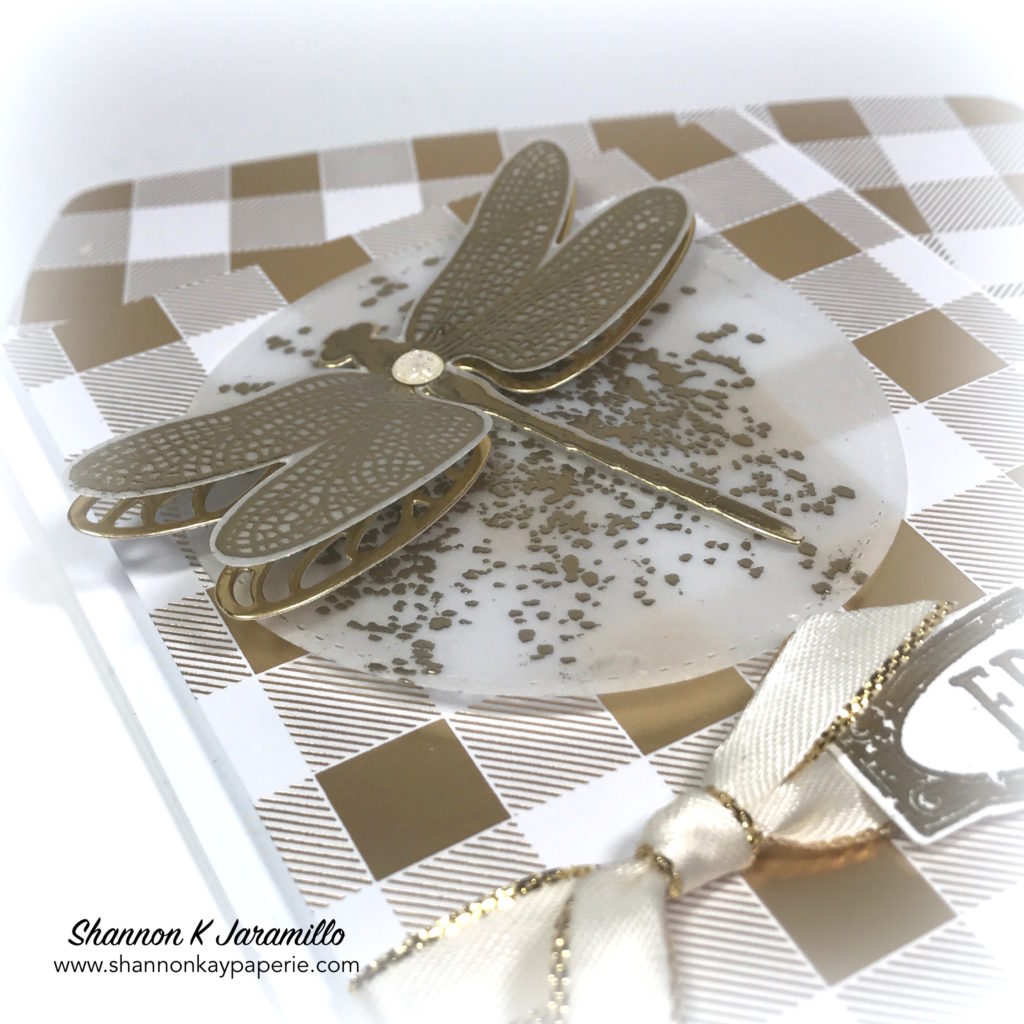
- A second dragonfly was die cut using a different die from the Detailed Dragonfly Thinlits Dies and Gold Foil Sheets. Can you see it peeking out from underneath? Just another layer of gold…it’s so amazingly pretty in person!
- I glued the two dragonfly dies together with the Fine-Tip Glue Pen and then popped them up off the circle of vellum using the edges of a sheet of Stampin’ Dimensionals. By using the edges I was able to snip some long thin lines of adhesive along the body and wings of the dragonfly and keep them hidden. I popped the vellum circle up off the DSP using stripes of Stampin’ Dimensionals as well.
- I had a wrinkle in the dragonfly’s body from not gluing the layers together properly but a single Glitter Enamel Dot in the very palest shade of Crushed Curry covered that easily and adds more sparkle!
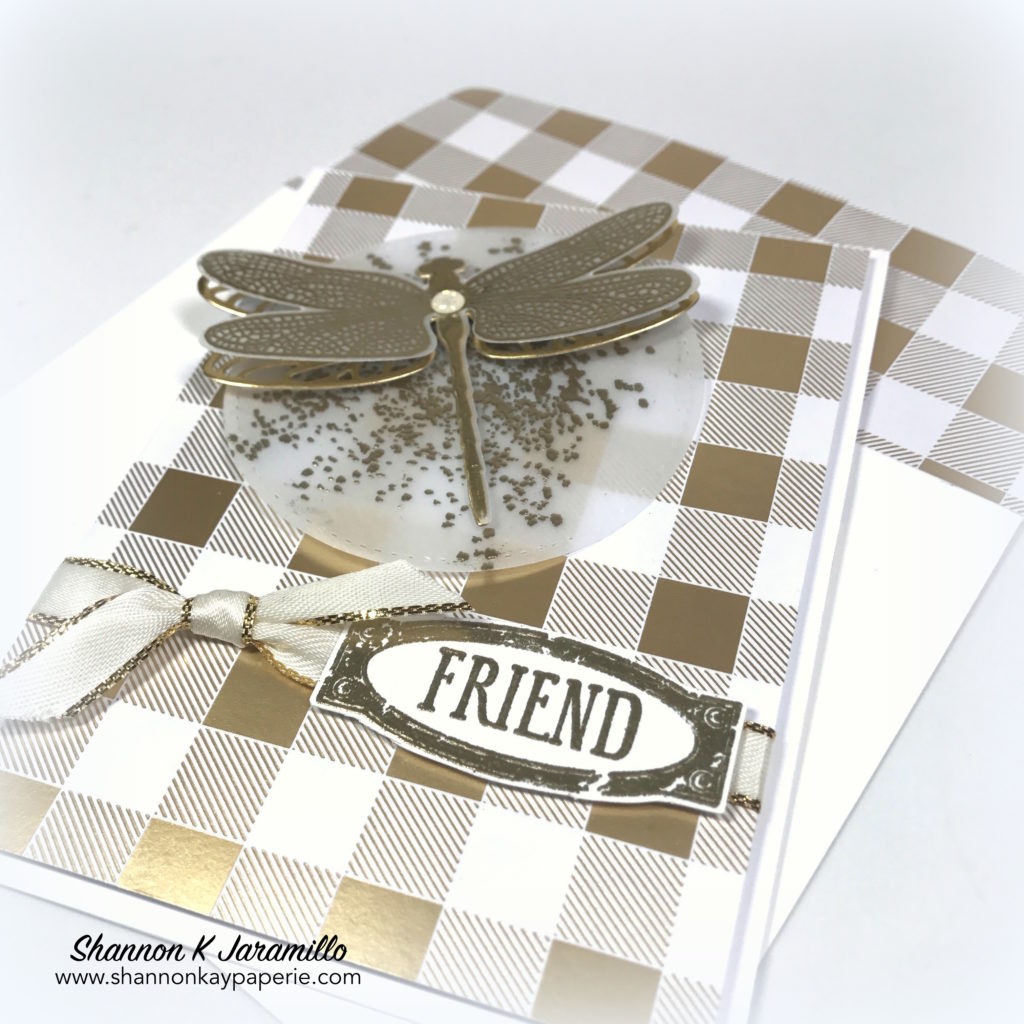
- The frame for the sentiment and the sentiment can be found in the Awesomely Artistic stamp set. I stamped both in Versamark Ink and heat set with Gold Embossing Powder. I then quickly snipped the framed sentiment with Paper Snips and attached it to my card with Stampin’ Dimensionals (a stampin’ girl’s best friend!)
- I adhered a 2 1/4″ x 6″ strip of matching DSP to my envelope by running SNAIL adhesive along the outside edges of the envelope flap, gently pressing the DSP to adhere it, and snipping off the extra with my Paper Snips, using the edge of the envelope flap as my guide. An easy way to dress up an envelope!
Thank you so much for stopping by today, please pop over and see more inspiration from the rest of the Tic Tac Toe design team and I hope you have a chance to play along with us this week!
Blessings!
Supplies:
Card Stock: Stamper’s Select White by Papertrey Ink
Pattern Paper: Year of Cheer Specialty Designer Series Paper by Stampin’ Up!
Specialty Paper: Gold Foil Sheets and Vellum Cardstock by Stampin’ Up!
Ink: Versamark Ink
Stamps: Awesomely Artistic, Dragonfly Dreams and Touches of Texture by Stampin’ Up!
Dies: Stitched Shapes Framelits Dies, Detailed Dragonfly Thinlits Dies and Envelope Liner Die (retired) by Stampin’ Up!
Tools: Embossing Buddy, Heat Tool and Gold Embossing Powder by Stampin’ Up!; MISTI by My Sweet Petunia (for the sentiment)
Embellishments: Gold 3/8″ Metallic-Edge Ribbon and Glitter Enamel Dots by Stampin’ Up!
Other: Medium Whisper White Envelope by Stampin’ Up!