Will You Be My Valentine? – The Paper Players 379

Stampin-Up-Sure-Do-Love-You-Valentine-and-Love-Card-Idea-Shannon-Jaramillo-stampinup

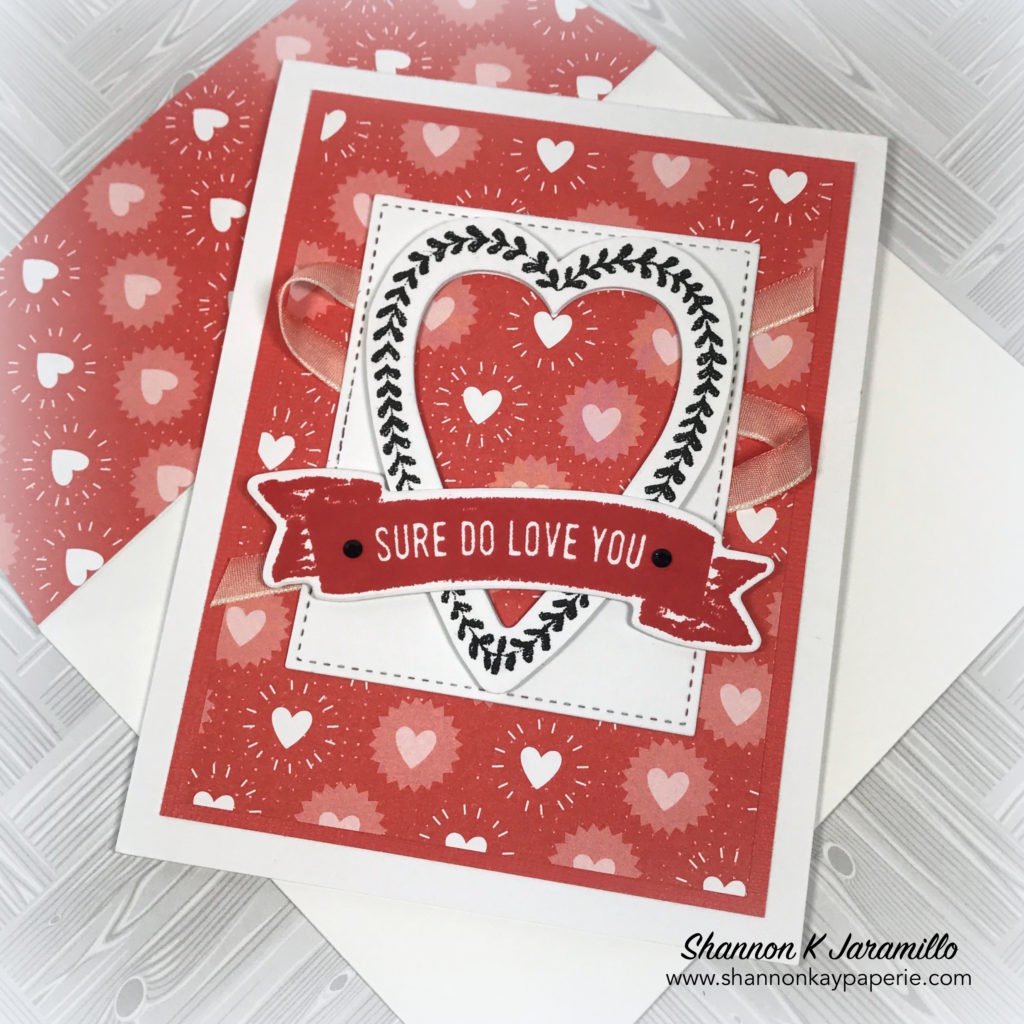
A few days ago when I was pulling out possible designer series paper options for this card, this was one of the patterns I pulled out. I loved it as soon as I saw it, and since it fit perfectly with The Paper Players challenge this week, I set it aside to create with! It’s part of a bright and fun pack of Designer Series Paper called Bubbles & Fizz which is available for free with any $50 purchase during Sale-A-Bration!

Measurements:

  • Card Base 4 1/2″ x 11″, scored at 5 1/2″
  • Calypso Coral Layer 3 3/4″ x 5″
  • DSP Layer 3 1/2″ x 4 3/4″
  • White Layer 2 3/4″ x 3 1/2″

Details:

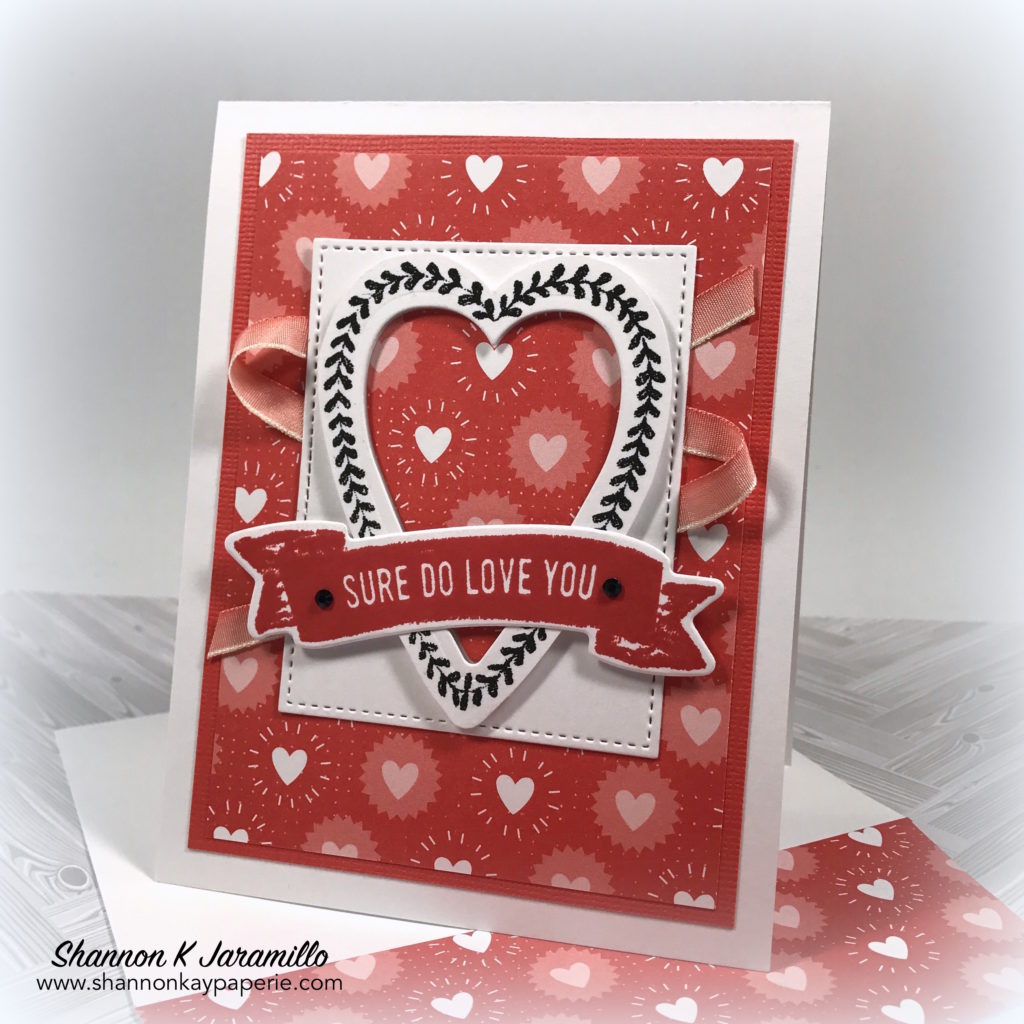
  • When I saw the Sure Do Love You stamp set in the catalog, I flipped right on by…wasn’t interested in more Valentine’s Day stamps. But on about my tenth pass through the catalog (do you do that too?), it caught my eye and I realized that the large heart was darling, oh! and then the banner, oh! and then what a cute saying in the other heart! Love button. And of course, if I purchase the Sure Do Love You bundle, I save 10%! That’s how we roll around here!

Stampin-Up-Sure-Do-Love-You-Valentine-and-Love-Card-Ideas-Shannon-Jaramillo-stampinup

  • If you look closely at the stamped heart, you will see that what appear to be connected petals are actually hearts…love button again! I stamped it with Memento Tuxedo Black ink and then die cut the middle out with the coordinating Lots to Love Box Framelits Dies. I snipped around the outside with my Paper Snips and popped it up onto a die cut rectangle.
  • The frame for the heart was created using largest square die in the Stitched Shapes Framelits Dies. How did I make a rectangle out of a square? I positioned the square die with one side hanging about a 1/2″ off the edge of the Magnetic Platform, cutting edge up, and secured it with a small piece of wash tape. I then laid the 2 3/4″ x 3 1/2″ piece of white card stock on top, lining the edges up straight and securing THAT with another piece of washi tape. I ran all of that through the Big Shot, stopping when I hit the edge of the magnetic platform, rolled it back through, lifted the card stock off the die, turned it around and laid it down just like I had previously, ran it through the Big Shot again and voila! a stitched rectangle!Stampin-Up-Sure-Do-Love-You-Valentine-and-Love-Cards-Idea-Shannon-Jaramillo-stampinup
  • The heart was popped up with Stampin’ Dimensionals and positioned on the frame, the sentiment stamped and die cut, a matching heart was cut with the heart die and laid into the center of the heart…I love the dimensional look it has…and then I positioned the sentiment on top!
  • A few posts ago I mentioned that I had “discovered” my Lemon Lime Twist Ombre Ribbon, well today I discovered my Calypso Coral Ombre Ribbon! lol I ran my adhesive across the back of the white rectangle layer and then randomly laid the ribbon out behind it, and adhered the whole thing to the card.
  • A few Black Rhinestones (retired) add a little bling and draw attention to the sentiment.

Stampin-Up-Sure-Do-Love-You-Valentine-and-Love-Cards-Ideas-Shannon-Jaramillo-stampinup

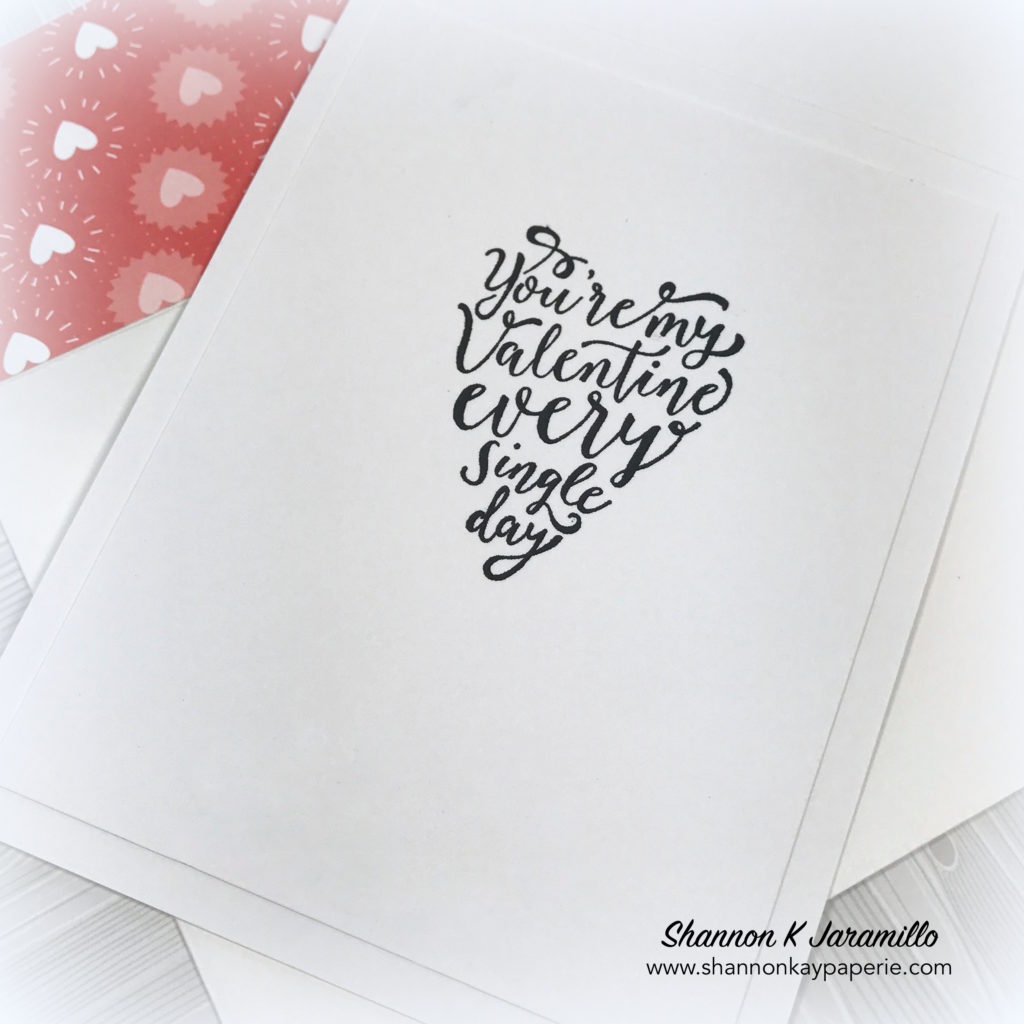
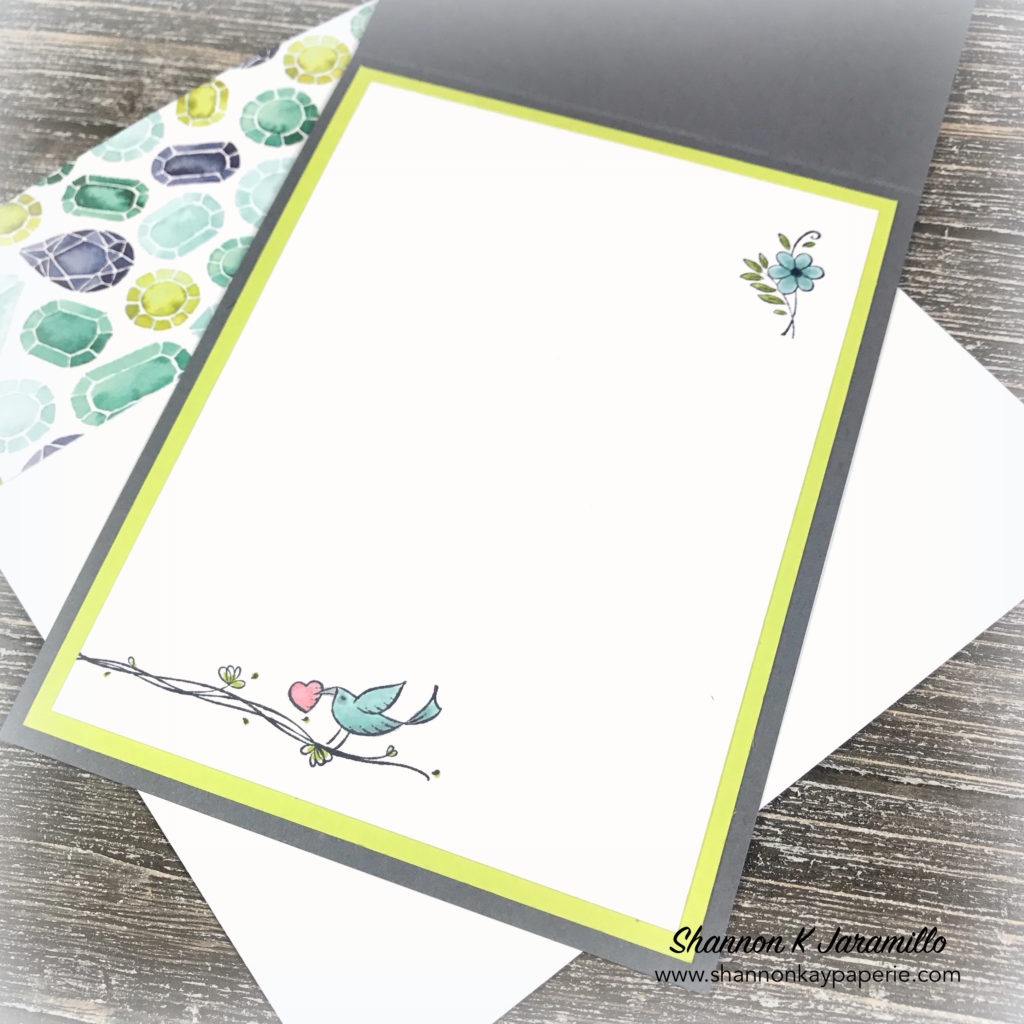
  • I kept the inside simple with this heart shaped sentiment. The shape and the sentiment itself are fabulous! As you can see, I added an additional layer of white card stock to the inside of the card. I have noticed that this layer of my cards tends to warp when displayed, probably because I add so much to the front, hopefully this additional layer will keep them from doing that!

Thank you Claire and The Paper Players for a sweet challenge this week! I sure enjoyed playing along!

Thank you for popping over to my little blog!

Blessings!

Supplies:

Card Stock: Stamper’s Select White by Papertrey Ink; Calypso Coral by Stampin’ Up!

Pattern Paper: Bubbles & Fizz Designer Series Paper by Stampin’ Up!

Ink: Memento Tuxedo Black; Calypso Coral by Stampin’ Up!

Stamps:  Sure Do Love You by Stampin’ Up!

Dies:  Lots to Love Box Framelits Dies by Stampin’ Up!

Tools: Big Shot and Stampin’ Trimmer by Stampin’ Up!

Embellishments: Calypso Coral 1/4″ Ombre Ribbon and Black Rhinestone Basic Jewels by Stampin’ Up!

Other: Medium Whisper White Envelope by Stampin’ Up!


Fun with Flowers – Tic Tac Toe Challenge 033

Simon-Says-Stamp-Blooming-Day-Thank-You-Card-Idea-Shannon-Jaramillo-simonsaysstamp

Hello there my crafty peeps! Funny story about this card…I started it last Sunday for last week’s Tic Tac Toe Challenge and ran to of time, so it sat until yesterday when I was able to finish it up and still be able to meet the criteria for this week’s challenge! So fun! Here’s the challenge board:

I went with the middle row: Flowers (Free); Die Cut; Sequins. These boards are so flexible and easy to play along with!

Measurements:

  • Card Base 4 1/2″ x 11″, scored at 5 1/2″
  • DSP Layer 3″ x 5 1/2″
  • White Layer 4 1/4″ x 5 1/2″, the cut with the die

Details:

  • I have a stash of make-your-own-bouquet type of flower sets, lots and lots of them actually, but it takes time to dream up a bouquet so lots of times I just pass on by them. This time I decided to take my time and just play.
  • I built the card around this darling Eyelet Arch Borders die by Simon Says Stamp. It’s sweet and dainty so I choose a pattern paper in that same vein. The color of the paper determined my color palette: Soft Sky; Pool Party; Pistachio Pudding; Mint Macaron and Sahara Sand.

Simon-Says-Stamp-Blooming-Day-Thank-You-Cards-Idea-Shannon-Jaramillo-simonsaysstamp

  • The pretty ‘thank you’ die cut is by Right at Home Stamps. It has a coordinating stamp and the die has a shadow around it. The two words cut out independently so you can use them with the shadow die, or use them the way I have here. I die cut the words twice in Pistachio Pudding (yes, that’s co-odinations case stock, I’m trying to use it up!) and one layer of Mint Macaron on the bottom and slightly offset to make it stand out better.
  • I stamped the flowers and leaves free hand, just adding as I went along and following the curve of the eyelet die.
  • The sentiment is from Stampin’ Up’s Cottage Greetings stamp set. I had intended for the stamp to be directly on the pattern paper but I smooshed (that’s a technical term :)) the stamp and ended up with a messy image, so…Lil ‘Inker’s Pinking Edge Sentiment Flags die to the rescue!
  • Medium size moonstones were added to the flower centers and then I stamped and die cut a few of the itty bitty flowers and added them for balance.

Simon-Says-Stamp-Blooming-Day-Thank-You-Card-Ideas-Shannon-Jaramillo-simonsaysstamp

  • The yellow pattern paper I used for the envelope liner is from the same pack as the bluish polka dots and I thought it set off the colors of the card perfectly.

I hope you have enjoyed today’s project! If you have a chance, please pop on over to the Tic Tac Toe Challenge site and see the beautiful cards the designers have for you!

Blessings!

Supplies:

Card Stock: Stamper’s Select White by Papertrey Ink

Pattern Paper: Simple Life by Echo Park

Ink: Memento Tuxedo Black; Coastal Cabana (R), Mint Macaron (R), Pistachio Pudding (R), Pool Party, Sahara Sand and Soft Sky by Stampin’ Up! 

Stamps:  Blooming Day by Simon Says Stamp; Script Greetings by Right at Home; Cottage Greetings (R) by Stampin’ Up!

Dies: Blooming Day by Simon Says Stamp; Script Greetings by Right at Home; Pinking Edge Sentiment Flags by Lil ‘Inker

Tools: Big Shot and Stampin’ Trimmer by Stampin’ Up!

Embellishments: Moonstones by Simon Says Stamp

Other: Medium Whisper White Envelope by Stampin’ Up!

Friendship’s Sweetest Thoughts – Freshly Made Sketches 322

Stampin-Up-Friendship's-Sweetest-Thoughts-Friendship-Card-Idea-Shannon-Jaramillo-stampinup

Oh my gosh, isn’t this flower cart image from Stampin’ Up!’s new set ‘Friendship’s Sweetest Thoughts’ the cutest thing EVER??? This was my absolute number-one-can’t-live-without-it stamp in Stampin’ Up’s Occasions Catalog! Mr. Brown just brought me my order this week (with this darling in it) and as soon as I saw the latest Freshly Made Sketches layout by Cecile, I knew it was meant to be 🙂

Measurements:

  • Card Base 4 1/2″ x 11″, scored at 5 1/2″
  • DSP Layer 4″ x 5 1/4″
  • Basic Grey Layer 3 1/4″ x 4 1/4″
  • White Layer 3″ x 4″

Details:

  • With the sketch layout in mind, and knowing that I was going to color the flower cart, I thumbed through my DSP collections and tried a few, but this pattern in the Naturally Eclectic DSP paper pack was the landslide winner…I really love the color combination!
  • Now how to color the image? Lemon Lime Twist is the green in the DSP so I colored the leaves with my Stampin’ Marker. I added the detail to the leaves after they had dried to give it more depth.

Stampin-Up-Friendship's-Sweetest-Thoughts-Friendship-Card-Ideas-Shannon-Jaramillo-stampinup

  • Next were the flowers and I chose another color from the DSP, Soft Sky. I also used a Stampin’ Marker for this one as well, coloring one layer and waiting for it to dry before adding another layer. It actually has three layers of Soft Sky and a small layer in the center of Pool Party.
  • The flower cart itself and the awning are colored with the Light Smoky Slate Stampin’ Blends alcohol marker. I added a second layer randomly to give it depth as well.
  • The little birdie up top is Soft Sky and Pool Party, and the sweet heart he’s holding was colored with the Dark Pirouette Pink Stampin’ Blends alcohol marker.

Stampin-Up-Friendship's-Sweetest-Thoughts-Friendship-Cards-Idea-Shannon-Jaramillo-stampinup

  • I saw a card made with this ribbon just a few days ago and was reminded that I owned it! It is the most delicate ombre ribbon, soft and pliable and so so sweet in Lemon Lime Twist. I tried the ribbon a few ways and then decided to wrap it like I used to wrap ribbon around Christmas gifts as a little girl. It feels so fresh!
  • And the darling bow. I love how it lines up with the angle of the ribbon. I must say, creating this bow was a bit of a challenge as the loops are smaller than my fingers…I ended up using small paint brushes to insert in the loops so I could tie the bow tight!

Stampin-Up-Friendship's-Sweetest-Thoughts-Friendship-Cards-Ideas-Shannon-Jaramillo-stampinup

  • I’m so disappointed that the camera didn’t pick up the sparkle on the flowers and the heart from using Wink of Stella, they are so sparkly and perfectly topped off with itty bitty Pearl Basic Jewels. Oh, and I added a pearl to the center of the wheel too 🙂
  • I didn’t mention the sentiment before, but it is from the same stamp set. As are the images I stamped and colored on the inside of the card:

Stampin-Up-Friendships-Sweetest-Thoughts-Friendship-Card-Idea-Shannon-Jaramillo-stampinup

  • Seriously, this is the cutest set ever and you can anticipate more creations from me using it!

The Freshly Made Sketches design team knocks it out of the park every week with their sketches, pop on over and see what they have created and maybe play along!

Thank you for stopping by! I appreciate you!

Blessings!

Supplies:

Card Stock: Stamper’s Select White by Papertrey Ink; Basic Grey and Lemon Lime Twist by Stampin’ Up!

Pattern Paper: Naturally Eclectic Designer Series Paper by Stampin’ Up!

Ink: Memento Tuxedo Black; Dark Pink Pirouette and Light Smoky Slate Stampin’ Blends Alcohol Markers; Soft Sky, Pool Party, Lemon Lime Twist Stampin’ Write Markers

Stamps:  Friendship’s Sweetest Thoughts by Stampin’ Up!

Dies:  None

Tools: Stampin’ Trimmer by Stampin’ Up!

Embellishments: Lemon Lime Twist 1/4″ Ombre Ribbon and Pearl Basic Jewels by Stampin’ Up!

Other: Medium Whisper White Envelope by Stampin’ Up!


All Because Two People Fell in Love – Sunday Stamps 170


Lil-Inker-Because-Love-and-Friendship-Card-Idea-Shannon-Jaramillo-lilinker

I decided to break out new paper, stamps and dies for this card that I made using the most recent Sunday Stamps sketch. I chose this sketch for the simple reason that the idea of three squares down one side of the card boggles my mind. So…challenge accepted!

Measurements:

  • Card Base 4 1/2″ x 11″, scored at 5 1/2″
  • Base Panel 4″ x 5 1/4″
  • Blue Layer 4 7/8″ x 3 5/8″
  • Striped Layer 4 7/8″ x 3 5/8″

Details:

  • I adore this new quilted heart die that I got for FREE with my order from Concord & 9th. And I saw this sentiment stamp and die set from Lil ‘Inker and knew that was the perfect sentiment for this card…but how to merge the two and still keep with the inspiration sketch? Hmmm…
  • Once the stamps and dies were chosen…now paper! My favorite accessory! I literally went through all of my 6 x 6 paper stash and had lots of fun options, but I have been purchasing scrapbooking kits from Felicity Jane and these papers from the ‘Heidi’ line are GORGEOUS!!!

Lil-Inker-Because-Love-and-Friendship-Card-Ideas-Shannon-Jaramillo-lilinker

  • I used the weathered wood paper for one of the quilted hearts and for the base layer as well. Then I chose two patterns from the same line and die cut them with a stitched rectangle die and added them at canted angles for a fun effect.
  • Everything being a little wonky made trying to line my hearts up straight a bit of an issue! I finally (and don’t laugh) took a piece of twine, lined it up on my Stampin’ Grid Paper, taped it down at the top and bottom, and then slid my card base under the twine. One I made sure the card was straight as well, I used the line of the twine to aline the center points of the each heart, at the top and at the point. That made it much easier to be straight, but I’m sure there is a better way to have done this!

Lil-Inker-Because-Love-and-Friendship-Cards-Ideas-Shannon-Jaramillo-lilinker


  • The ‘because’ die has a matching stamp. I tried stamping the stamp and then die cutting it, but couldn’t line everything up, then I tried cutting the die cut out and lining it up with the stamp set in my MISTI and that worked better but the ‘s’ in the stamp and the die aren’t quite the same! Third time is a charm, right? I simply took the stamped die and turned it upside down into my Onyx Versafine ink! That did the trick! And it’s REALLY black! I love it!
  • I added a bit of Powder Pink shimmer ribbon in the upper left hand corner and anchored it with a Black Rhinestone Jewel.A couple more in the lower right hand corner for balance and voila!

I’m pretty happy with how the card turned out. I wanted to try to create a more modern, maybe a little of a ‘Joanna Gaines’ type valentine card and think I achieved that goal. Enjoy the rest of your day and I will see you soon! If you have a minute, I would love hearing your feedback!

Here’s the sketch I used from Sunday Stamps:

I’m also playing along with the Simon Says Stamp Wednesday Challenge which is Use Patterned Paper.


Blessings to you.

Supplies:

Card Stock: Stamper’s Select White by Papertrey Ink

Pattern Paper: Heidi by Felicity Jane

Ink: Versamark Onyx Black

Stamps:  Because by Lil ‘Inker

Dies:  Quilted Heart by Concord & 9th; Because and Stitched Mats: Rectangles by Lil ‘Inker; Envelope Liner Die (retired) by Stampin’ Up!

Tools: Big Shot by Stampin’ Up!

Embellishments:  Powder Pink Shimmer ribbon and Black Rhinestone Basic Jewels by Stampin’ Up!

Other: Medium Whisper White Envelope by Stampin’ Up!

Floral Feel Better – Freshly Made Sketches 319

Concord-&-9th-Hello-Lovely-Get-Well-Card-Ideas-Shannon-Jaramillo

Hello my stamping friends! I woke up today with the Santa Ana winds blowing again (yuck) but also to a perfectly clear bright blue sky and that was the inspiration for today’s card. The sun just fills me up with ‘happy’ and so I poured it out onto my card.

Measurements:

  • Card Base 4 1/2″ x 11″, scored at 5 1/2″
  • White Panel 3 1/2″ x 5 1/2″
  • Orange Layer 1″ x 5 1/2″
  • Blue Layer 1/2″ x 5 1/2″

Details:

  • I broke out a new-to-me stamp set and had fun playing not with alcohol markers, but with good old Stampin’ Up! foam ink pads! LOTS of them!!
  • The ‘Hello Lovely’ stamp set is made by Concord & 9th, a stamp company I had not really noticed until now (Thanks Michelle). I love that it is a large image, and really open to personalization. I think I could make a hundred cards with it, all different.
  • Besides the large image, there are lots of watercolor type images to fill in the flowers. The large blossom has three stamps for the interior color. So I stamped the largest image in Powder Pink, the next largest in Blushing Bride, and the smallest in Flirty Flamingo.

Concord-&-9th-Hello-Lovely-Get-Well-Cards-Idea-Shannon-Jaramillo

  • The smaller pink bud was stamped in Flirty Flamingo with Rose Red accents, The blue ones are Coastal Cabana with Bermuda Bay centers and the the daisies are stamped in Daffodil Delight with Crushed Curry centers.
  • The largest leaves are stamped in Lemon Lime Twist, the medium leaves are stamped in Pear Pizzazz, and the little leaves are Lucky Limeade.
  • Once I was done I decided everything needed more depth of color so I pulled out a bunch of pencil type stamps that I purchased from ‘Stamps by Judith’ (which are featured on the main photo) and went to town. I added lots of Powder Pink, Flirty Flamingo and Rose Red squiggles to the main flower. I adore the addition of Rose Red to the center of it.
  • The Hello Lovely stamp set comes with an ink splotch stamp so with some masking, I added Daffodil Delight ink spots all around the stamped image. That wasn’t enough so I added more in Sahara Sand.
  • Still wasn’t enough so I added a three dot pencil stamp all over in Crushed Curry and Fresh Fig. I still wanted ‘more’ so I used the squiggle stamp again in Fresh Fig. The touch of purple makes my bouquet complete 🙂

Concord-&-9th-Hello-Lovely-Get-Well-Card-Idea-Shannon-Jaramillo

  • I found some patterned paper that went well with my colors in a 6 x 6 paper pad by My Mind’s Eye, appropriately called ‘Happier’
  • I fussed with the sentiment for a bit until I found this one by PTI. I tried in on vellum first, nope. Then tried it on white card stock, nope. The third time was just right, stamped in Versamark Ink on Basic Black card stock and heat embossed with Ranger white embossing powder. I placed it flat onto my card rather than popped up as I wanted the card to be very mailable.
  • I felt everything was a bit off balance with all the black to the upper right so I added black sequins to the opposite corner. It feels balanced now!
  • I couldn’t just stop, so I added shimmer to ALL of the flowers…so sparkly!

And that’s it! I left the inside blank to leave room for lots of writing space.

I want to thank the Freshly Made Sketches for my layout this week, a perfect blank canvas to decorate!

I’m also playing along with Concord & 9th‘s challenge to use your first (or closest to first) C9 set! How fun is that!

Thank you so much for visiting me! Making cards is a wonderful way to wind down and the process makes me happy so I’m always delighted to share with, and hear from, those who share this passion!

Blessings to you.

Supplies:

Card Stock: Stamper’s Select White by Papertrey Ink, Basic Black by Stampin’ Up!

Pattern Paper: Happy by My Mind’s Eye

Ink: Versamark Onyx Black;  Powder Pink, Blushing Bride, Flirty Flamingo, Rose Red, Costal Cabana, Bermuda Bay, Daffodil Delight, Crushed Curry, Lemon Lime Twist, Pear Pizzazz, Lucky Limeade, Sahara Sand and Fresh Fig by Stampin’ Up!

Stamps:  Hello Lovely by Concord & 9th, Inside & Out: Healing Touch by Papertrey Ink

Dies:  Envelope Liner Die (retired) by Stampin’ Up!

Tools: Heat Embossing Tool and Embossing Buddy by Stampin’ Up!; White Embossing Powder by Ranger

Embellishments:  generic black sequins and Wink of Stella

Other: Medium Whisper White Envelope by Stampin’ Up!