Welcome Baby – Tic Tac Toe Challenge #50

tic_tac_toe-challenge_Shannon_Jaramillo_001

Hello there, peeps! I’ve been quiet on the blogging front as helping my mom with life “things” has taken precedence. But I am SO happy to be back today with a special card and an announcement! The Tic-Tac-Toe Challenge is back up and running and today is their first challenge! I am the featured designer this week, which means that I get to create the Tic-Tac-Toe board! I filled it with things that I love so I hope you will love them too and play along! Without further ado, here is this week’s challenge board:

tic_tac-toe-challenge_50

I used the far left column for today’s card: Flower, Ribbon, Punch.

Measurements:

  • Card Base: 4 1/2″ x 11″, scored at 5 1/2″
  • First Layer: 4″ x 5 1/4″
  • DSP Layer: 2 1/4″ x 5″ & 1 1/2″ x 5″

Details:

  • I used this gorgeous DSP Sweet Girl by CTMH as my inspiration. This month’s theme is Home Decor/Congrats/Thinking of You. I decided congrats could mean baby, which gave me the chance to color this darling giraffe from Whimsy Stamps.

tic_tac_toe-challenge_Shannon_Jaramillo_003

  • I used rectangle stitched dies for my image as well as a foundation for my sentiment die. I snuck the punch in as an accent behind the focal image and even used up some positively ancient candy dots from Stampin’ Up!

tic_tac_toe-challenge_Shannon_Jaramillo_002

  • I used another rectangle die for the inside of the card and snuck in a scrap of coordinating DSP as a fun accent. The sentiment is from the same set as the giraffe from Whimsy Stamps.

I SO hope you’re as excited as I am to have this challenge back up and running, Tic-Tac-Toe boards are SO fun to play along with – the possibilities are endless!!

Please stop by the Tic-Tac-Toe Challenge blog to see what the rest of the team has whipped up for you this week!

Supplies (all Stampin’ Up! unless otherwise noted):

Card Stock: Going Gray (R), Blushing Bride;  Neenah Solar White Classic Crest 80#

DSP: Sweet Girl by Close To My Heart

Ink: Going Gray (R) & Memento Tuxedo Black

Stamps: Baby Animals by Whimsy Stamps

Alcohol Markers: W0 Warm Gray No. 0, W1 Warm Gray No. 1,  and R11 Pale Cherry Pink by Copic; RP196 Pale Pink Light by Shin-Han

Dies: Stitched Rectangle by Stampin’ Up!; Congrats by Hero Arts

Tools: Big Shot, Stampin’ Trimmer (both retired); Everyday Label Punch

Embellishments: Blushing Bride 3/8″ Stitched Satin Ribbon and Candy Dots, both retired

Other: Whisper White Envelope


Hey Lady! – Freshly Made Sketches 417

Stampin-Up-Little-Ladybug-Love-and-Friendship-Card-Idea-Shannon-Jaramillo-shannonkaypaperie

Hey there, hi there, ho there…anyone else know what song those lyrics are from? 🙂

Today’s project features a number of products from Stampin’ Up!’s new Occasions Catalog and their 2020 Sale-A-Bration Catalog.

I absolutely adore this piece of pattern paper from Stampin’ Up!’s new ‘Best Dressed’ collection. I accented the bold color in the DSP with bold color in this darling flower stamp which can be found in Stampin’ Up!’s ‘Little Ladybug’ stamp set. I truly enjoyed coloring the flower with SU’s Lovely Lipstick Stampin’ Blends and then used thin lines of Dark Blackberry Bliss to deepen the color in the center. I then stamped, colored and fussy cut an absolutely darling little ladybug to sit on top of the flower (it makes me think of the smoking caterpillar on the mushroom in ‘Alice in Wonderland’ :))

Stampin-Up-Little-Ladybug-Love-and-Friendship-Cards-Ideas-Shannon-Jaramillo-shannonkaypaperie

and little Miss Ladybug pairs perfectly with the sentiment!! Oh my gosh – SO cute!!

I added Journey Glaze to the flower center as well as to little Miss Ladybug, and of course, Wink of Stella to the flower petals.

Stampin-Up-Little-Ladybug-Love-and-Friendship-Card-Ideas-Shannon-Jaramillo-shannonkaypaperie

I love being able to use up every last scrap of DSP – don’t you? My piece of DSP was 6 x 6, so with a panel for the card measuring 4 x 5 1/4, I had a 6 x 2 piece left over which I used to cover the envelope flap. I also had a 4 x 3/4 inch strip left so with a strategic trim to one end of it, I was able to add it to the inside of my card. Waste not, want not, right?!?

And here’s a peek at the inside of the card:

Stampin-Up-Little-Ladybug-Love-and-Friendship-Card-Idea-Shannon-Jaramillo-shannonkaypaperie

This card will be going in Monday’s mail to my mom, I hope she likes it as much as I do!

The latest Freshly Made Sketches challenge was the inspiration for my layout:

I struggled with having the main panel all the way over to the far right, but that’s what challenges are for, right?!?

Thank you SO much for stopping by!

Supplies (all Stampin’ Up! unless otherwise noted):

Card Stock: Lovely Lipstick;  Neenah Solar White Classic Crest 80#

DSP: Best Dressed

Specialty Paper: None

Ink: Versamark Onyx Black & Memento Tuxedo Black

Stamps: Little Ladybug; Angel Policy by Honeybee Stamps

Alcohol Markers: Light & Dark Lovely Lipstick, Dark Blackberry Bliss, Light & Dark Old Olive, Dark Mossy Meadow, Color Lifter; CG2 & CG3 Shin-Han Twin Touch

Dies: Stitched So Sweetly, Stitched Rectangle and Envelope Die (retired)

Tools: Big Shot, Stampin’ Trimmer (both retired)

Embellishments: Happiness Blooms Enamel Dots, Gold Metallic Thread, Journey Glaze by FSJ; Wink of Stella 

Other: Whisper White Envelope

Daisies & Dragons

Daisies and dragons, sigh. What could be better? Pairing them up with a fanciful color combination, that’s what! I came across this darling paper while going through some old supplies and fell in love. Then my mind connected it to the Magical Dragons stamp set by MFT Stamps that I had recently purchased and a card idea was born!

As you can see, I used dies to create just about everything so no measuring involved! I began with a base of Mama Elephant’s Femme Frames and added some stitched die cut pattern paper shapes.

I stamped the dragon (I named her Isabella) in Versafine Onyx Black and colored her with a combination of Copic, Shin-Han, and Stampin’ Blends alcohol markers. I also stamped some darling daises  from Whimsy Stamps (those are fussy cut, no dies) and arranged everything onto a popped up stitched scalloped circle. Another die, this one by Hero Arts, and coordinating sentiment complete this whimsical card.

The daisies have had a subtle sparkle added to them with Wink of Stella around the petal bases and did you notice the tiny sparkles? If you zoom in on the blue pattern paper you can see the tiny sparkles all over it – swoon!

I had SO much fun creating this card – thank you for stopping by to take a peek!

2020-01-06 MFT Stamps-Daises-and-Dragons-Thank-You-Card-Idea-Shannon-Jaramillo-shannonkaypaperie.com

Supplies (all Stampin’ Up! unless otherwise noted):

Card Stock: Stamper’s Select White & Ocean Tides by Papertrey Ink

DSP: 12 x 12 For Peep’s Sake – Drapin’ Daisies by Imaginisce (from 2008!)

Specialty Paper: none

Ink: Versafine Onyx Black

Stamps: Magical Dragons by MFT Stamps; A Girl’s Best Friend by Whimsy Stamps and Thanks Stamp & Cut by Hero Arts

Dies: Magical Dragons and Stitched Mini Scalloped Circles by MFT Stamps; Femme Frames by Mama Elephant; Thanks Stamp & Cut by Hero Arts and Stitched Rectangle Dies by Stampin’ Up!

Tools: Big Shot; Copic , Shin-Han and Stampin’ Blends alcohol markers

Embellishments: Wink of Stella

Other: Whisper White Envelope

Adventures in Organizing – Creating Stamp Indexes

Hello there my friends! During this past year I took a detour to reorganize the way I store my Stampin’ Up! dies and ended up reorganizing my whole storage system. Nuts, right?!? That’s just who I am. I could decide to clean up the placemat drawer in my kitchen and end up with all the cupboards opens and stuff flying everywhere! Still, I didn’t expect it to take me as long as it has and I’m still not quite there yet. It occurred to me to share the process with you but, being a linear person at heart, the thought of starting at the beginning with my story had me quaking in my flip flops!

Fast forward to today as I was thinking about creating a post but did not have a new card to share, and it hit me.

I realized that because I don’t know where to start with sharing my organization process that I’m NOT starting at all!

I want to start so I thought I would take some photos as I worked and start sharing, beginning with today’s work, even though it’s not at the beginning. And so my idea for an organizing series was born!

So…today’s post doesn’t have a pretty card for you so if that’s what you need today, keep moving! lol!

For those who are still reading, I will warn you that this post is picture heavy. With that, grab your coffee or Diet Coke (!) and get comfy!!

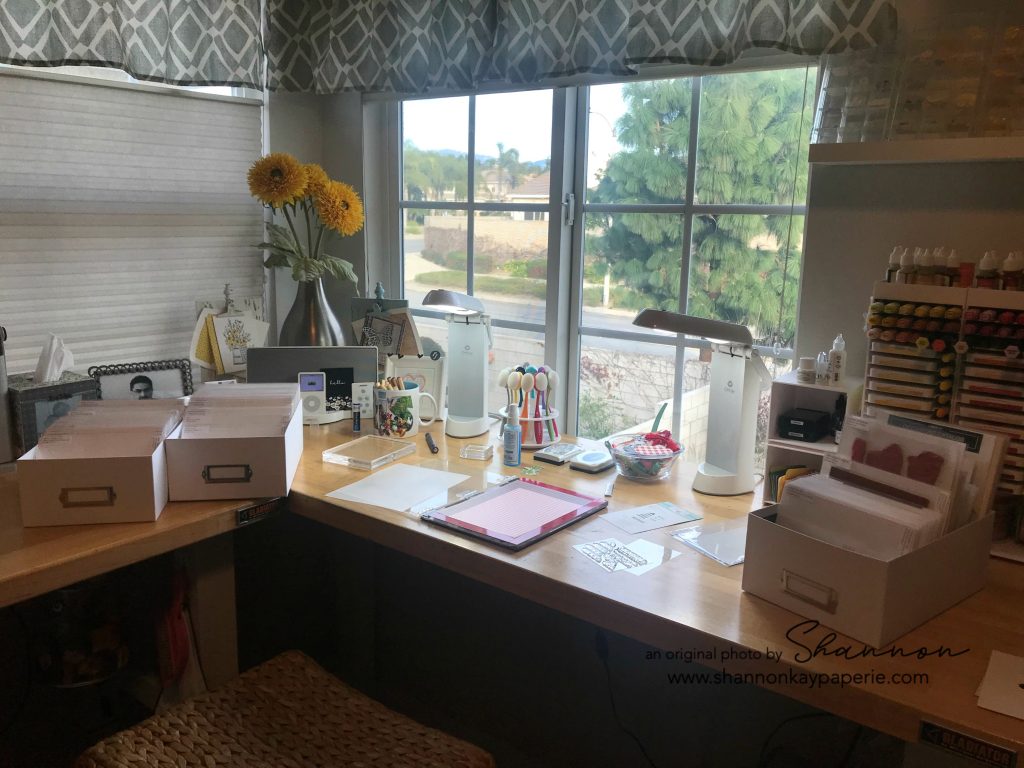
I recently received some stamps that needed to be filed away. I like consistency and must have every stamp I own stored in the same packaging. Depending on the stamp manufacturer this process can be quite simple or…it can feel like I may never finish! The group I worked with today is fairly labor intensive. Papertrey Ink has a line of budget friendly stamp sets (which I love), but because they are budget friendly, they do not come with the stamp index (in more expensive PTI stamp sets, they come with a sticker that you have to adhere to the clear acetate yourself) and I am NOT a fan of dumping a clear stamp set into an Avery Elle storage sleeve – the images are hard to see and I know I won’t even bother. So I take the time to stamp a stamp index.

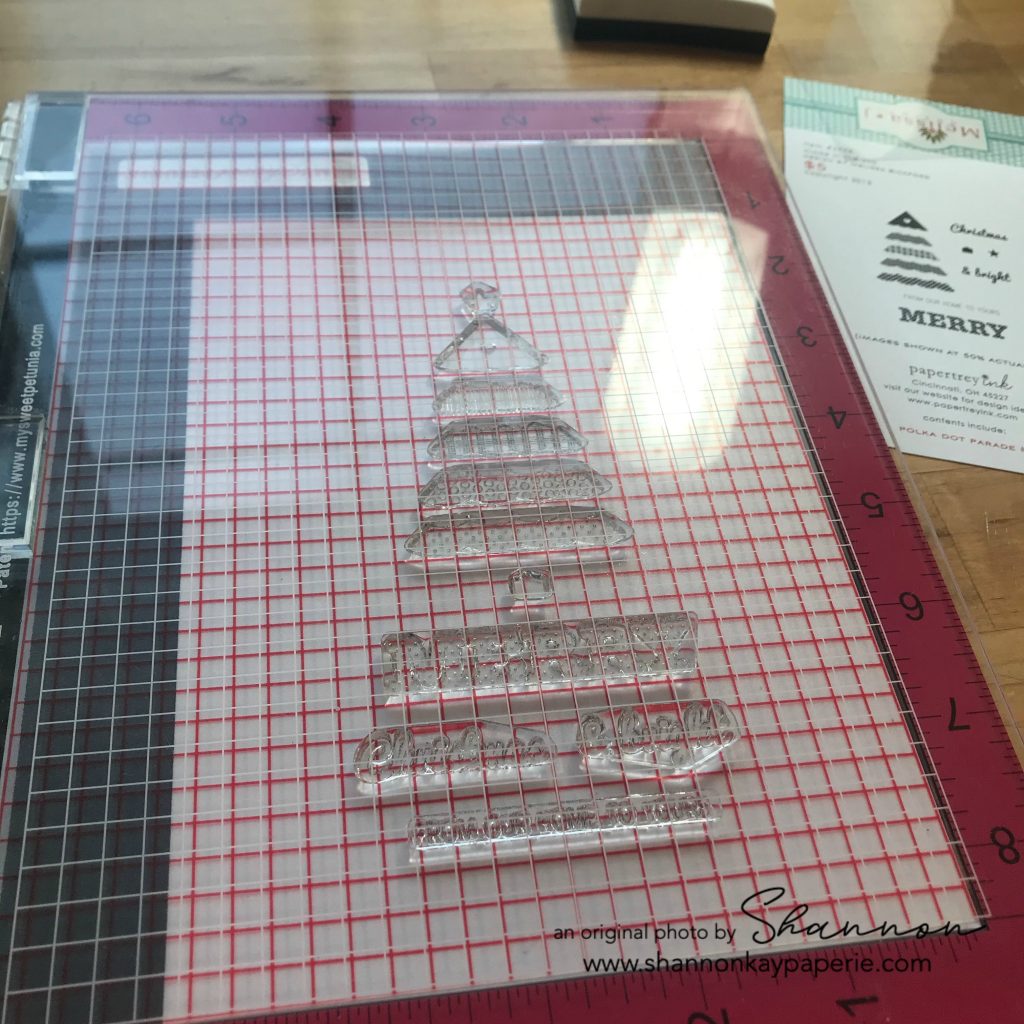
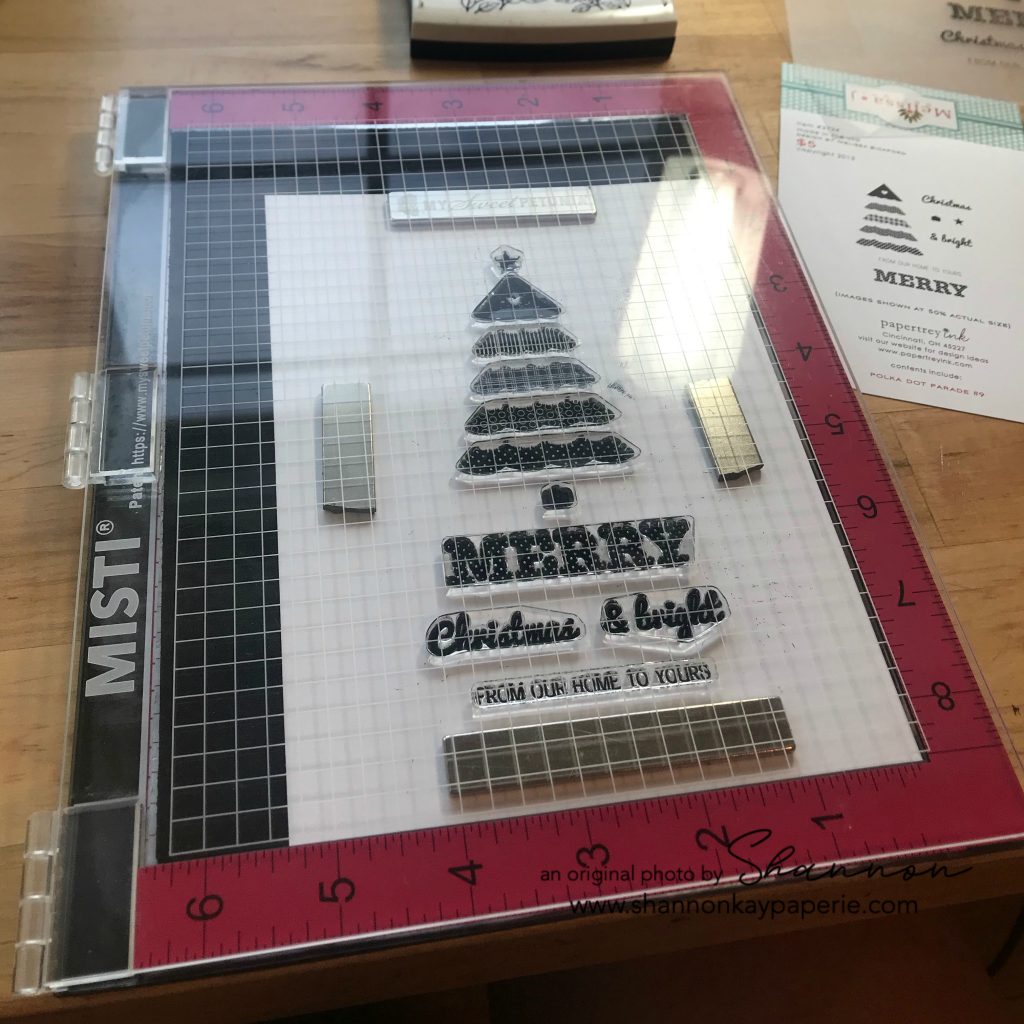
I start with Neenah Solor White Classic Crest cardstock and trim it to fit in the AE sleeve (5 3/8″ x 7 3/8″). I insert the card index into my MISTI and then lay a see thru grid template over the top (see it here). Now I am ready to lay the stamp set out in preparation for stamping. Photopolymer stamps can be sticky little buggers so I keep my craft knife handy and use it to guide a stamp into place, or to poke the stamp (gently of course) to keep it in place while I remove my fingers. That’s what I’ve done here:

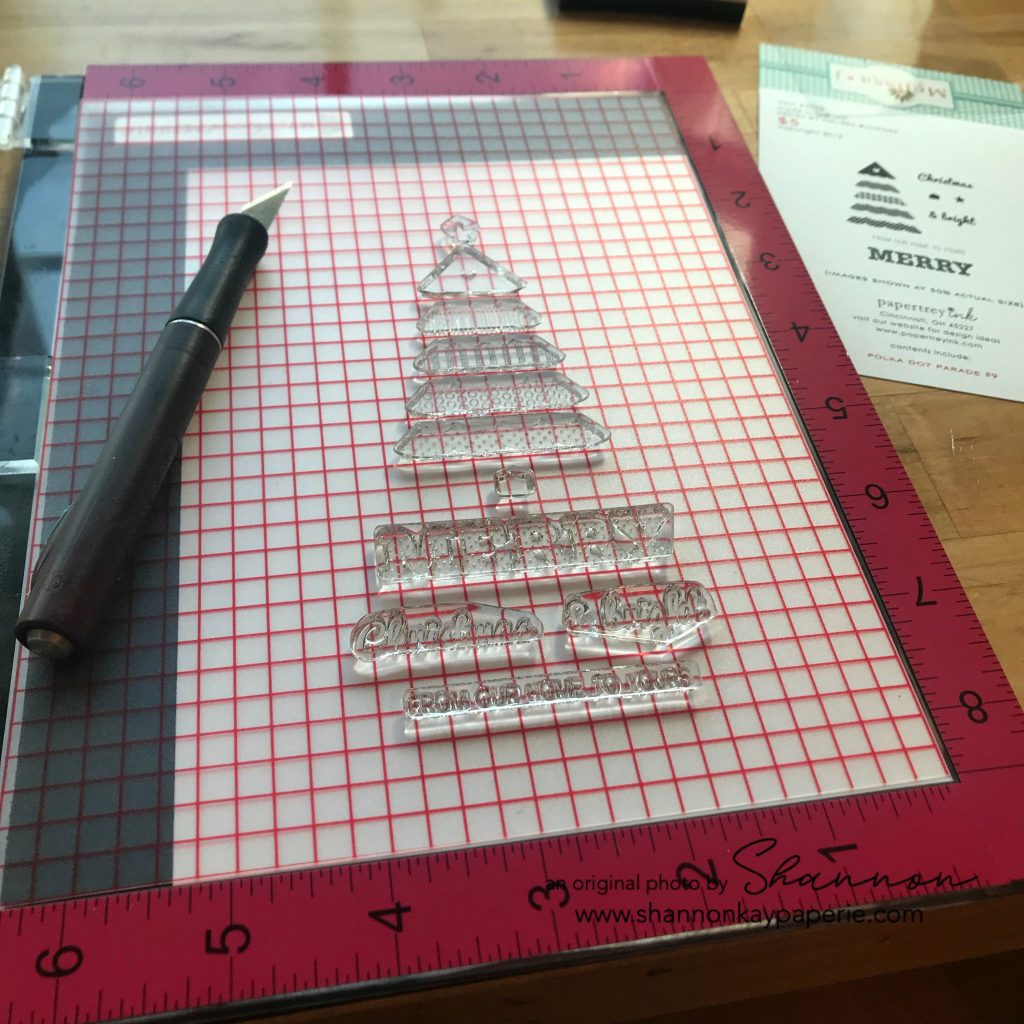
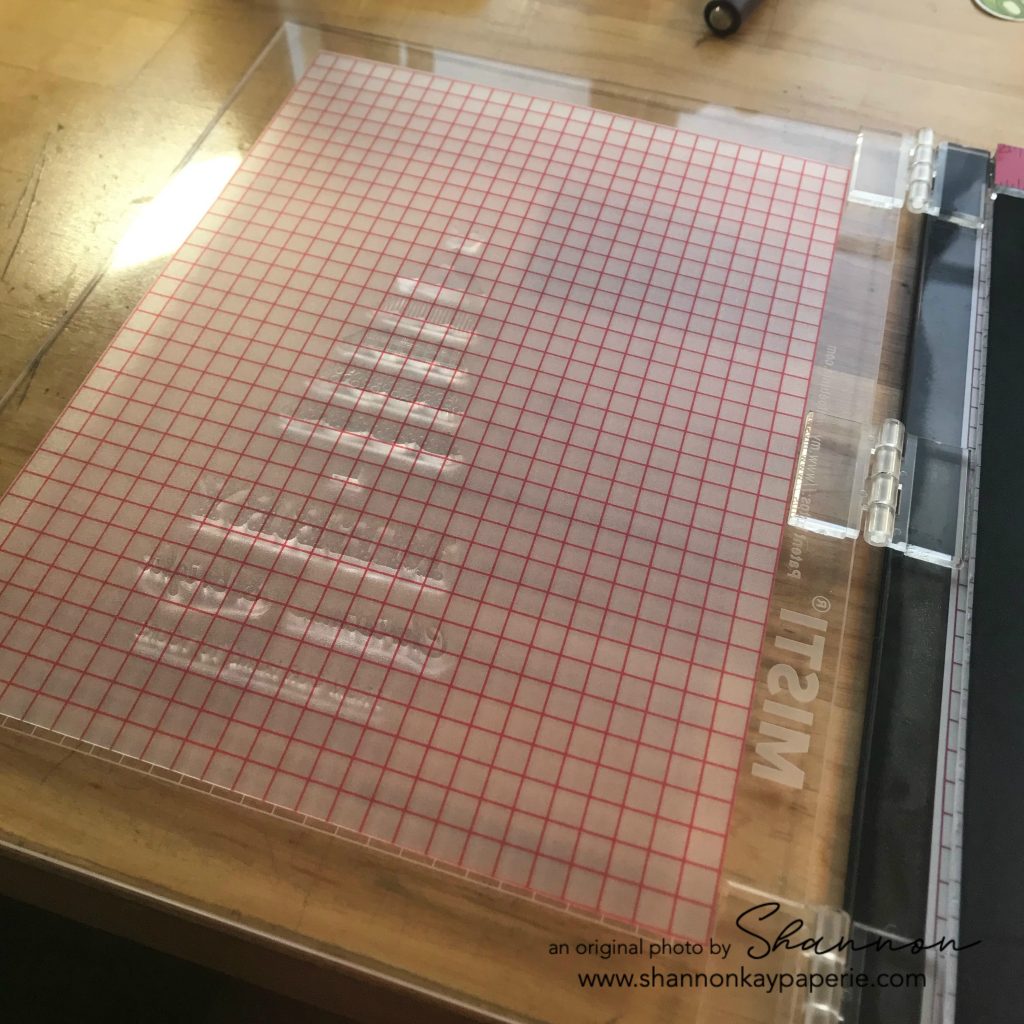
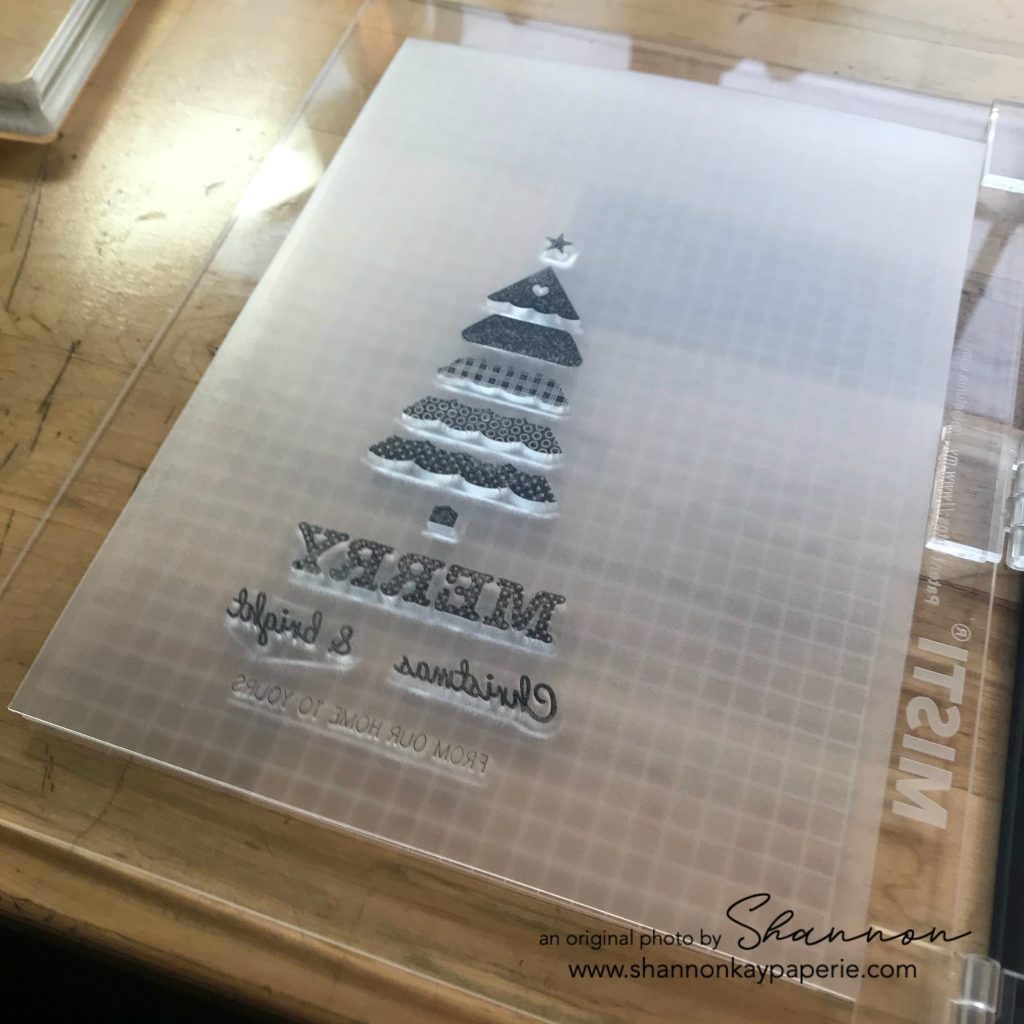
Once everything is the way I want it, I put the MISTI’s lid down on top of the stamps and gently press to adhere the stamps to the lid. My MISTI may face a different direction than you are used to seeing, but I am left handed and left to right is what works for me – it’s like closing a book 🙂

I’ve mentioned that photopolymer stamps are sticky so I don’t worry about my grid, I just open the lid and then gently peel the grid off of the stamps:

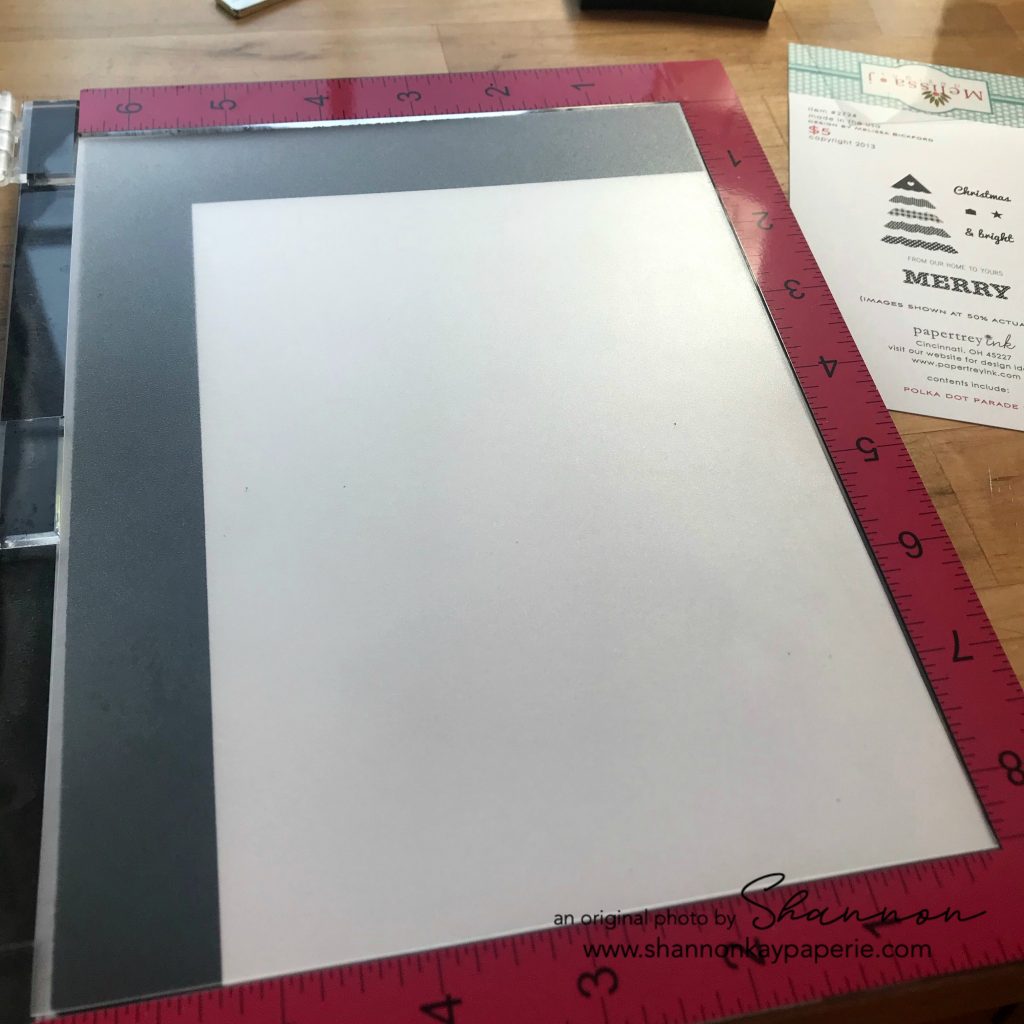
Next I lay a clear template (trimmed to fit) over my soon-to-be stamp index. I want to test out the layout I’ve created to make sure it’s what I want:

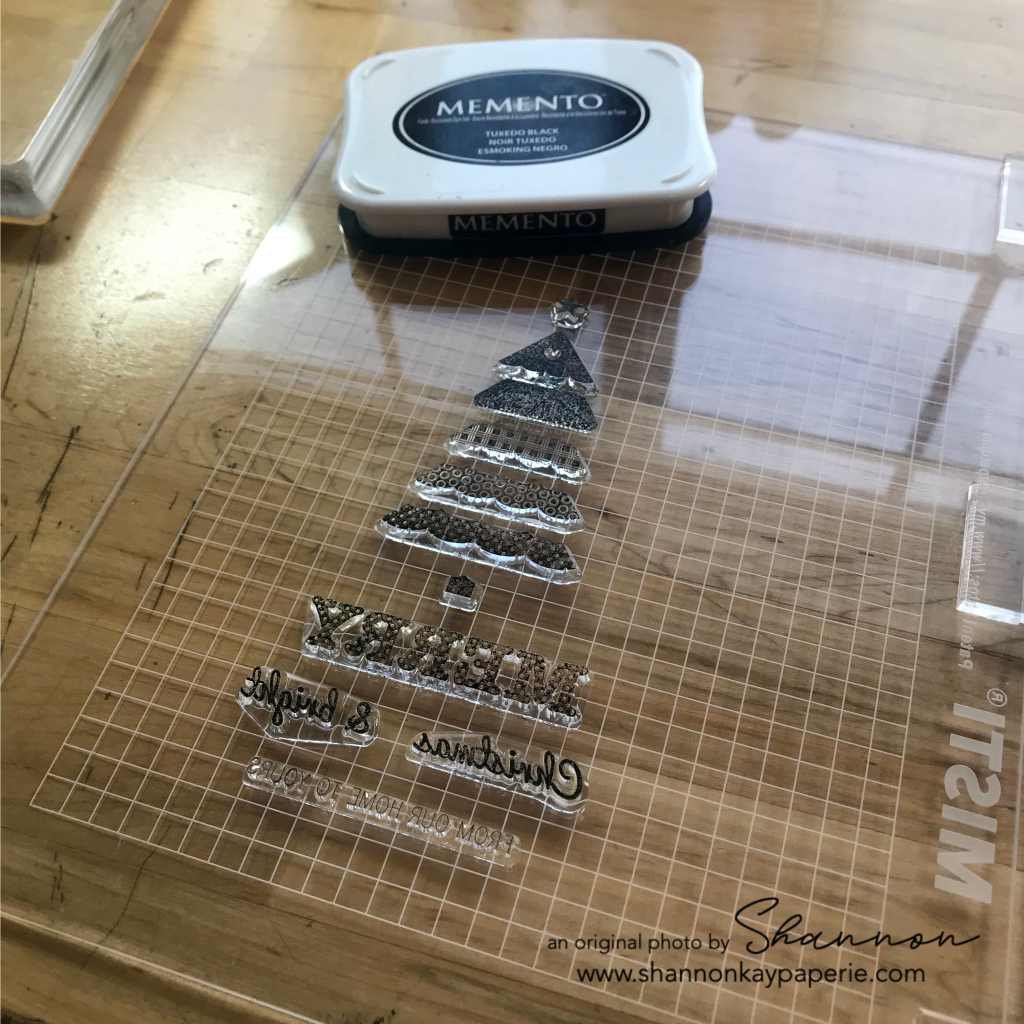
Using Memento Tuxedo Black ink, I cover the stamps with ink. It doesn’t need to be perfect, just stamped enough that I can make any adjustments I want to my layout:

Again, I close the lid and gently press:

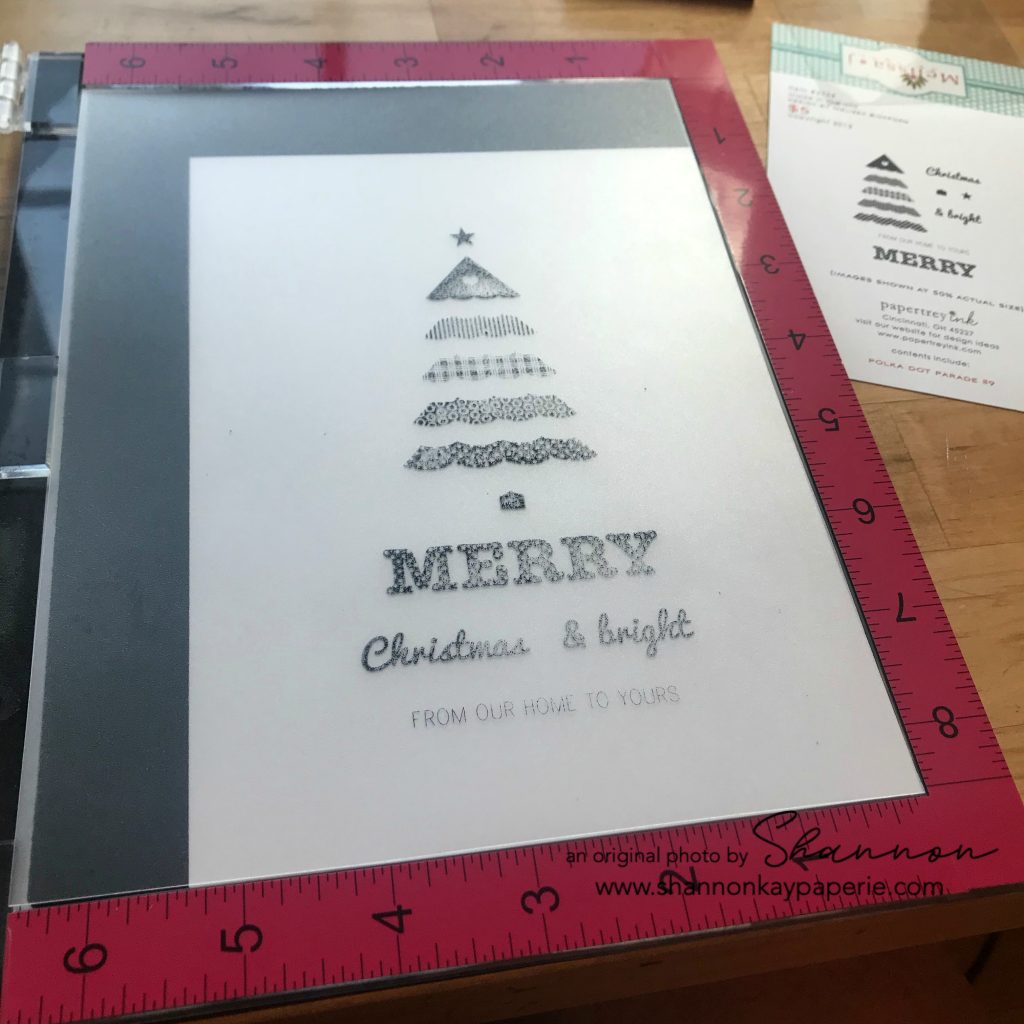
And again, I don’t worry about the template sticking to the stamps, I just lift the lid and then gently pull the template off:

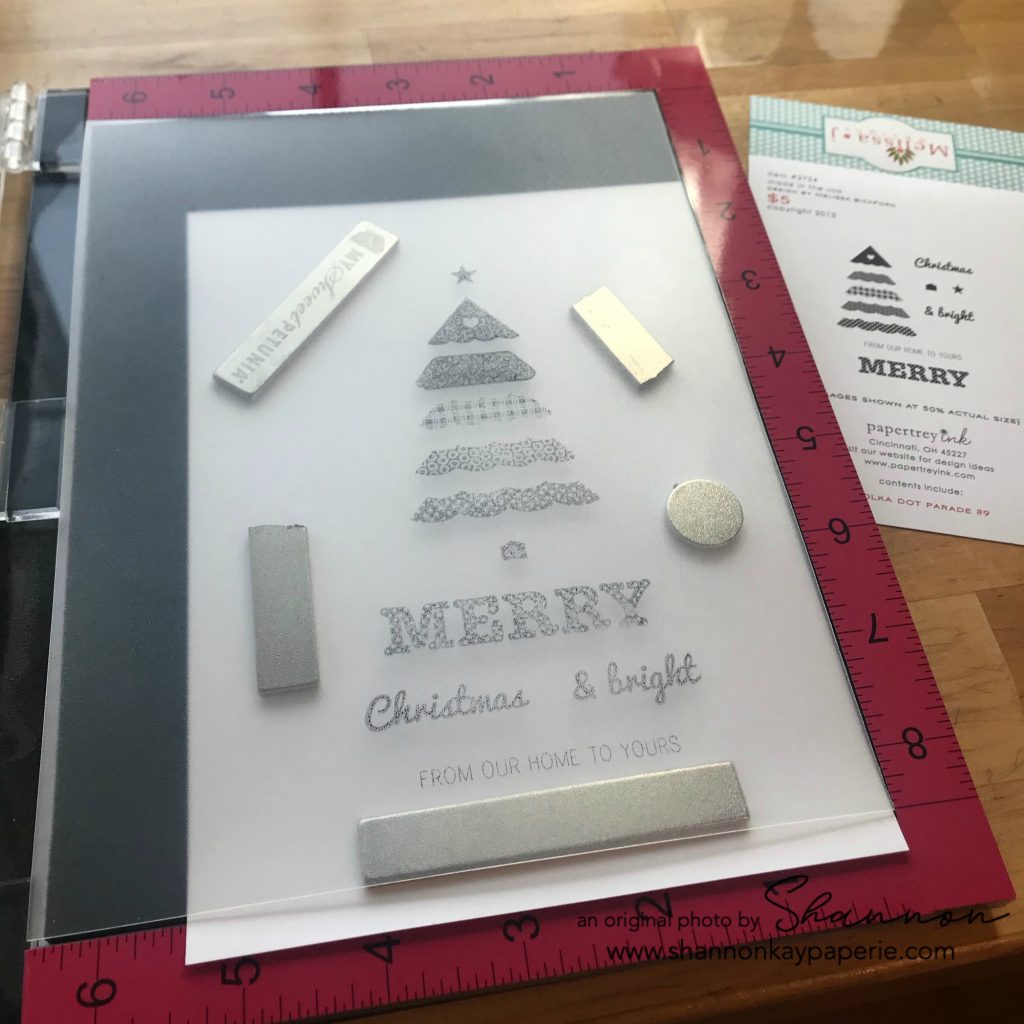
Now I have a guide so I can see exactly how things are going to look on my finished project. For demonstration only, I have shifted the card stock in the image below to show one change I might make. Once I am satisfied, I slip magnets under the template so the card stock doesn’t shift during stamping. Disclaimer about the magnets – BE CAREFUL!! Please keep them away from each other, they are very strong magnets but very fragile too, as demonstrated by the remains of a whole magnet used here (!). Also, those broken edges are SHARP so I don’t recommend using the broken pieces. I do because, well, just because. I probably shouldn’t so, kids, don’t try this at home 🙂

I might also peel a stamp up and shift it slightly to straighten it out (using the grid template helps with that issue). I’m happy with the way everything looks so now I can stamp!

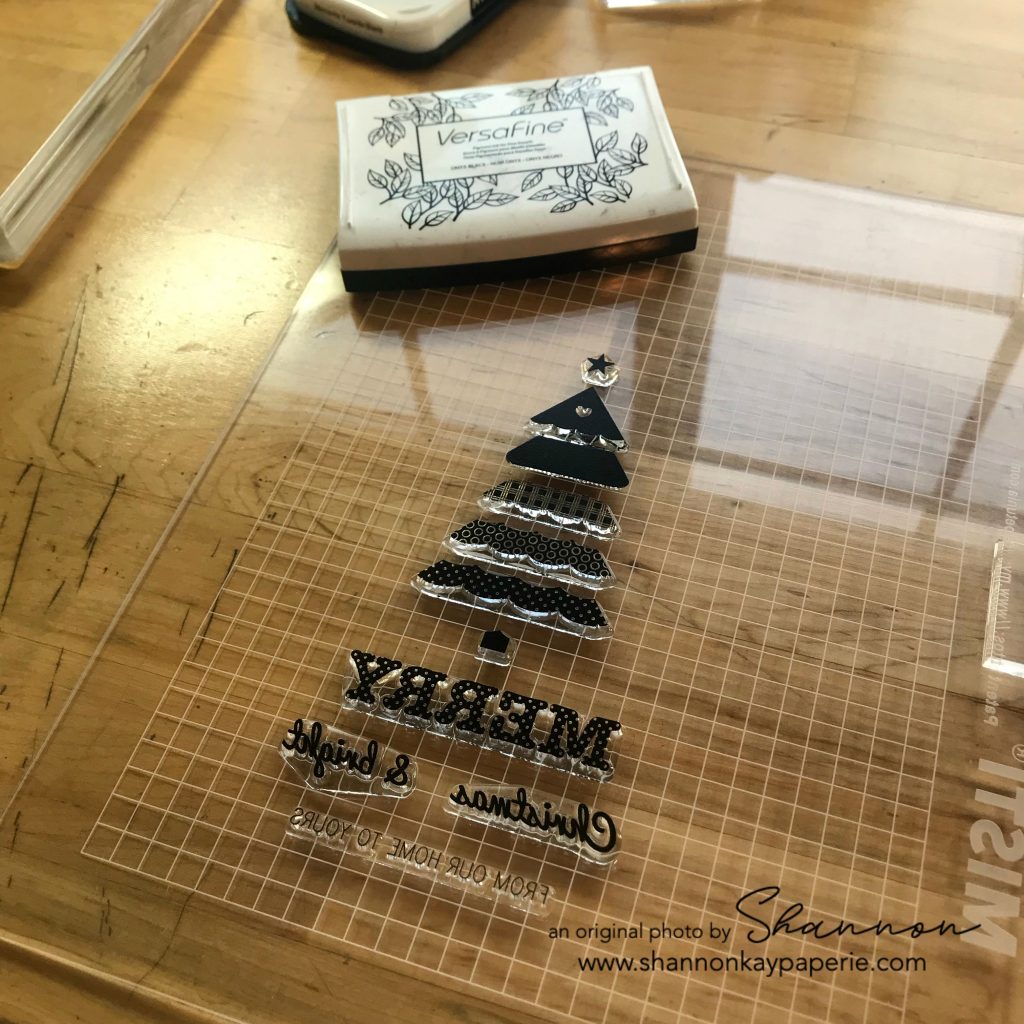
I use Versafine Onyx Black ink for everything but images that will be colored with alcohol markers. As you can see from the photo, the color of the black is very intense and make a gorgeous impression:

I close the lid and press gently…but wait!! I have found that pressing down with my fingers can lead to using excess force and make fine images and sentiments look squished (for lack of a more professional term) and I HATE to start over so I accidentally came across a solution that has worked very well for me.

I discovered that covering the lid of the stamping tool with a large clear block and then pressing down on the block rather than the lid creates a much cleaner impression:

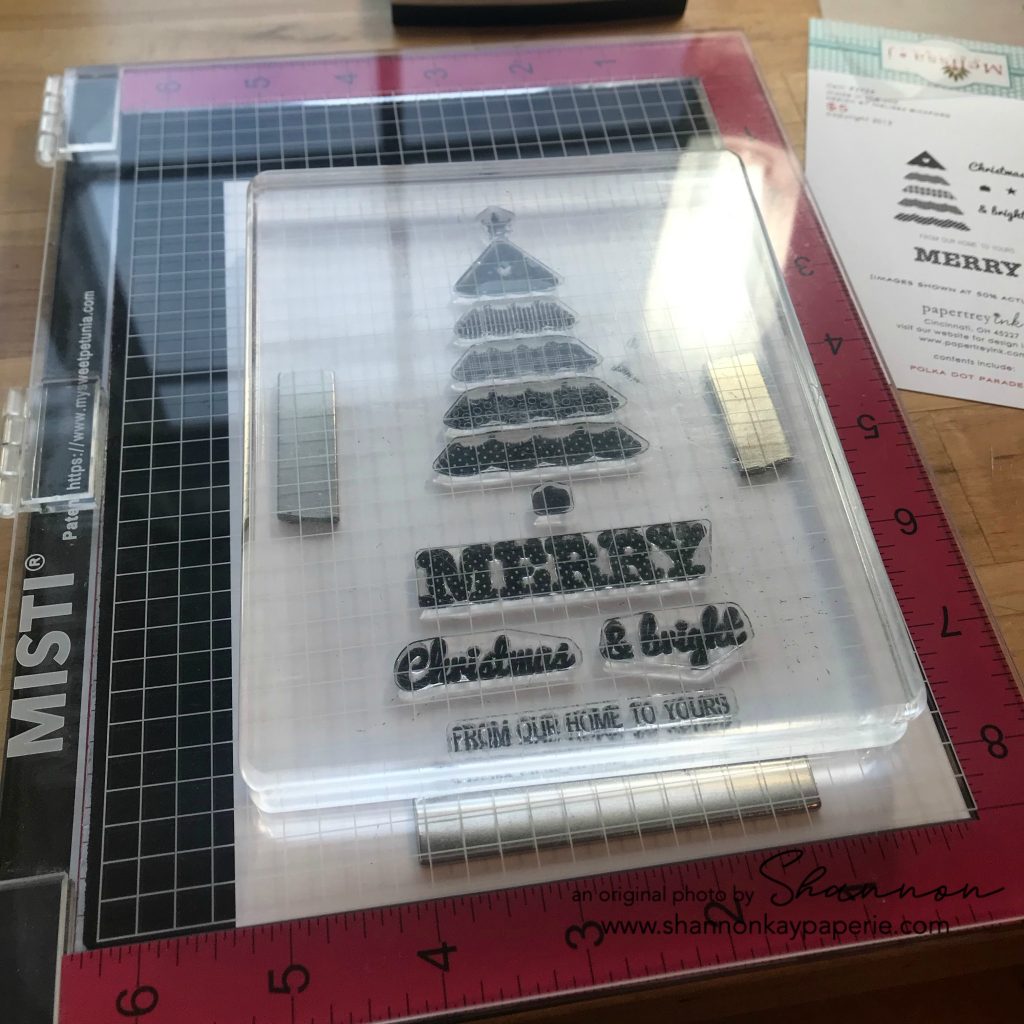
And voila! I love it – it’s looks so pretty!! Note: I DO lift the lid of the MISTI very carefully. I lift it just a smidge and put a finger down on the card stock to help keep it from shifting, just in case I need/want to stamp a second time. 

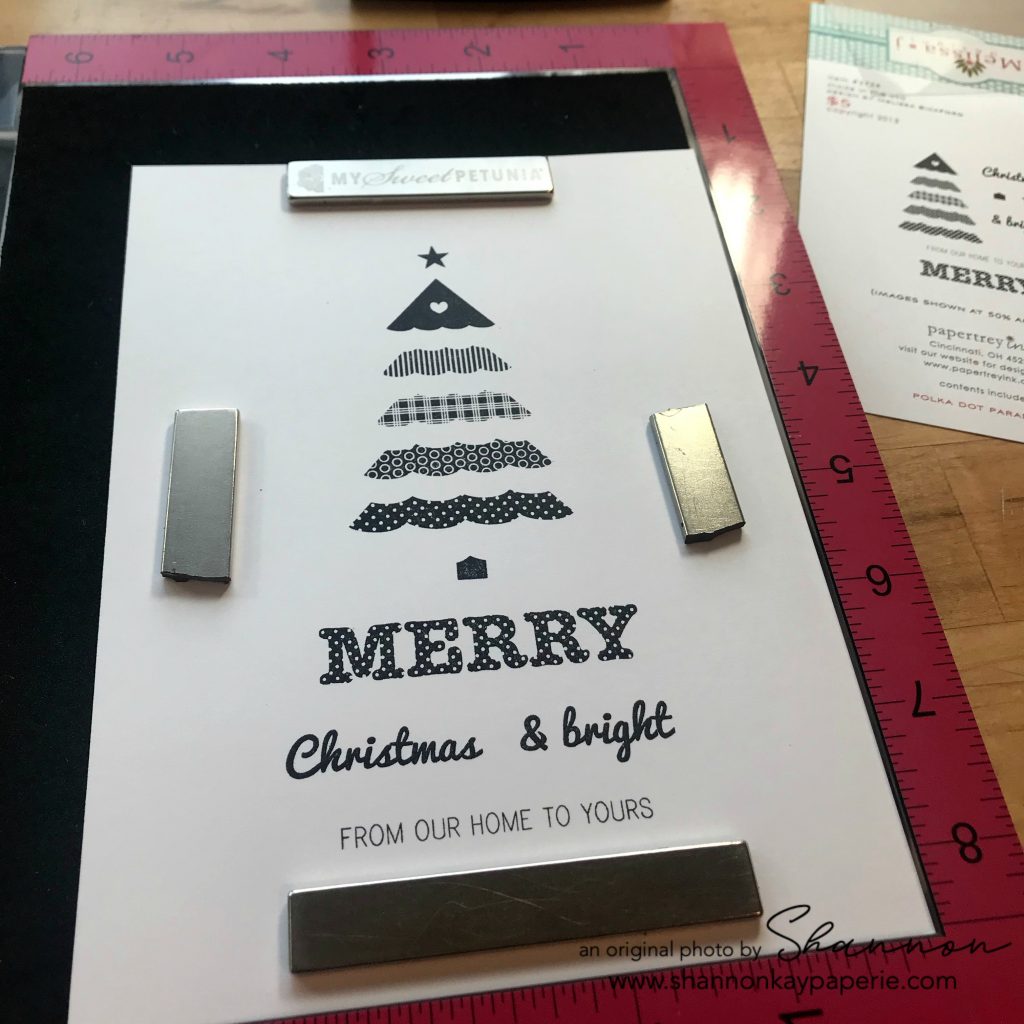
The next step needs to be done QUICKLY if you are like me and HATE stained photopolymer stamps. So let’s see what the next step is!! CLEAN YOUR STAMPS!! Don’t wait!! I have found that the combination of Hero Arts Ultra Clean stamp cleaner and a microfiber cloth, if used right after stamping, will remove ALL of the ink. Pinky swear. Even shades of red, but you have to be Speedy Gonzales with the red.

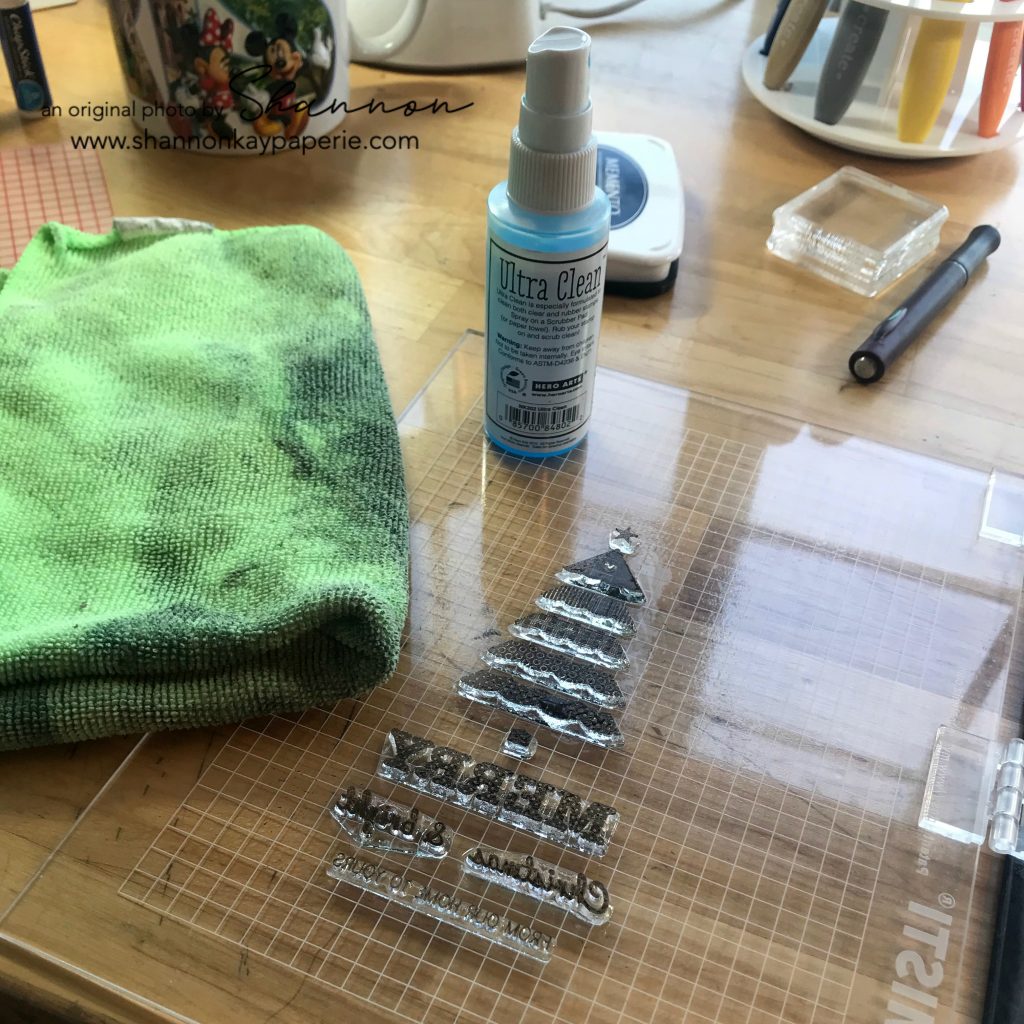
See?!? I promise, it works!! And I’m not even charging for this fabulous tip!! LOL!!

Squirrel moment: I use Memento Tuxedo Black when stamping on my clear template because it can sit on the template for an extended period of time and I will still be able to wipe the template clean with just a baby wipe. If I use Versafine Onyx Black on the template, I have to clean it off right away to keep it from staining and that defeats the purpose of using the template in the first place. 

Once my stamps were clean I went back to my stamp index and noted that the tree trunk needed more ink. I removed all of the stamps below the one I needed to stamp again so that I couldn’t possibly get ink on another stamp by mistake and mess everything up.

And here you have it! A beautiful stamp index so I can see what’s inside the sleeve without having to dig. I store both the stamp set and the coordinating die together behind the stamp index with the die facing outward so that 1. I can see it easily and 2. so that the die can’t damage the stamp set. You might not see a die on the magnet card below and you would be correct. This die was on back order when I purchased the stamp set so I’m waiting for the in-stock notification so I can purchase it. Once it come in I can easily pull the sleeve out and add it.

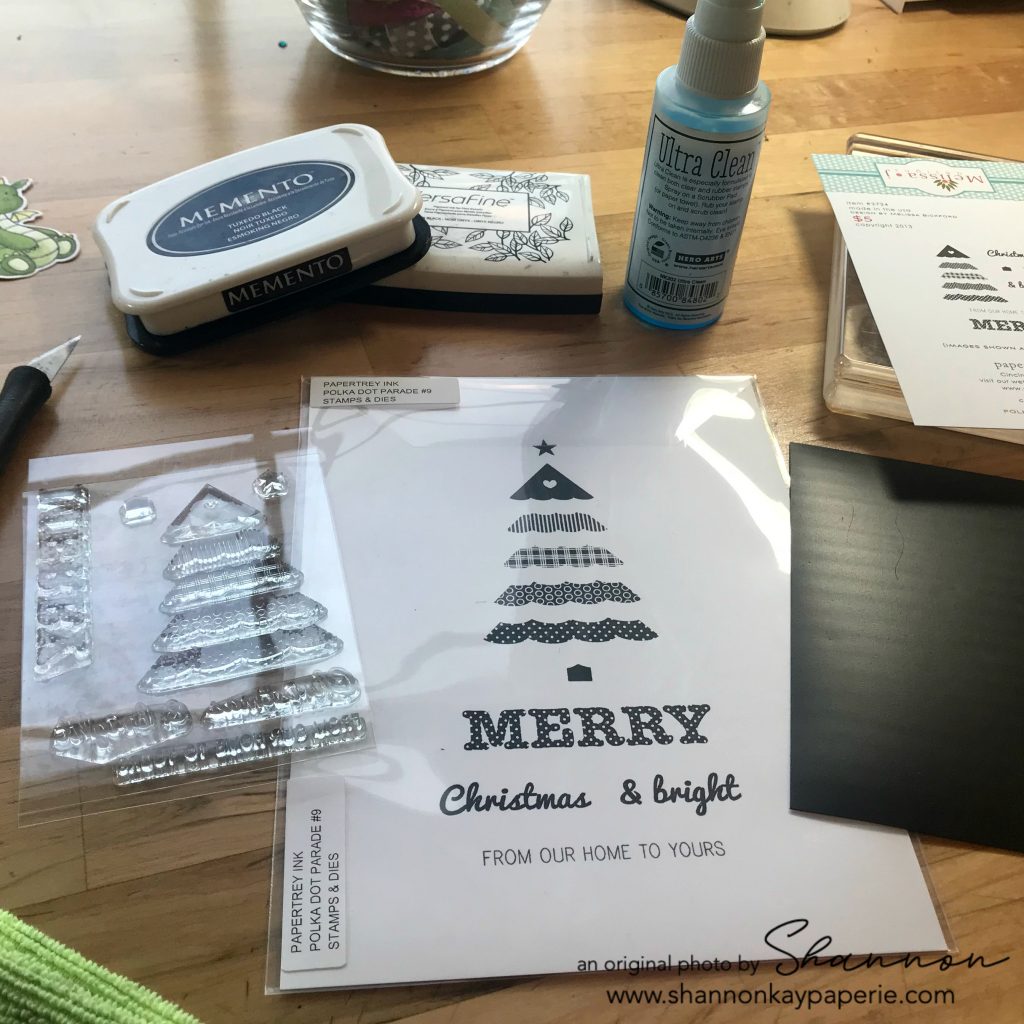
This many sets finished:

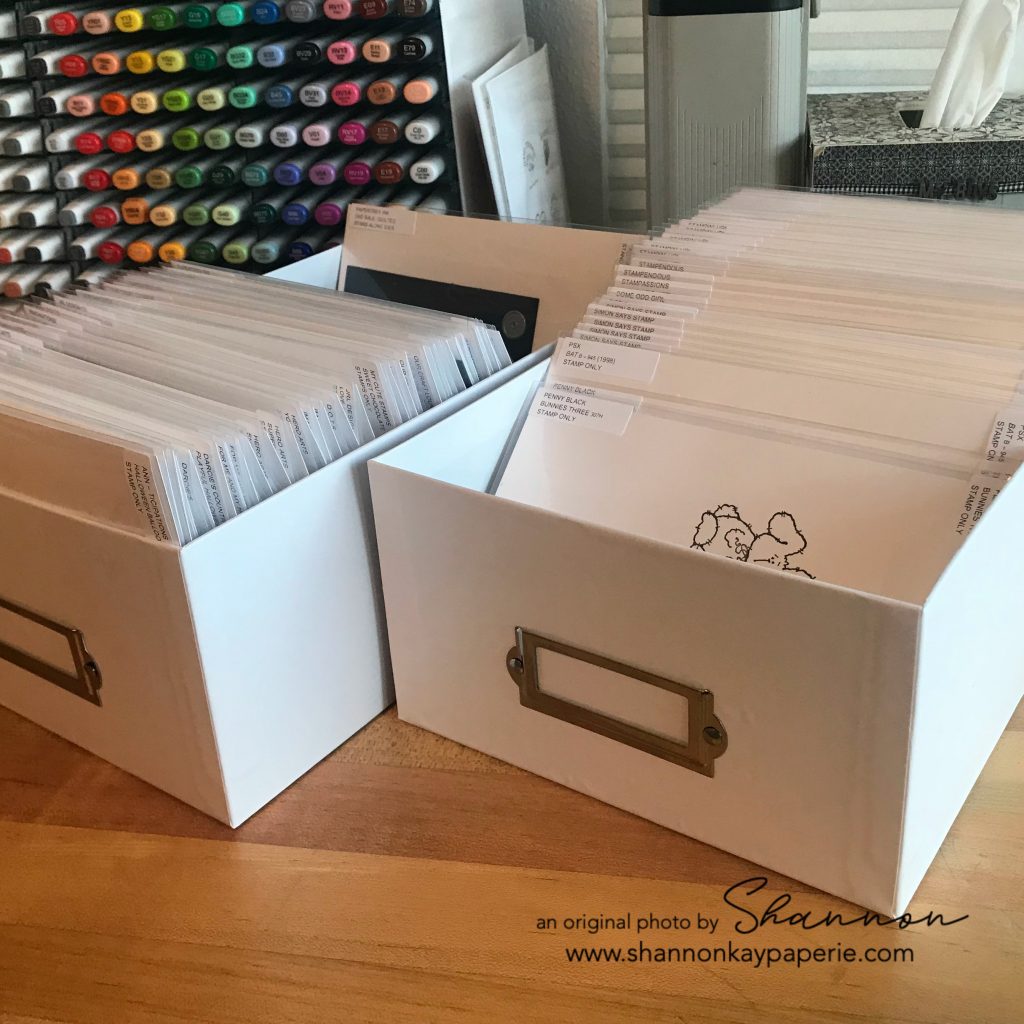
And this many sets to go! Whew! I can do it!!

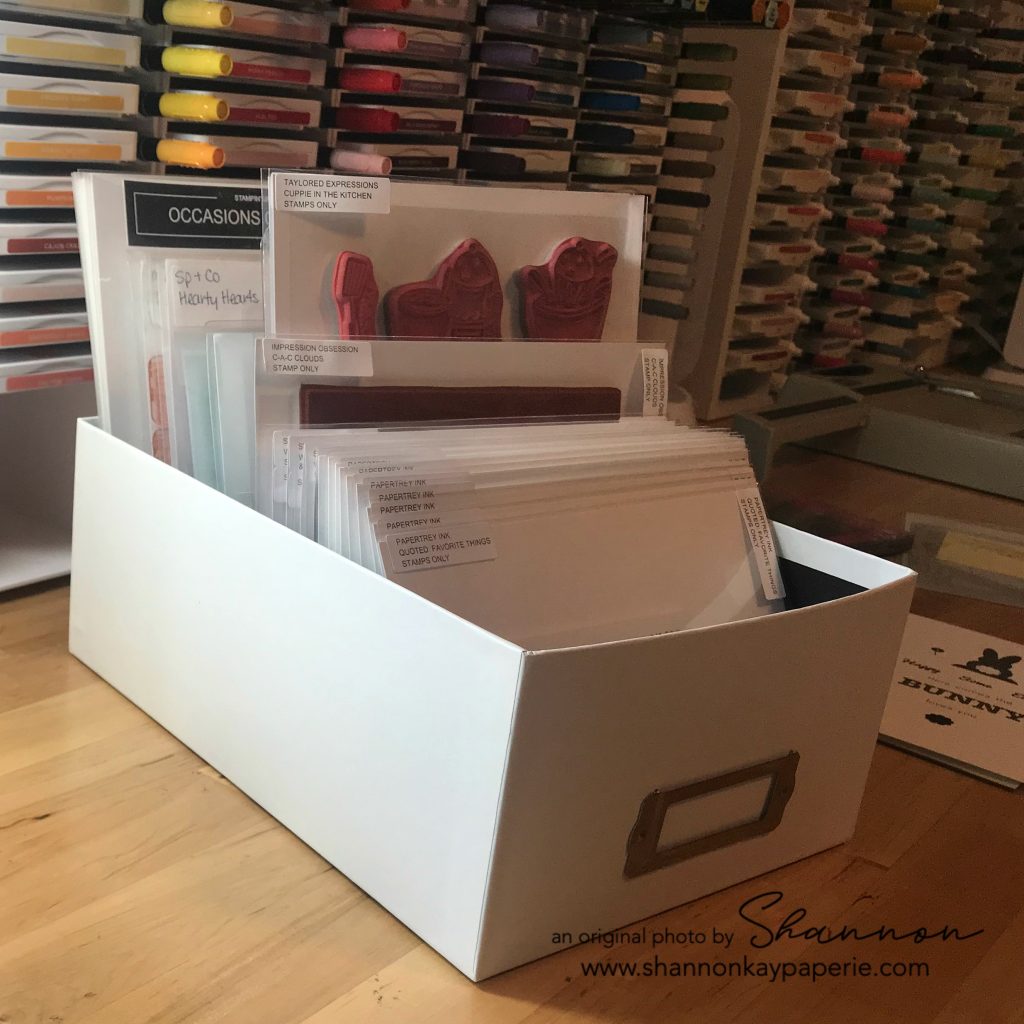
If you are still with me, THANK YOU!! I hope you found something here that sparks something in you that will help you with your own organizing!

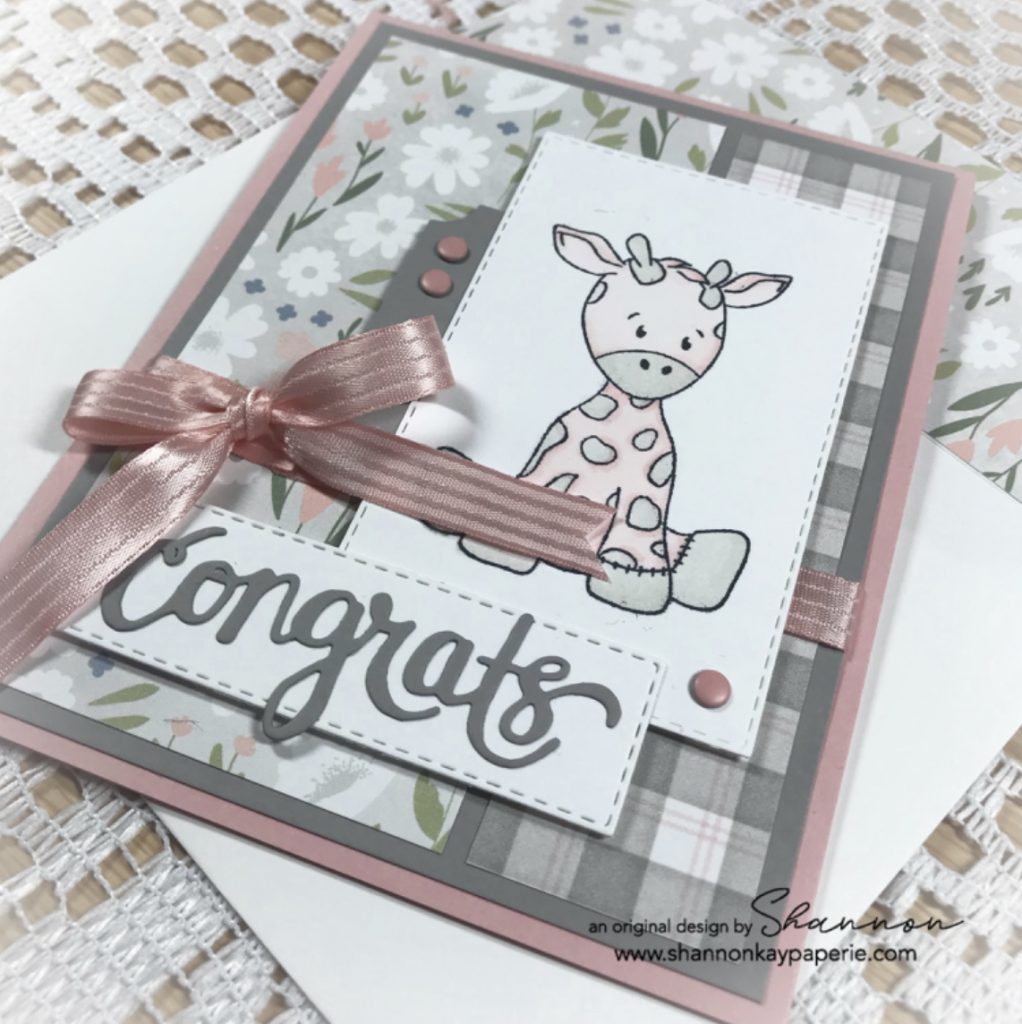
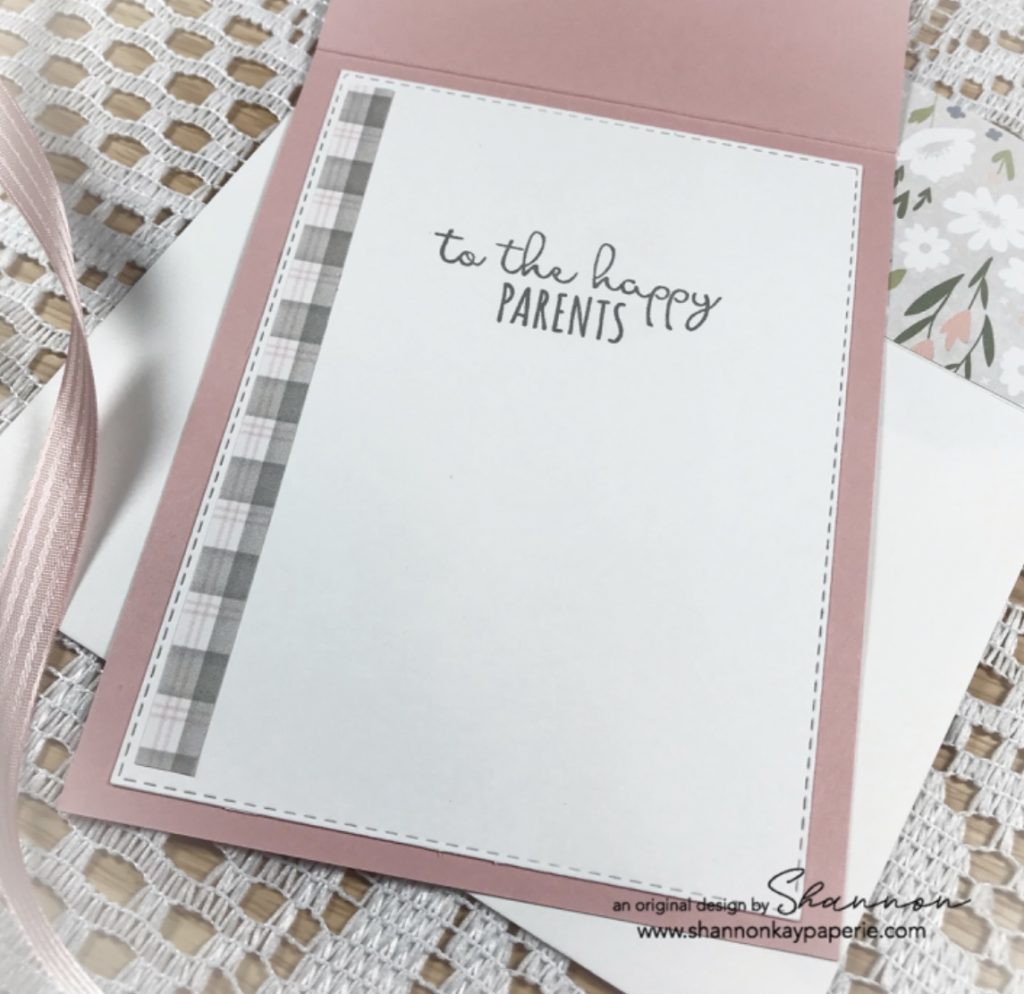
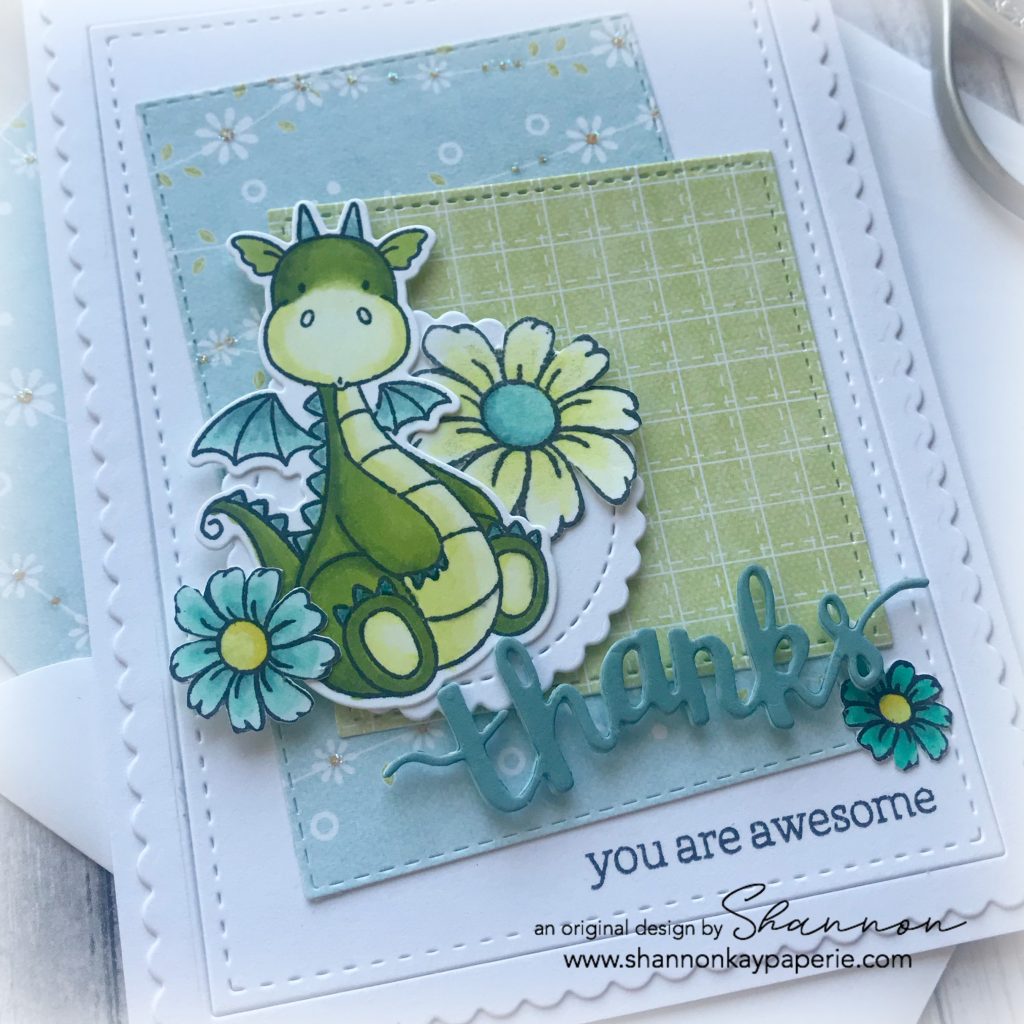
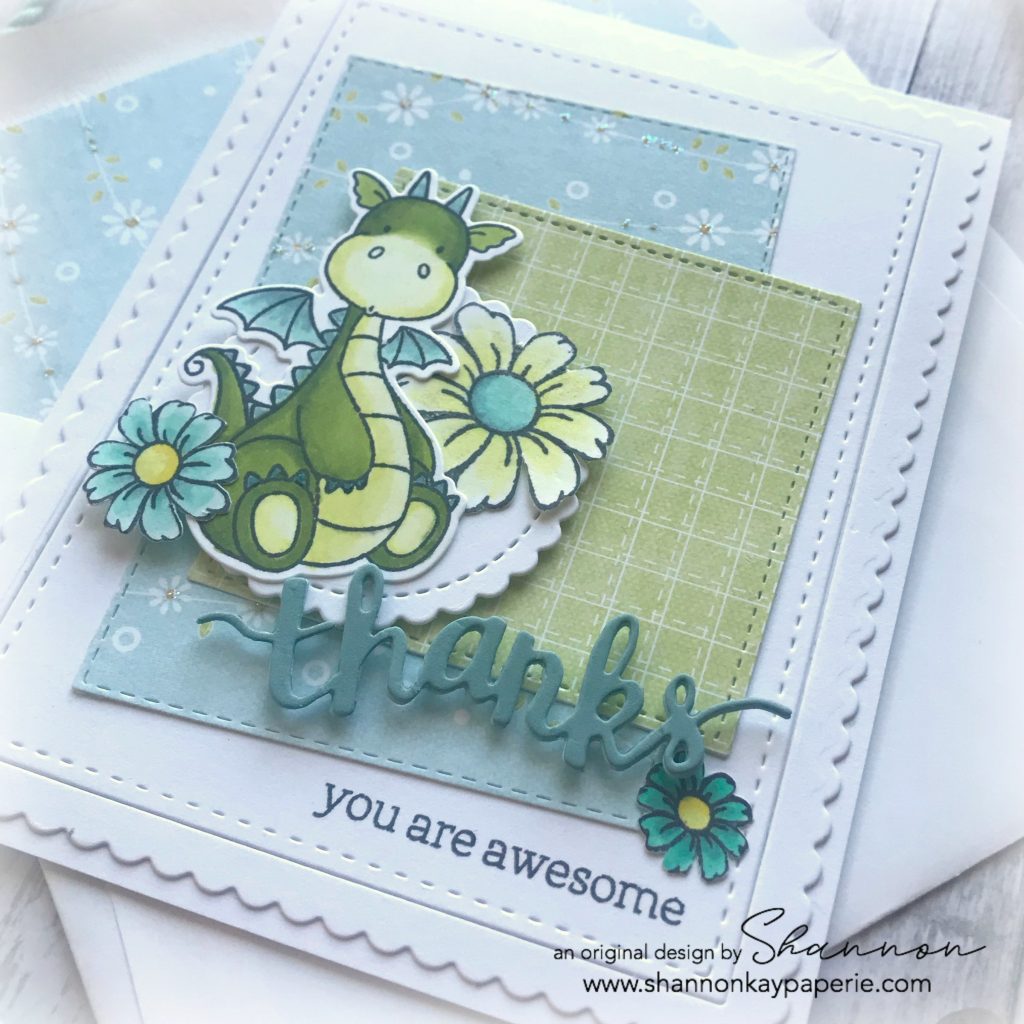
For sticking with me through this LONGGGG post, here’s a sneak peek at the subject of an upcoming post:

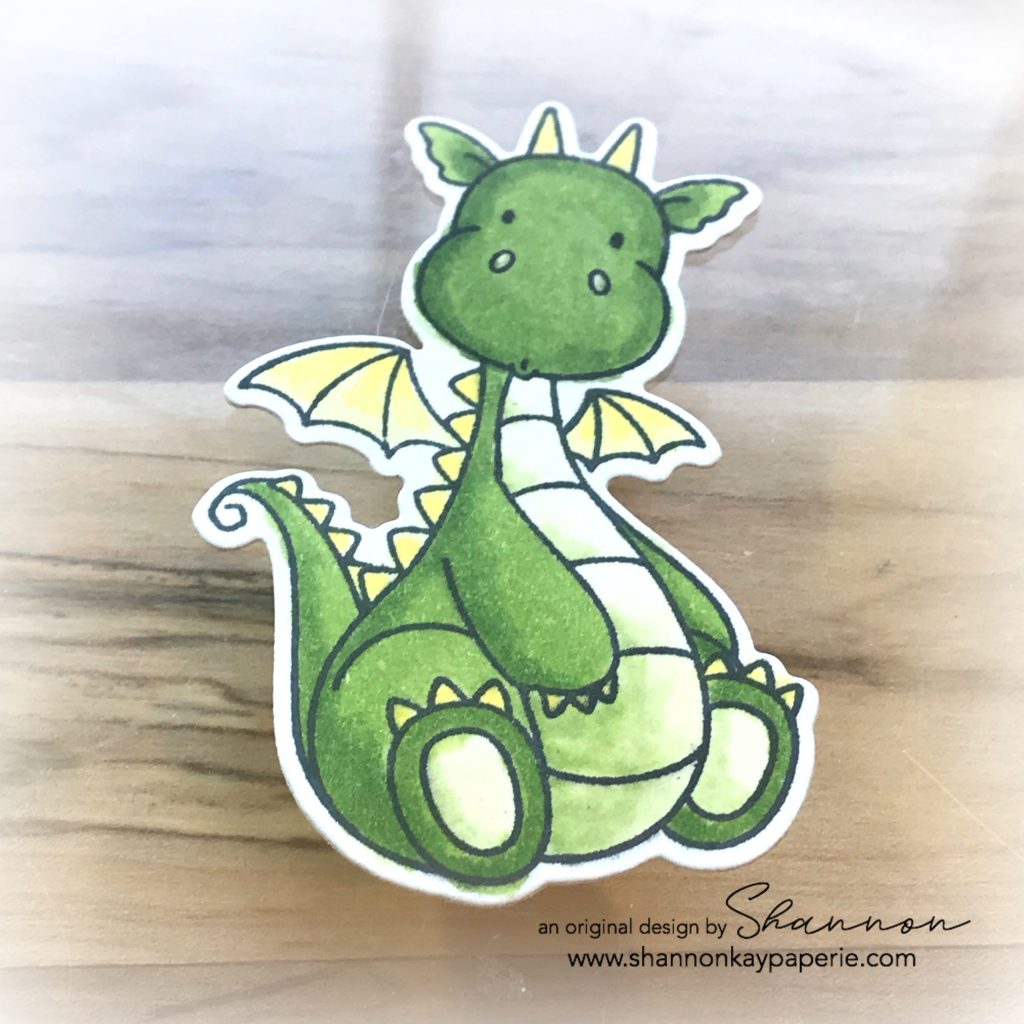
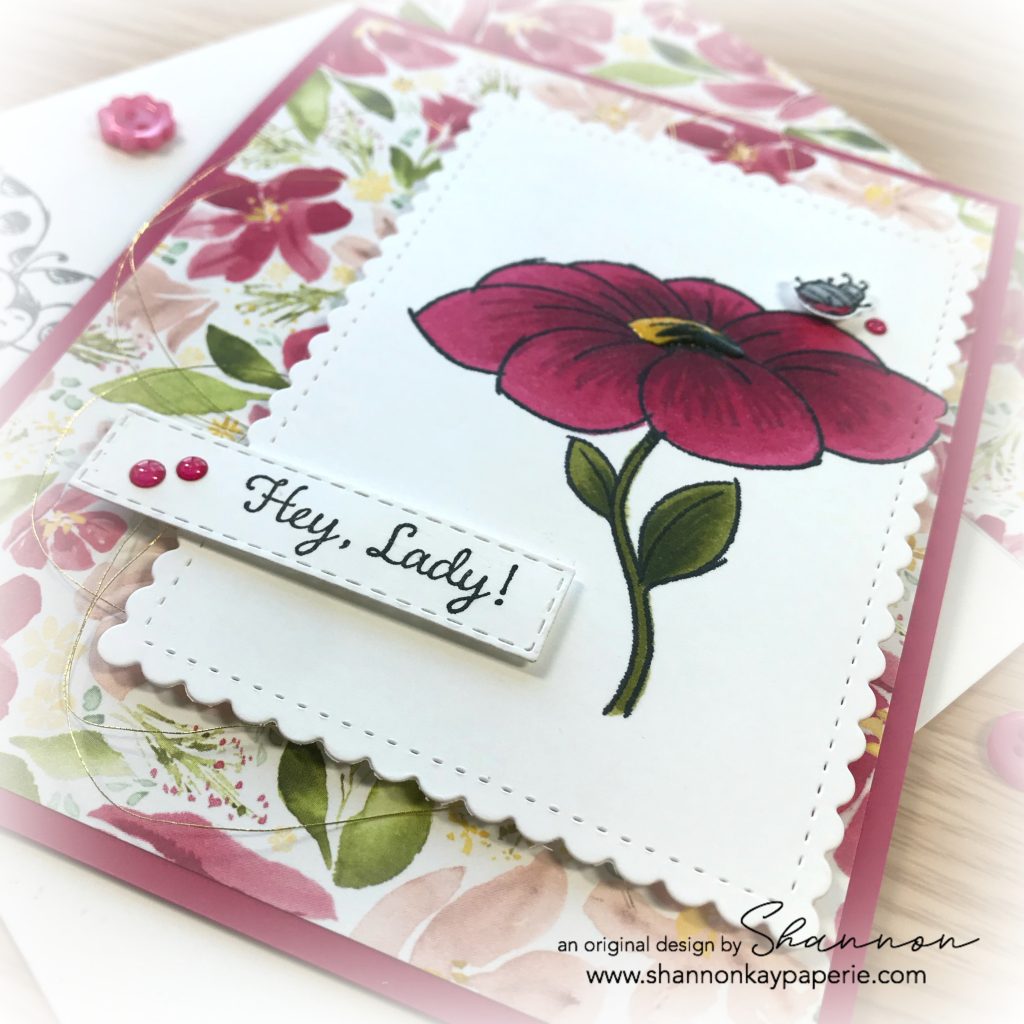
Oh My Stars, this little guy is too cute. T.O.O. C.U.T.E. He’s actually a spare, I used a different color combination on the final card but I saved him because I think needs to have a permanent home on a different card. To be determined, lol.

Again, thank you for visiting me. I would love to have your thoughts/comments on this post!!

See You Soon!

A Clean & Simple Birthday – Freshly Made Sketches 416


Birthday-Card-Idea-Felicity-Jane-Hip-Hip-Hooray-Shannon-Jaramillo-shannonkaypaperieHello and Happy New Year! It has been awhile since I have posted so I’m feeling a bit terrified to put myself out into the digital world again! 2019 has been a busy year and I am looking forward to (hopefully) spending more time creating and sharing in 2020! I always follow my friends over at Freshly Made Sketches and decided that if I could, I would jump in with the last sketch of 2019, and I’m so happy to spend my New Year’s Eve doing just that!

Isn’t it pretty?!? Clean and simple with lots of room for interpretation.

Details:

  • This sketch seemed like a great way to show off DSP so that’s where I started. I stood in my craft space facing my drawers of pattern paper collections and randomly pulled a drawer out – it turned out to be a monthly kit from Felicity Jane called “Jenny”. Every time I see their papers, I sigh with delight – GORGEOUS!

  • Did I lie?? G.O.R.G.E.O.U.S. I pulled one sheet out and used my old stand by, Femme Frame by Mama Elephant, to die cut one rectangle from the front side and one rectangle from the back side. I tilted the rectangles and layered them onto the scalloped rectangle die from the same set, which i die cut from a coordinating piece of heavy DSP. Easy peasy. Now to decorate!!
  • Felicity Jane’s stamp and die set Hip Hip Hooray was my choice for creating my focal point. I stamped and die cut the sentiment and then stamped a star onto a coordinating embellishment from the “Jenny” collection and die cut them out with the coordinating die.

Birthday-Cards-Ideas-Felicity-Jane-Hip-Hip-Hooray-Shannon-Jaramillo-shannonkaypaperie

  • I created a sparkly bow with a bit of Stampin’ Up! gold metallic twine and a bit of Doodlebug Designs baker’s twine. I discovered that the gold metallic twine unwound into 6 separate threads so I went with the ‘messy’ look – I love it!! I attached the bow with a glue dot, the sentiment with Stampin’ Dimensionals, and the stars with Tombow adhesive tape.  A variety of colored and sparkly enamel dots add detail and a bit of playfulness to compliment the bow.
  • Using the bold black pattern as the envelope liner both mimics and accentuates the bold birthday sentiment. Such a FUN pattern!

And that’s it! A fun clean and simple card that took me about three hours to make!! lol. I’m rusty!! But it was fun to get my beloved toys out and make a really big mess. I can’t wait to do it again!! Thank you to Amy and the Freshly Made Sketches design team for their continued efforts to inspire us!!

Supplies (all Stampin’ Up! unless otherwise noted):

Card Stock: Stamper’s Select White by Papertrey Ink

DSP: the “Jenny” Collection from Felicity Jane

Specialty Paper: None

Ink: Versamark Onyx Black

Stamps: Hip Hip Hooray by Felicity Jane

Dies: Hip Hip Hooray by Felicity Jane; Femme Frame by Mama Elephant and SU’s Stitched Rectangle Dies & Envelope Die (retired)

Tools: Big Shot, Stampin’ Trimmer (retired)

Embellishments: Enamel Dots & Baker’s Twine by Doodlebug Designs, SU’s Glitter Clear Epoxy Shapes & Gold Metallic Twine (both retired), Wink of Stella 

Other: Whisper White Envelope