Hello My Friends! Are you knee deep in holiday preparations and celebrations? Me too but when my Stampin’ Up! preorder of new goodies from the upcoming Occasions and Sale-A-Bration catalogs came in, I MADE time to play!
Measurements:
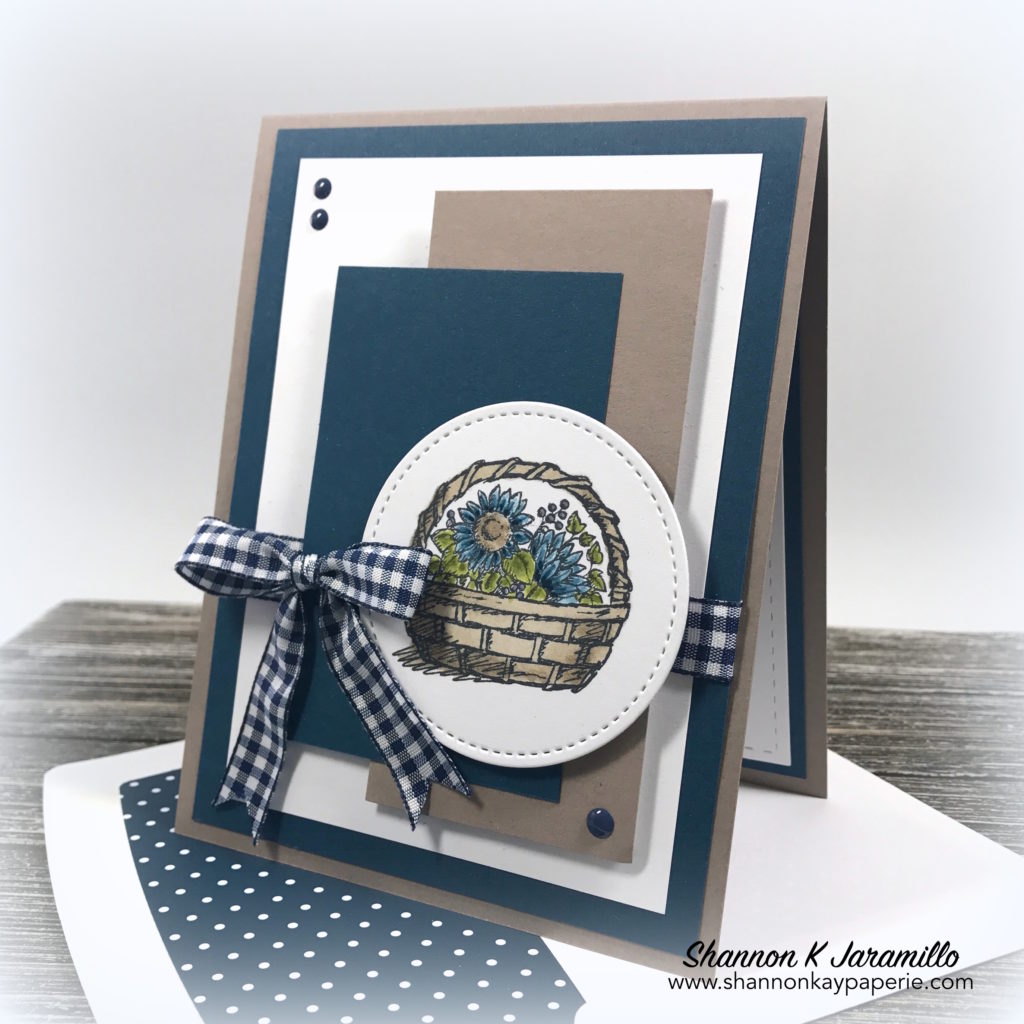
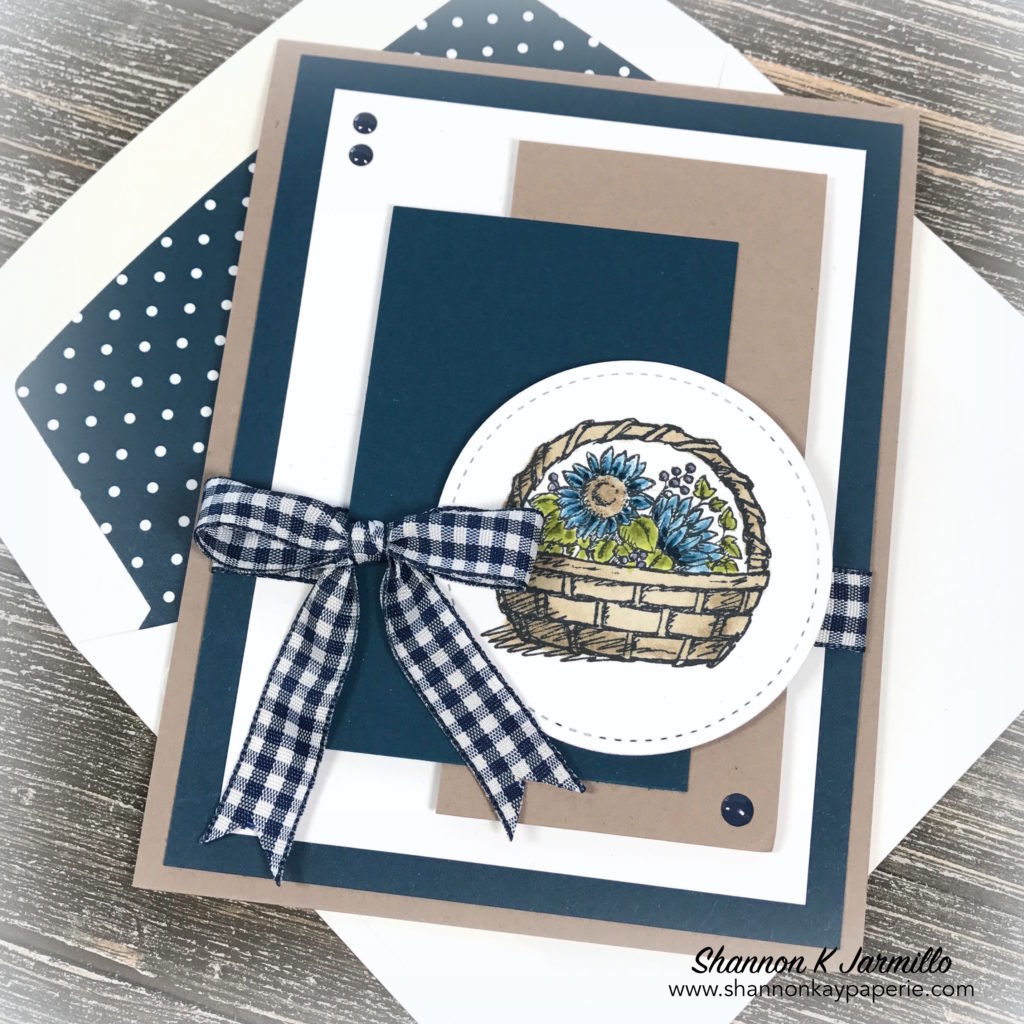
- White Card Base 4 1/4″ x 11″ scored at 5 1/2″
- Everything else is a die cut!!
Details:
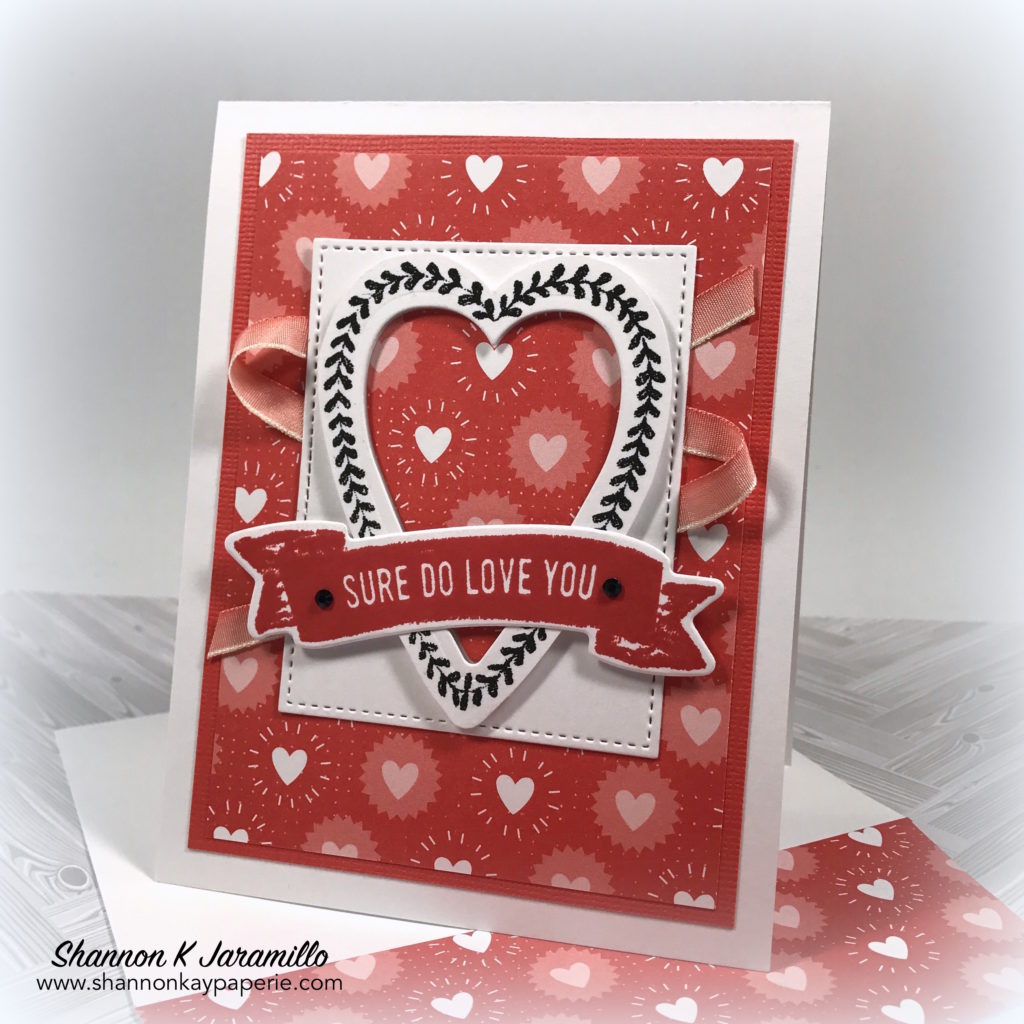
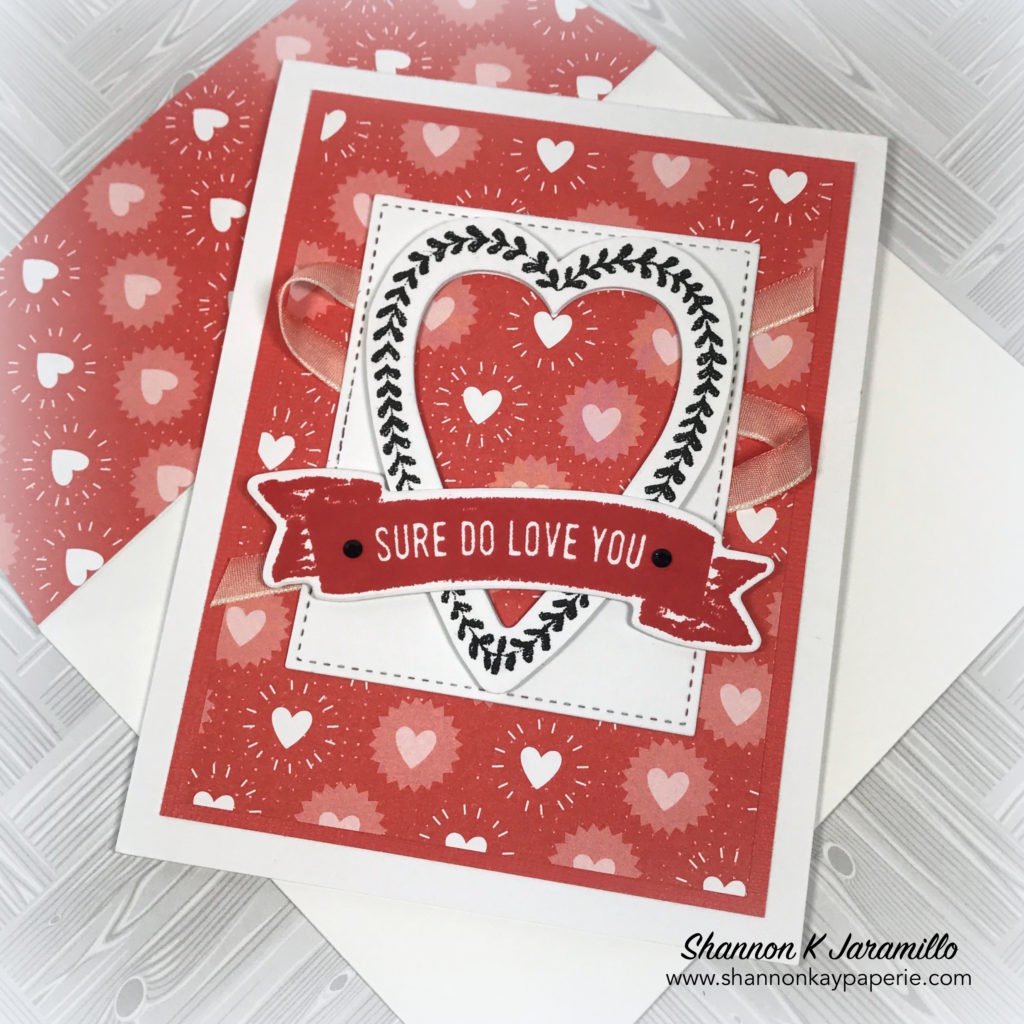
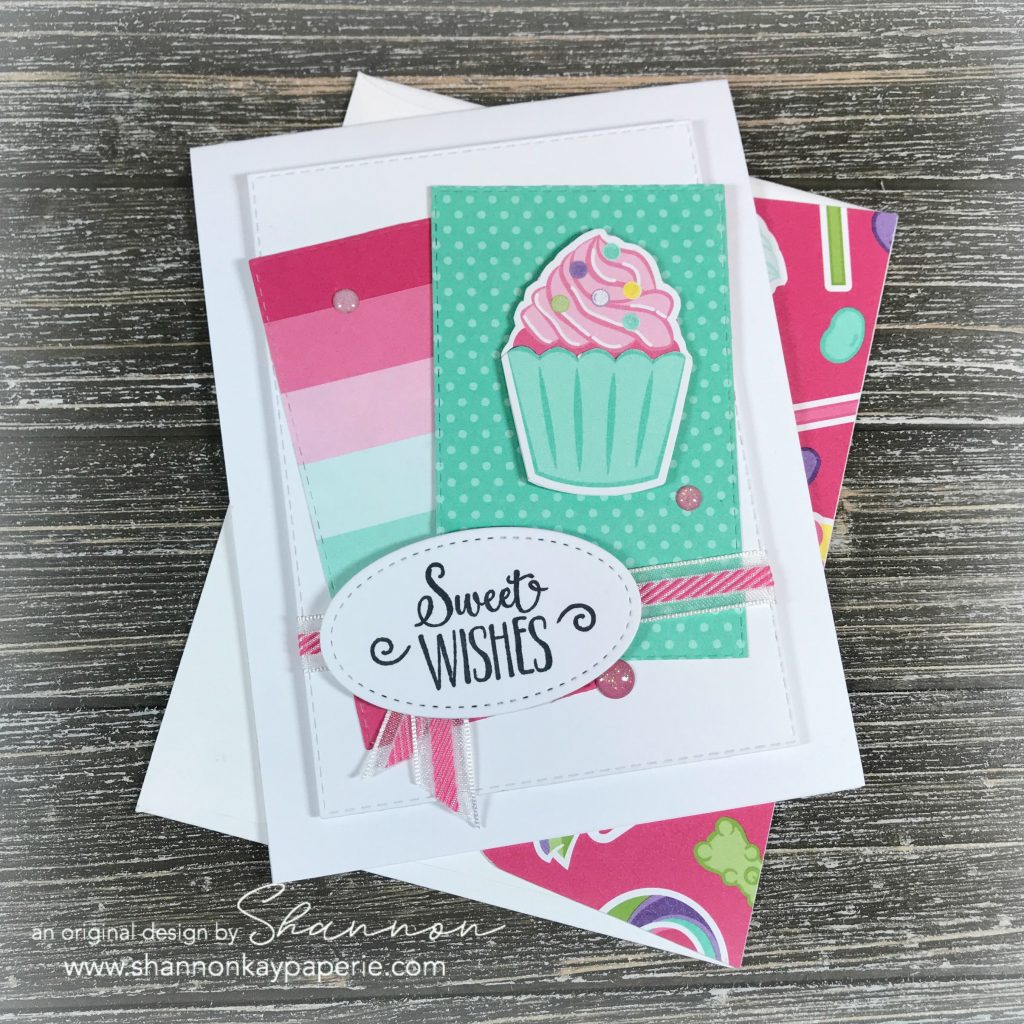
- My jumping off point for today’s card was the latest Freshly Made Sketches challenge. I loved the design and the opportunity to break in my brand new Stampin’ Up! Stitched Rectangle Dies! Yes! January 3, 2019 is the day they will be available for purchase!
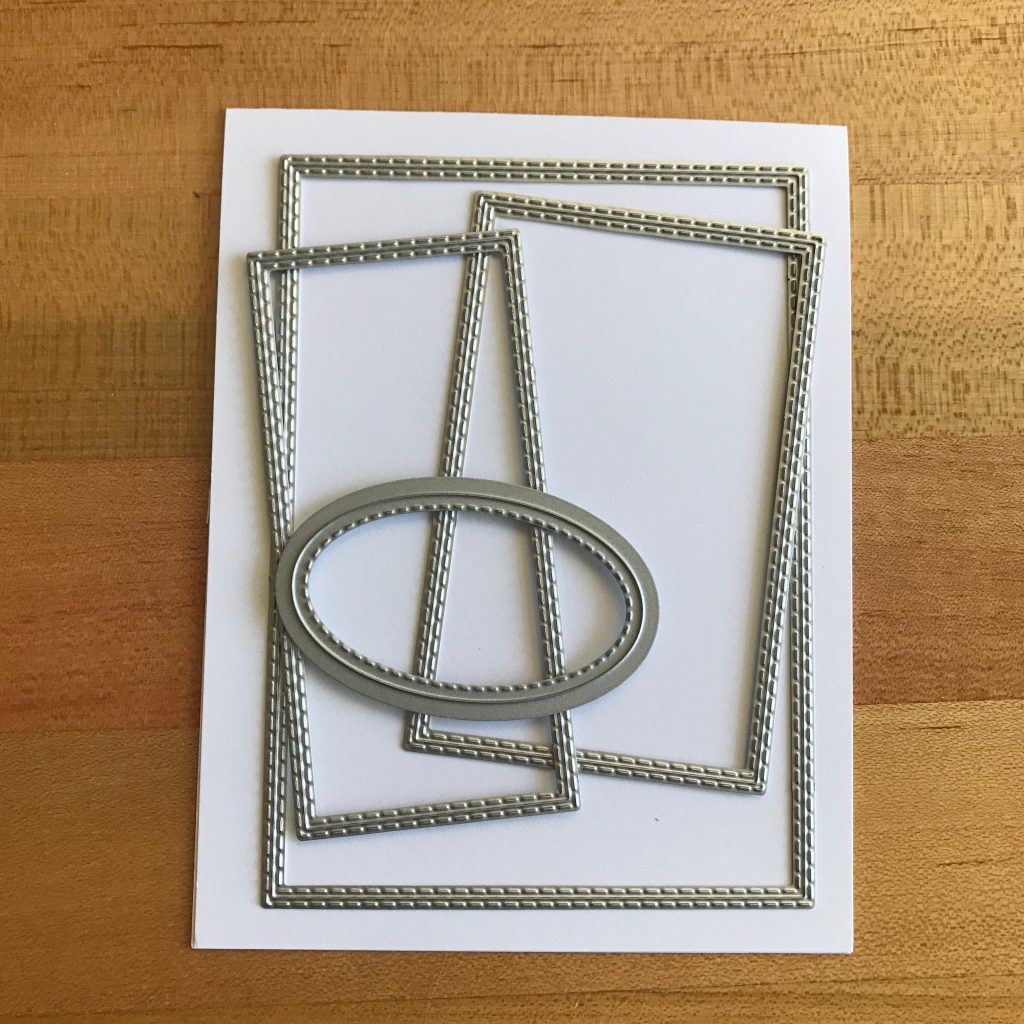
- I thought I would share with you a few process photos today, this one shows how I arrived at my basic layout – all with dies! And can you see how the rectangle on the left is more narrow than the other two? They have given us choices! Love it!
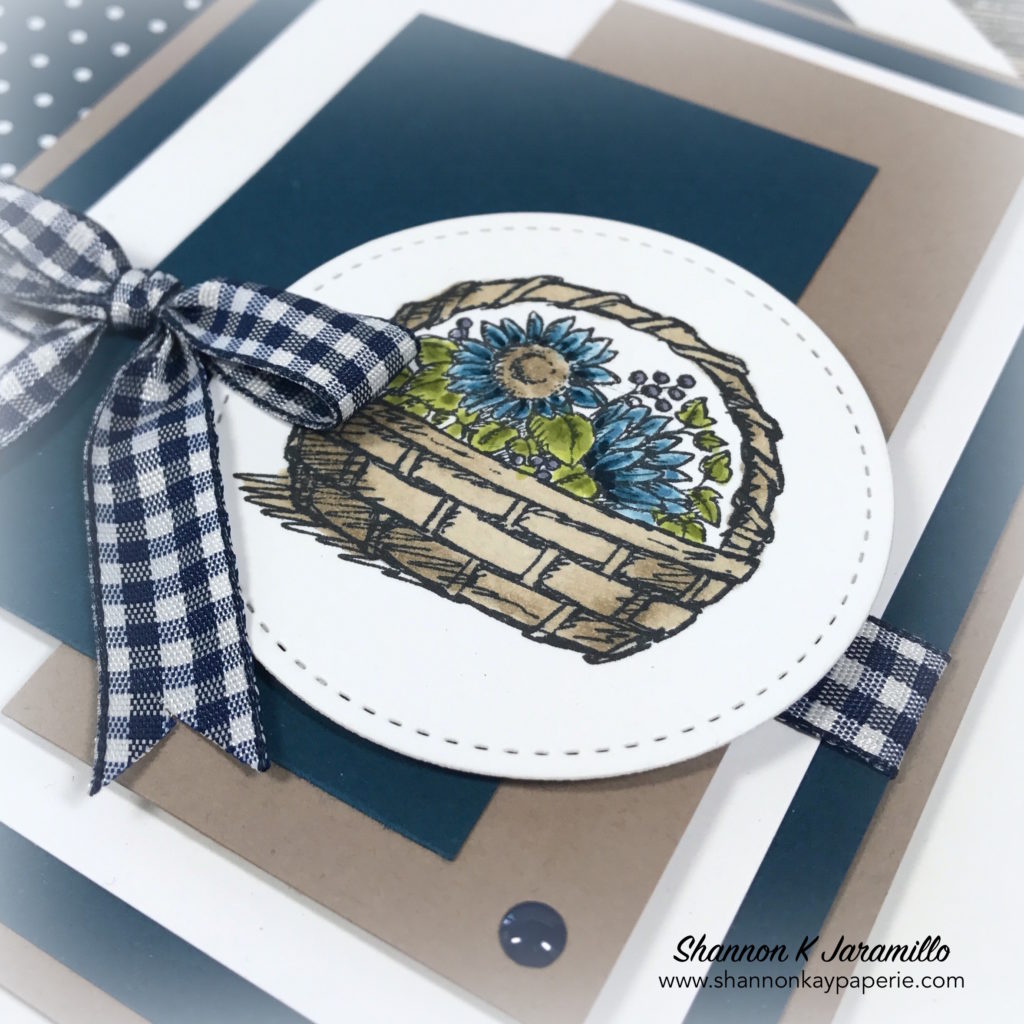
- It just took a few minutes to decide which patterns to use for my layout – the new ‘How Sweet It Is’ DSP in the Occasions catalog made it very easy – AND provided me with these darling cupcakes to use as a die cut! The two cupcakes below were each hand cut out of one the patterns of the DSP (I used this pattern for the envelope flap as well).
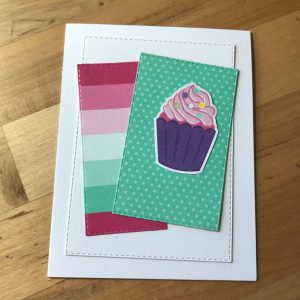
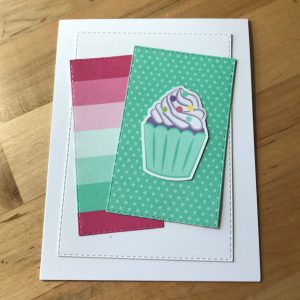
- I couldn’t decide which cupcake to use! The top cupcake used the color Gorgeous Grape for the cupcake liner but I didn’t have Gorgeous Grape anywhere else on my card so I felt that the color actually took away from my overall design. And the Coastal Cabana cupcake liner with the white frosting in the bottom photo blended too easily with the patterned paper behind it. WHAT TO DO???
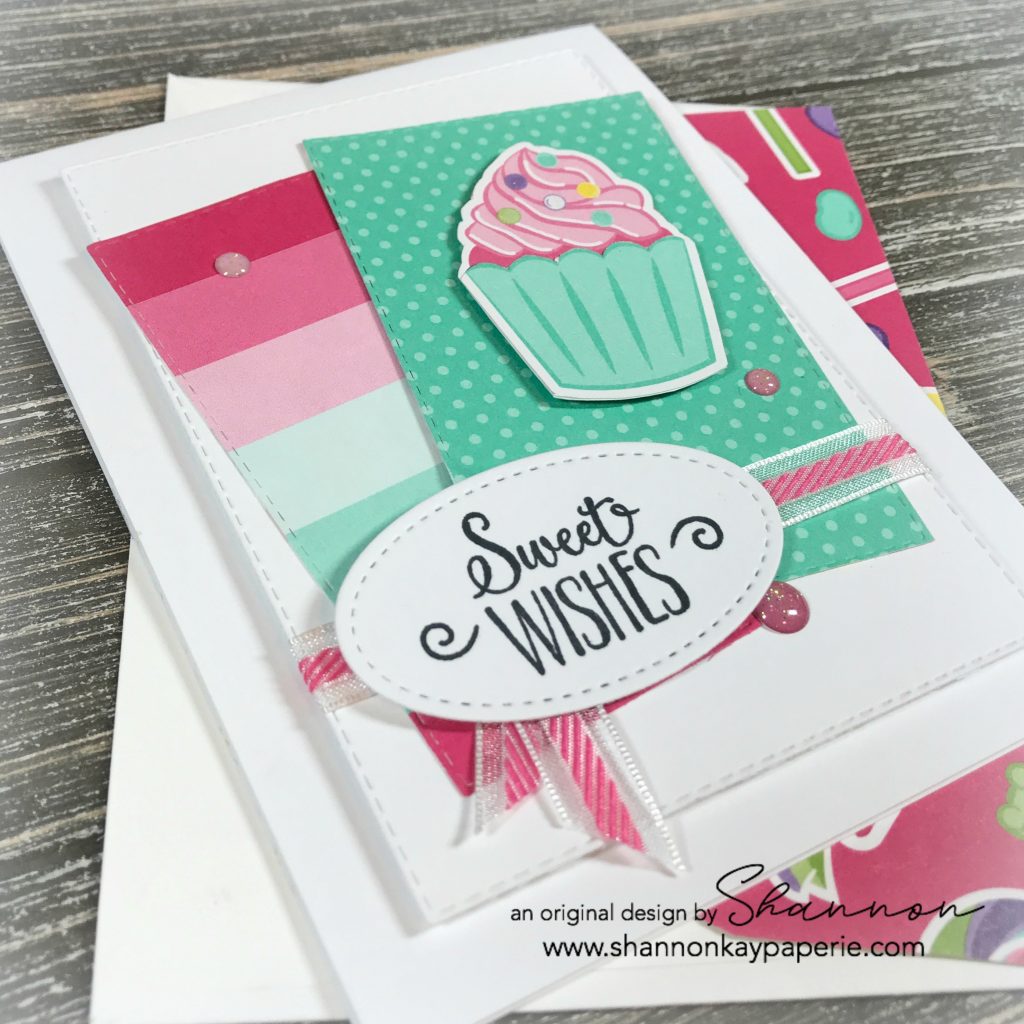
- I fussy cut the Coastal Cabana cupcake liner and adhered it right on top of the Gorgeous Grape cupcake liner to create my own custom combination! There are four different cupcakes in the patterned paper to create SO many custom options! And I love that the images already come white the white outline…SO simple to cut out!
- This darling sentiment (love the font!) is from the ‘Hello Cupcake’ photopolymer stamp set that you will be able to get free with your $50 purchase of any product! Super cute stamp set, I’ll be back with more samples soon!
- The embellishments are all retired. The super sparkly and scrumptious enamel dots retired with the last annual catalog but you could easily use whatever you have on hand. The darling ribbon is VERY retired…like maybe 7 years ago? It also came in Old Olive and Marina Mist and was quite unlike any ribbon I had seen before so I kept it, and I’m thrilled to have the opportunity to use it!!
- The large white rectangle is popped up using white craft foam and the cupcake and sentiment are both popped up with Stampin’ Dimensionals.
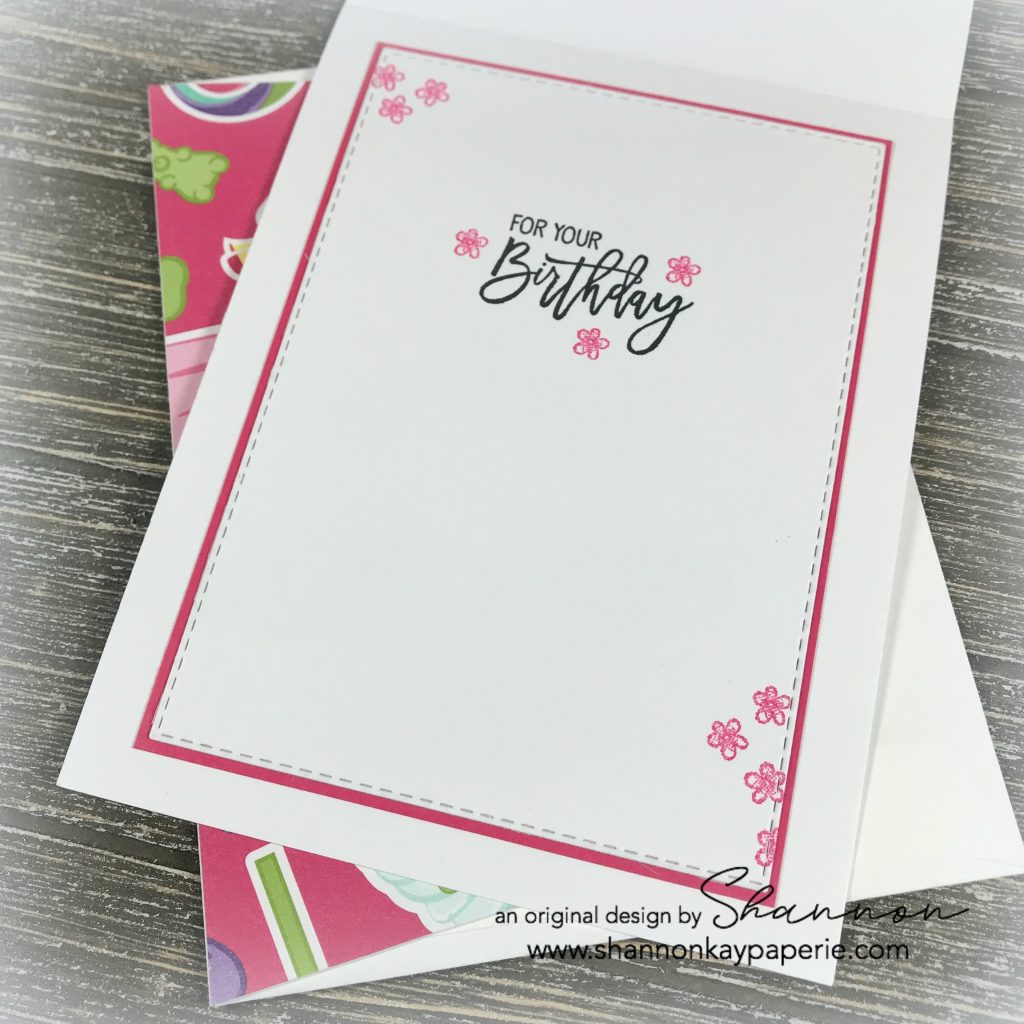
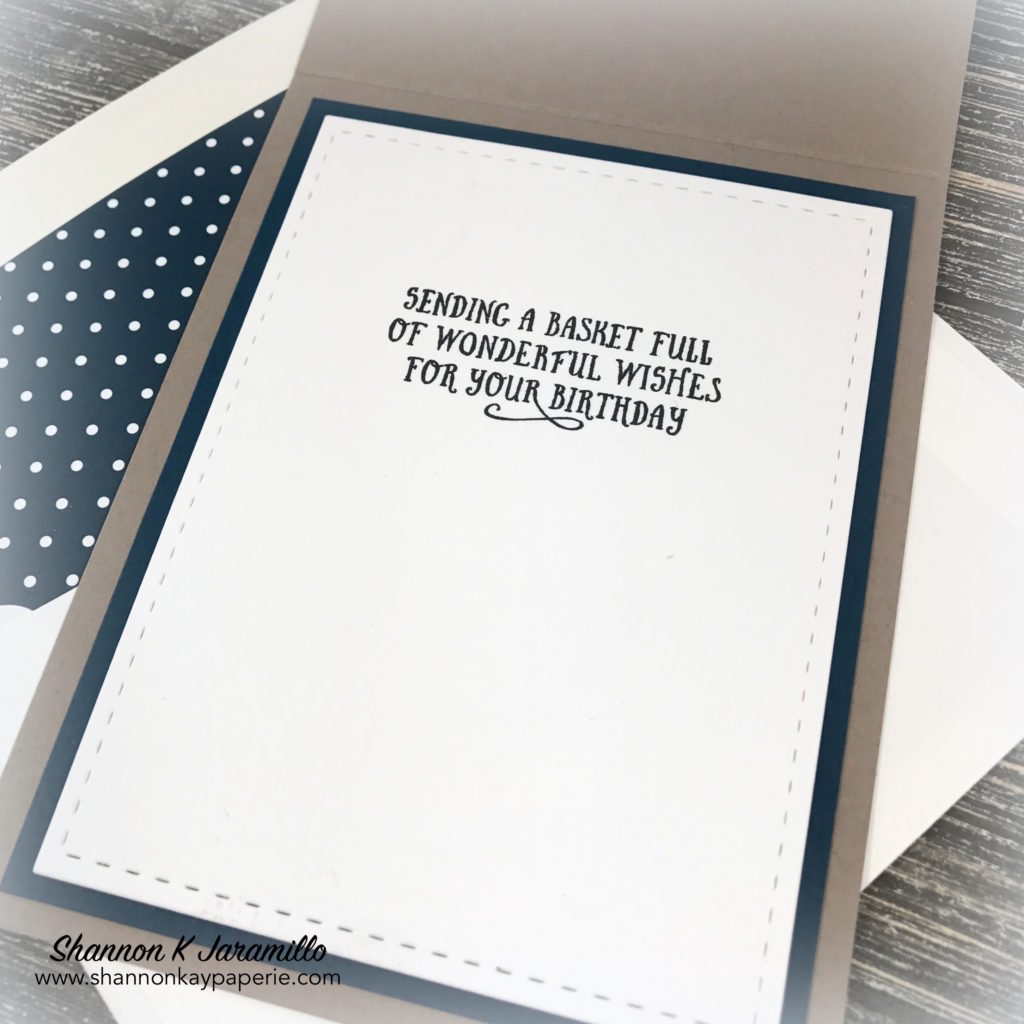
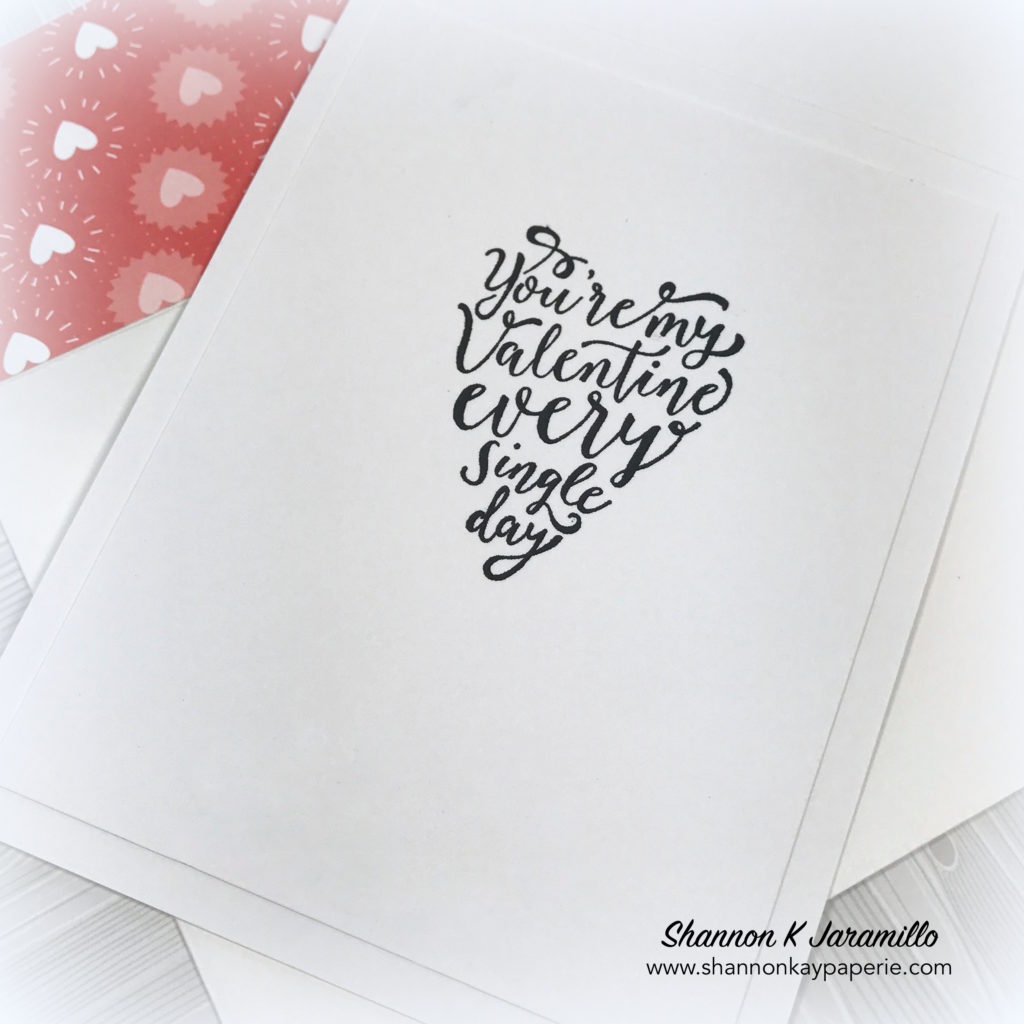
- I die cut another rectangle for the inside the same size as the one on the outside and then trimmed it out with Melon Mambo card stock. These super sweet flowers are from the ‘Hello Cupcake’ stamp set again (they are just the perfect size for an accent!) and the sentiment is from a stamp set that you will be able to purchase from the Occasions catalog called ‘Birthday Cheer’. Super fun fonts in this set!!
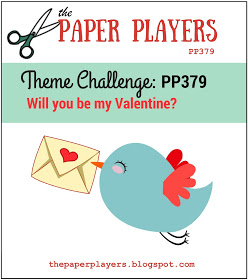
Here is the sketch from the Freshly Made Sketches design team that inspired today’s project:
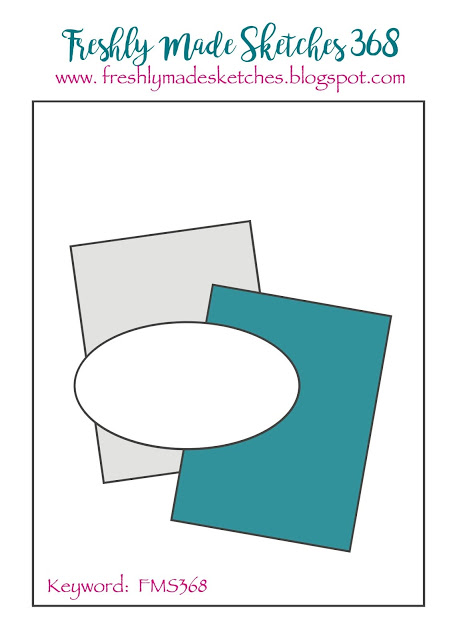
I had such a fun time using this sketch and all of the bright new products available Jan 3rd from the Occasions catalog – it’s always fun to play with brand new stuff!!
Thank you for taking the time to visit me today and I hope that you have a wonderful holiday! I will be back next week with new projects!
Blessing to you!
Supplies (all Stampin’ Up! unless otherwise noted):
Card Stock: Melon Mambo and Stamper’s Select White by Papertrey Ink
DSP: How Sweet It Is
Ink: Melon Mambo and Versafine Onyx Black
Stamps: Hello Cupcake (outside Greeting); Birthday Cheer (inside greeting)
Dies: Rectangle Stitched and Stitched Shapes Framelits Dies; retired Envelope Liner Die
Tools: Candy Cane Builder Punch; Stampin’ Trimmer
Embellishments: Glitter Enamel Dots and 3/8″ Melon Mambo ribbon, both retired
Other: Whisper White Envelope