Thanks for Teacher – The Card Concept 36

Happy Hump Day!! Do you have as much trouble as I do getting out of bed? Ugh. For me, this is the WORST day of the week for wanting to just pull the covers back over my head! But now…I have something to look forward to so who knows, it may become one of my favorite days of the week now! It could happen! lol

I’m excited to share that I have joined the design team over at The Card Concept. It’s a challenge blog with a fun twist! Each challenge showcases different design styles and provides examples of each style and then challenges you to make a card within the parameters of one of the styles! How fun! I rarely design that way, I just make whatever happens to float my boat that day! This is going to be a FUN challenge!

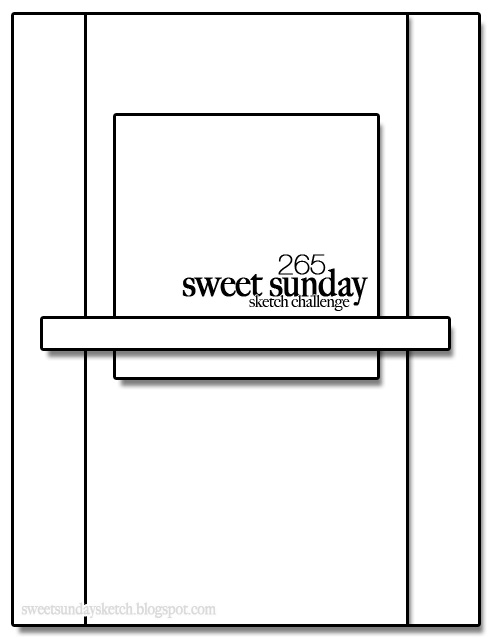
Here is the design concept photo this week:

05:27CC36
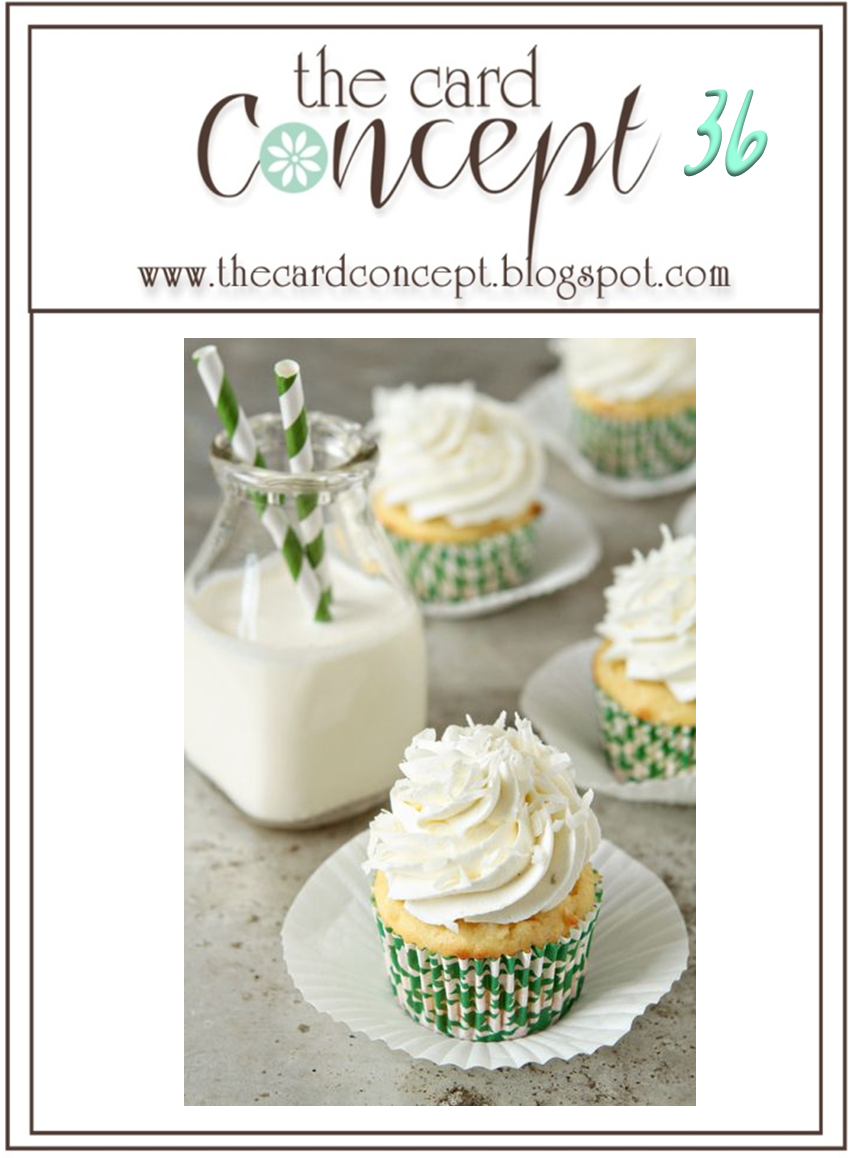
Isn’t it yummy?? What about this photo inspires you most? I barely even noticed the fact that they were cupcakes and to go with a birthday theme, or to pull out the gray in the counter top. All I saw were the bright, graphic lines of the straws and cupcake liners. Which is probably not a coincidence, as I am a designer for the Clean and Graphic design! Please click on the link for a description of the styles.

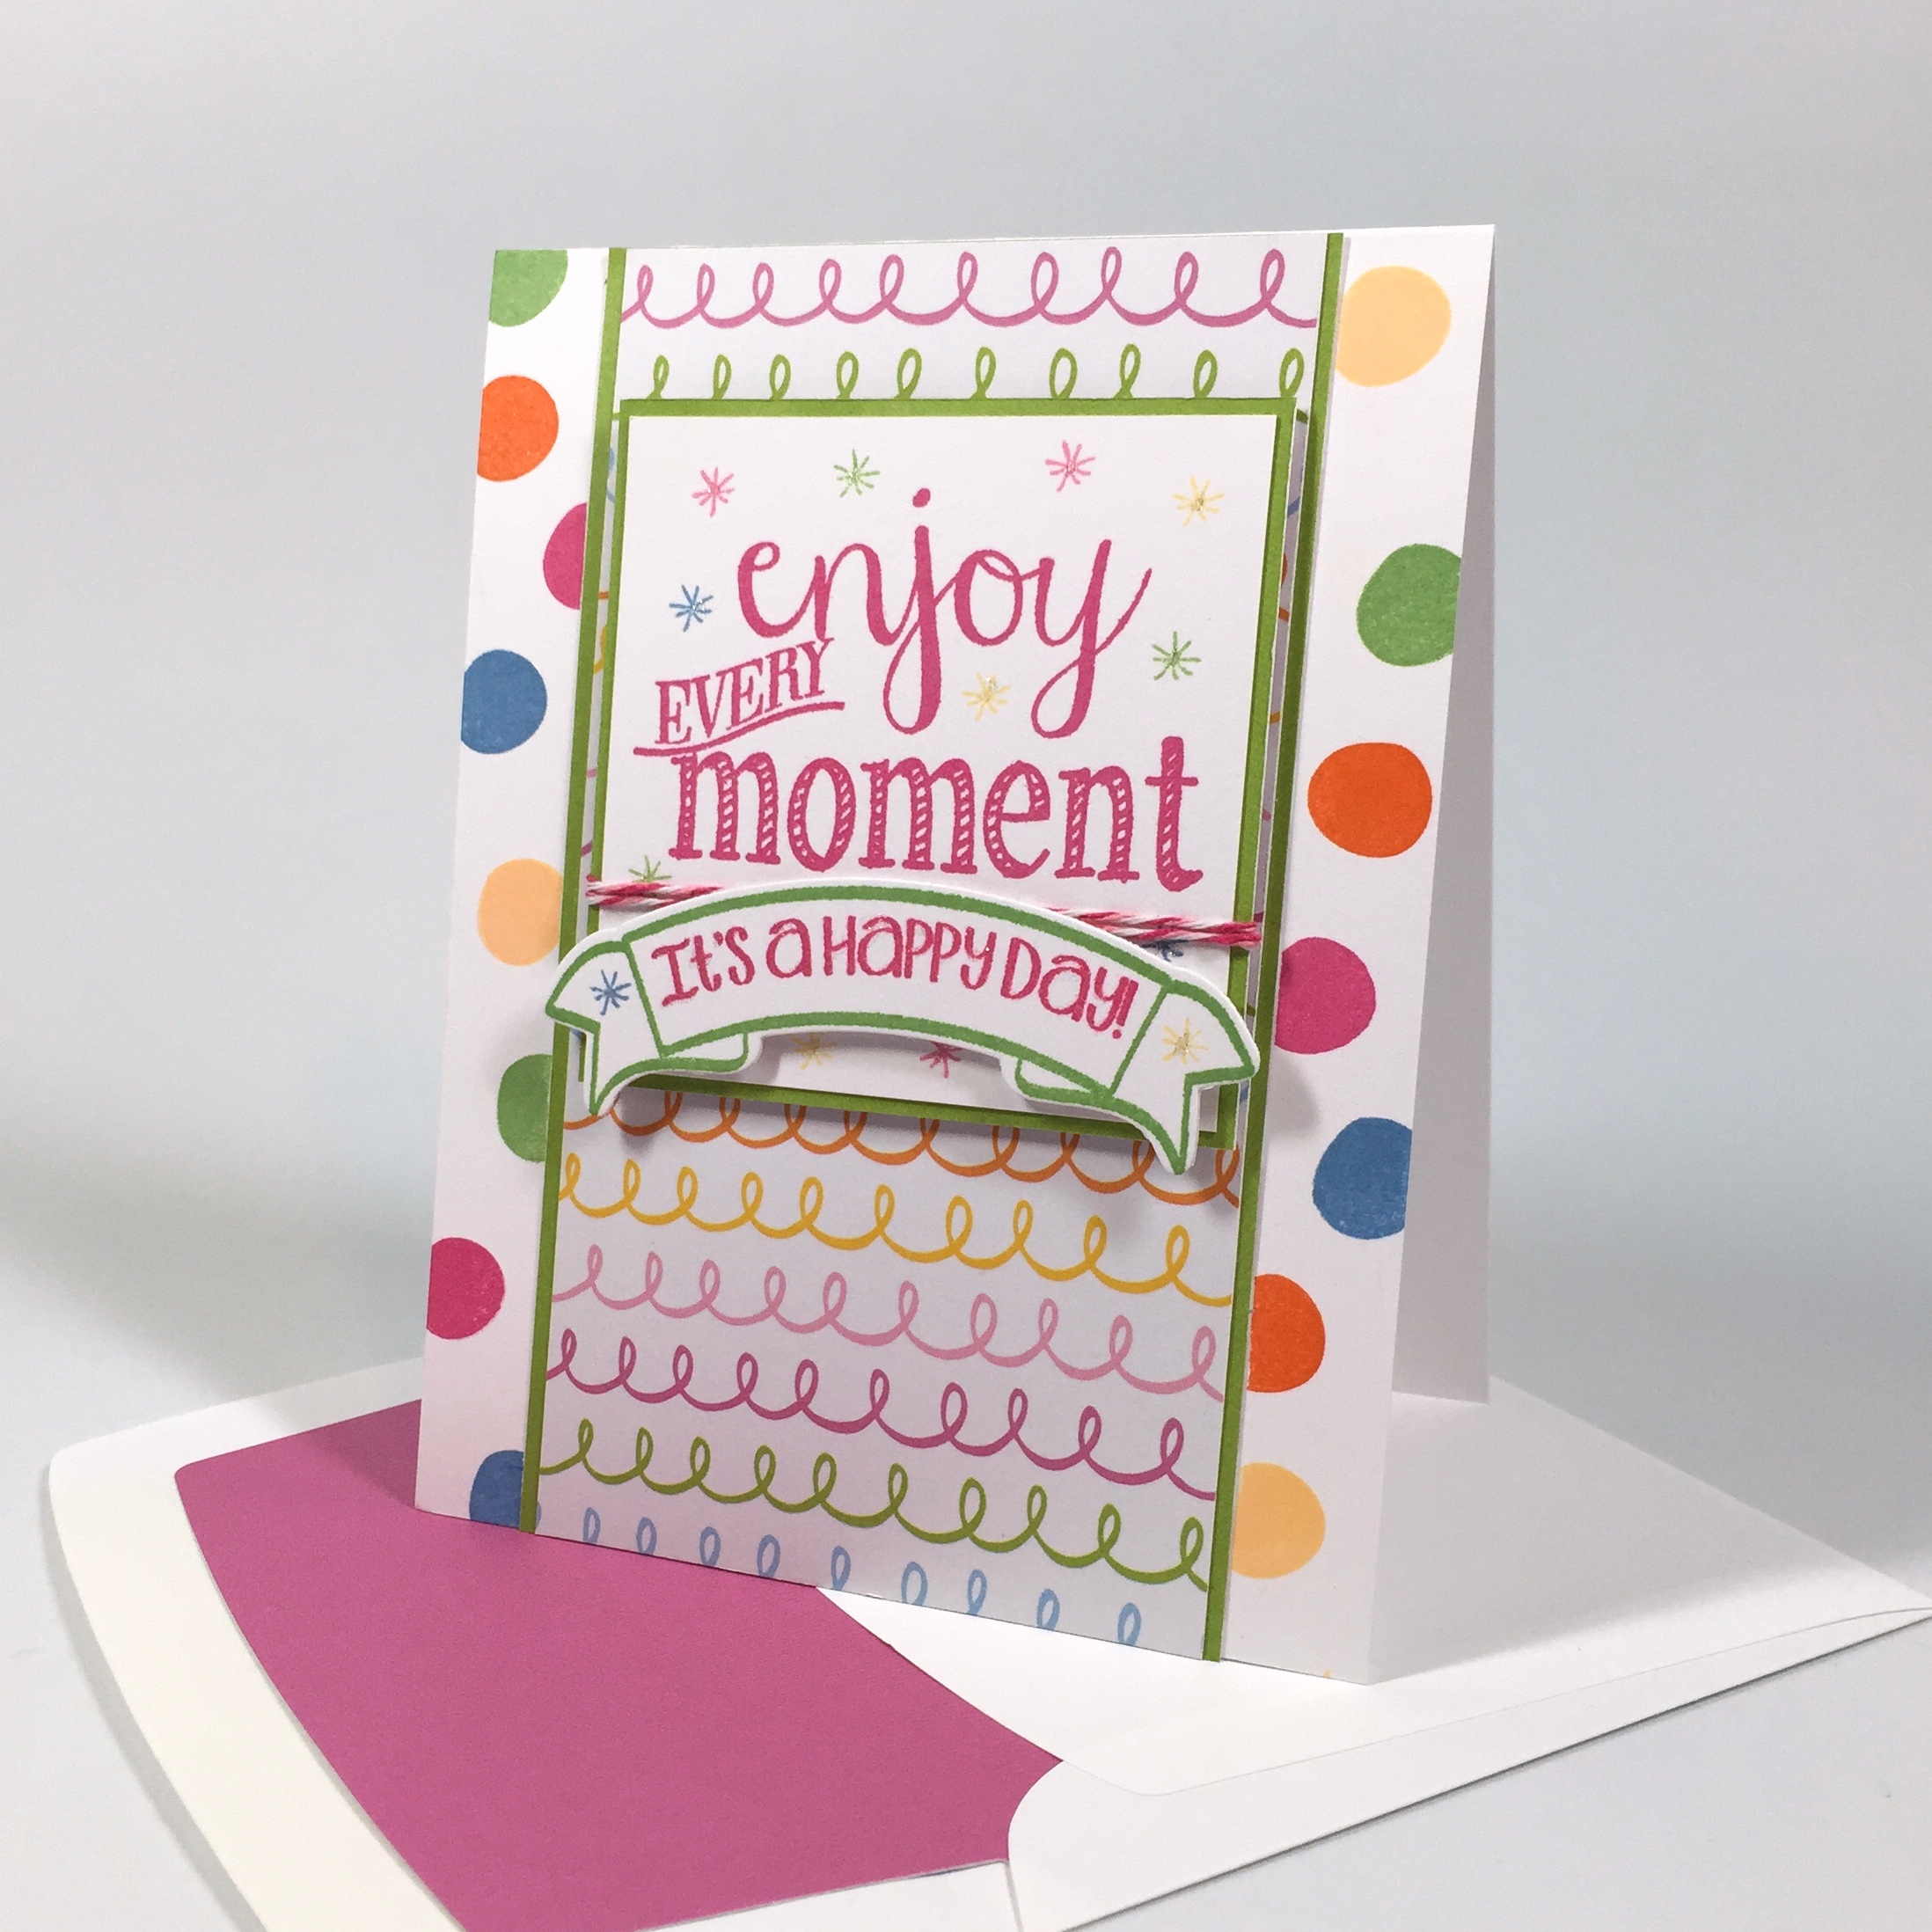
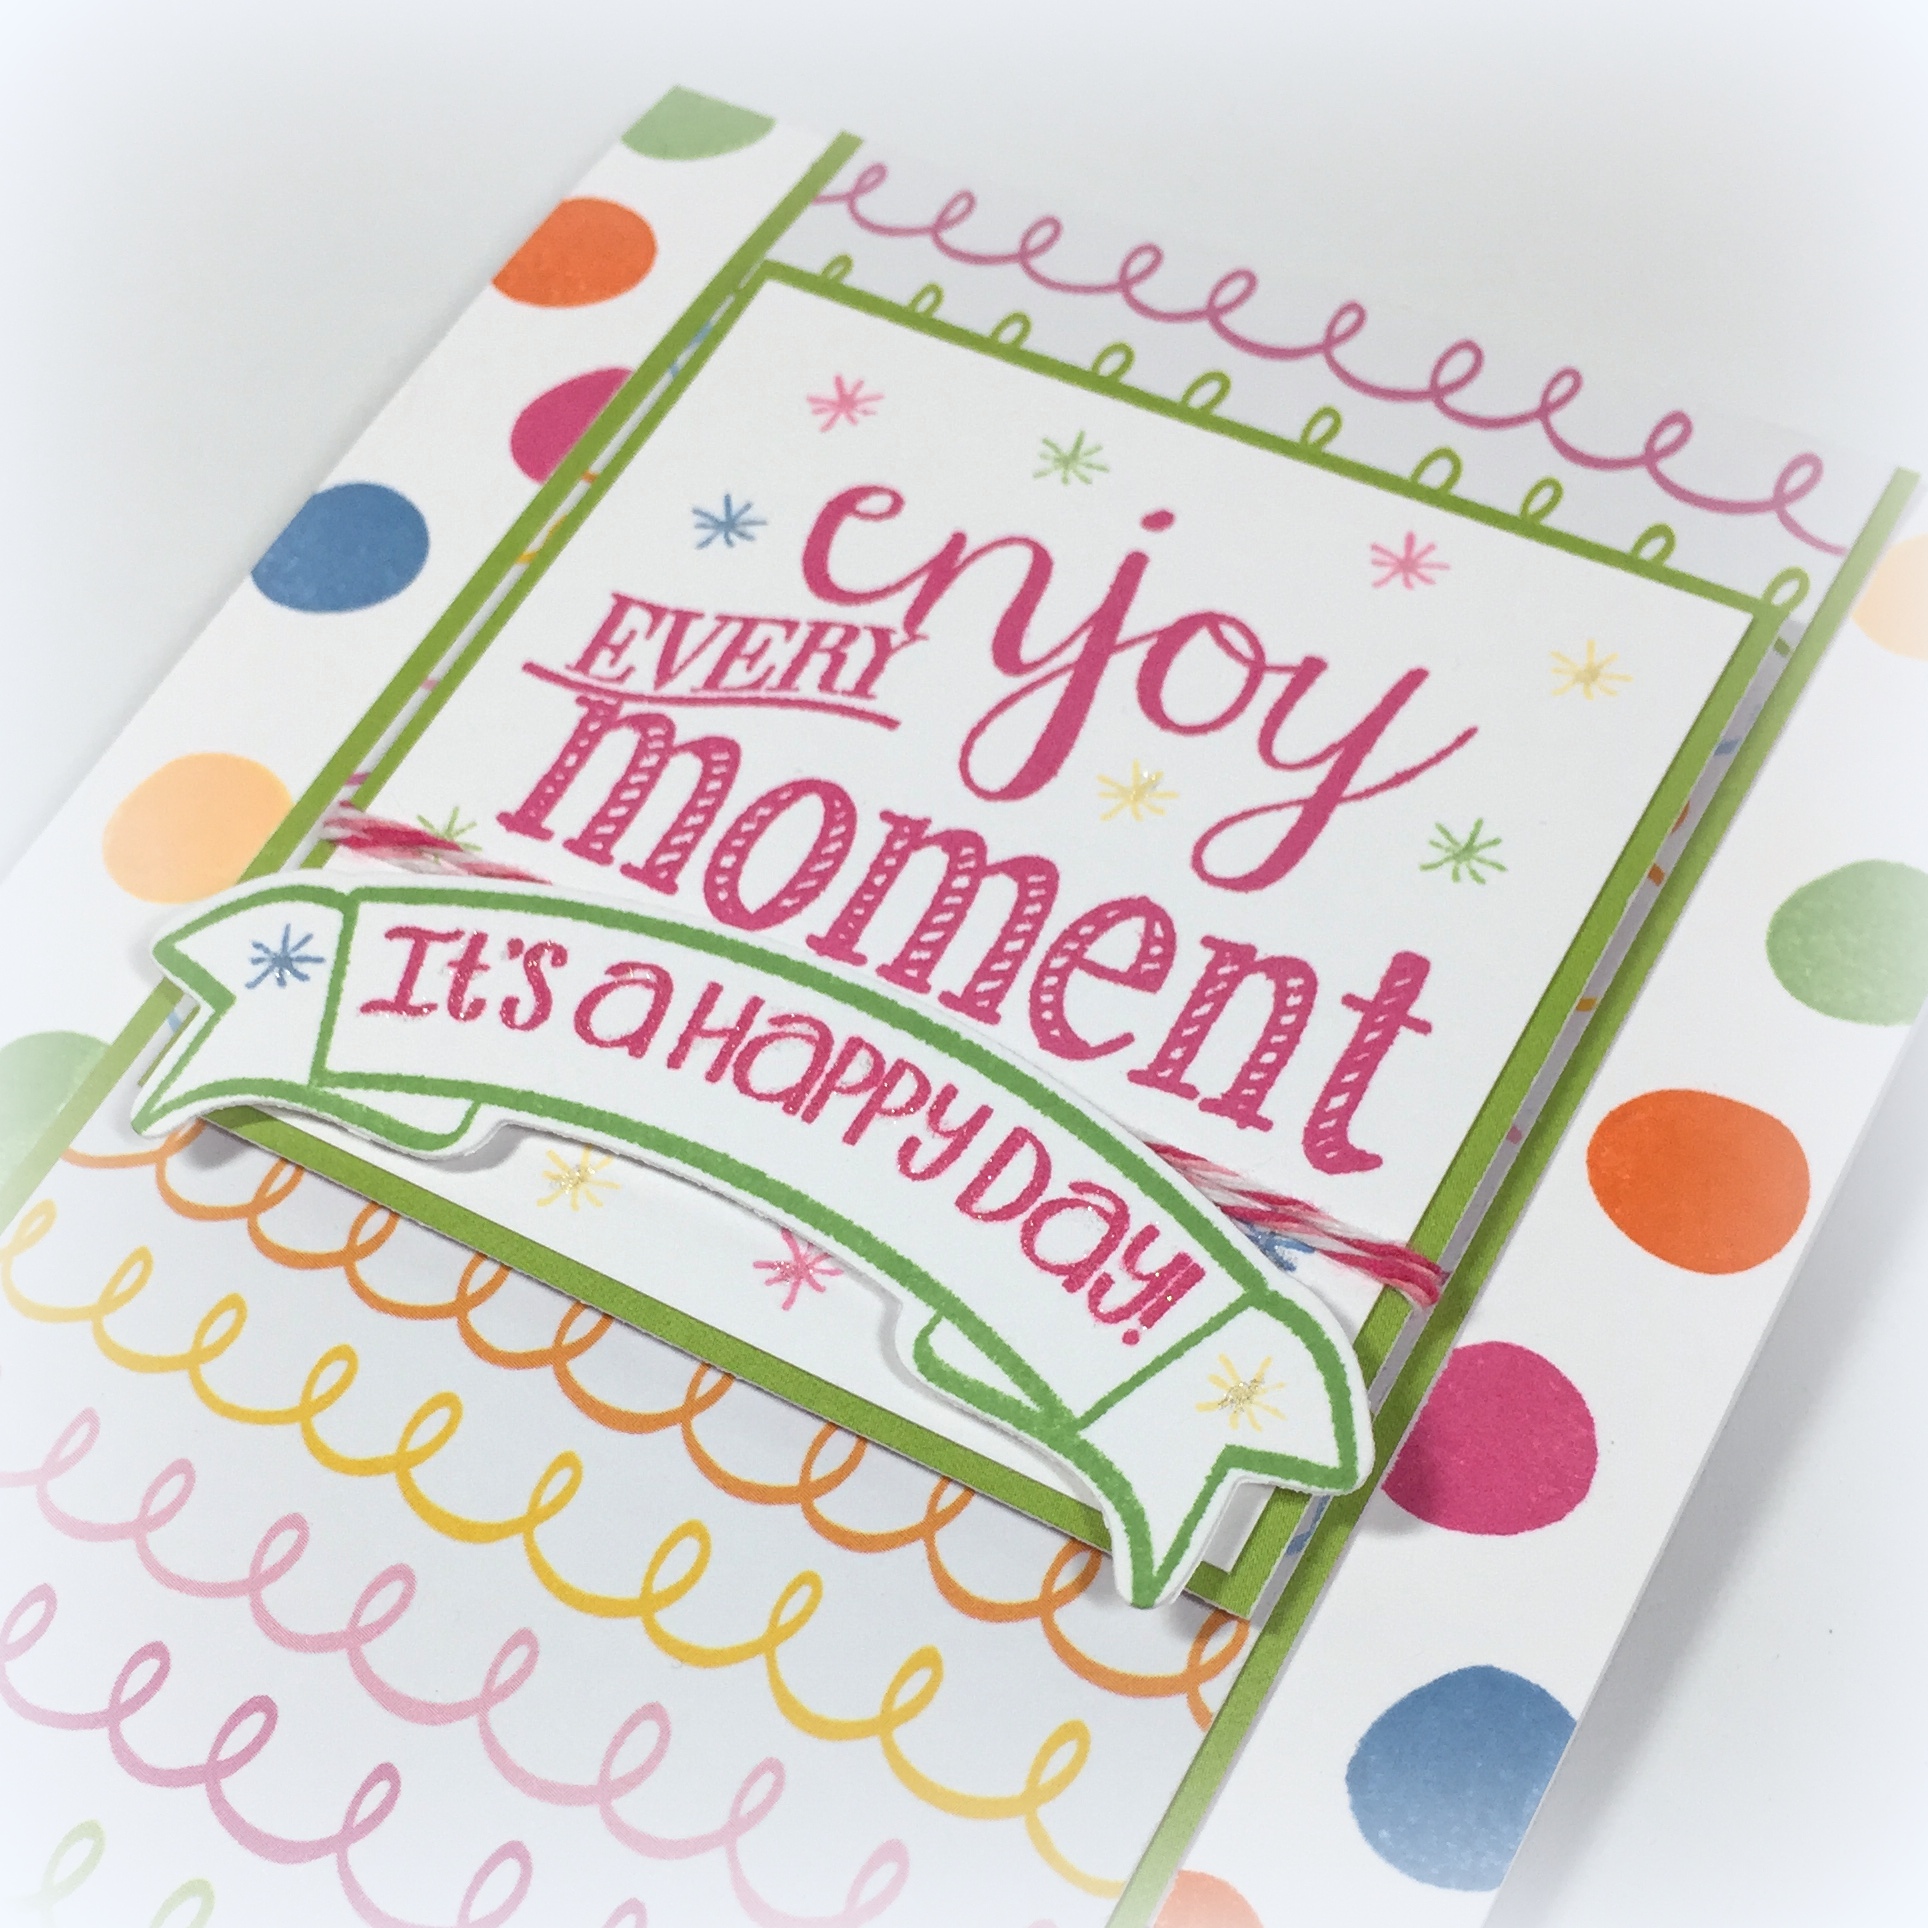
I know I’ve blathered on quite a bit…so here’s the card I was inspired to create:

SKP Watermarked Photos4-020Isn’t this pattern stamp amazing?? And the MISTI makes it so easy to line it up and create a repeat. The stamp set also has lots of options to fill the design with, I chose a bold pattern, but used it only only the smaller sections of the pattern, I wanted to leave lots of white space.

SKP Watermarked Photos4-021
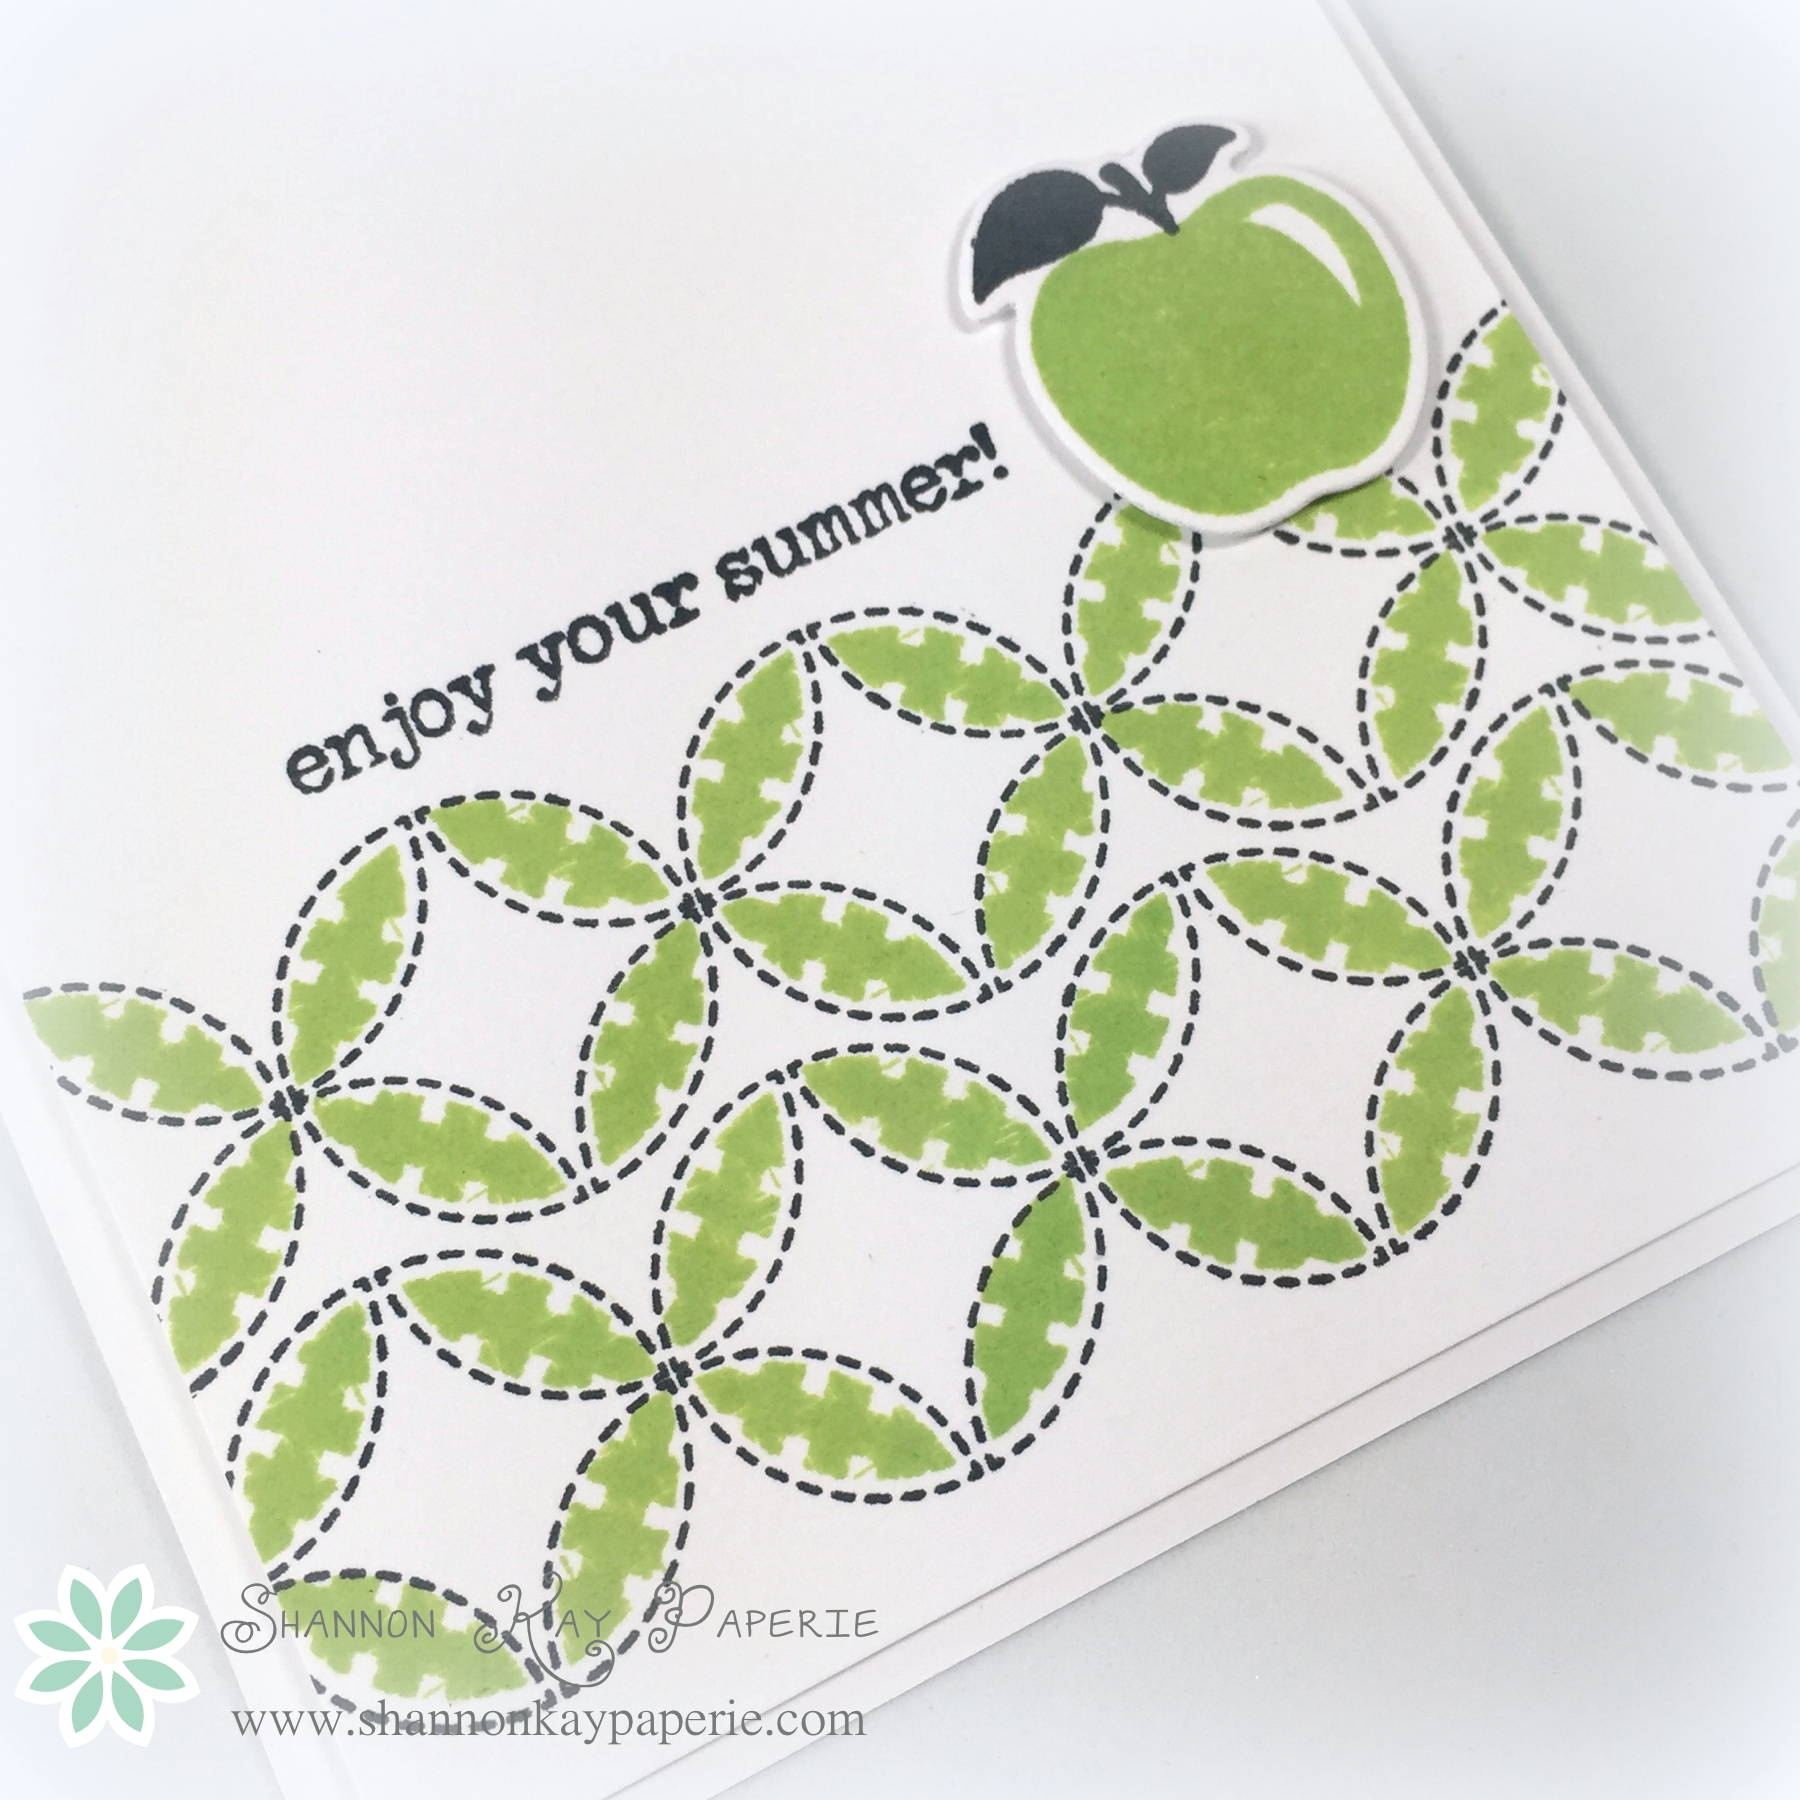
I then accented it with an adorable little apple and fun sentiment. This card is a wonderful thank you to that teacher who always puts out that extra effort! And guess why I chose the ink color??? It’s a bit different than the inspiration photo, but I couldn’t resist it as it is called GREEN APPLE!!!! Hahahahahaha, I’m falling all over myself at how cute that is 🙂

So…did I fulfill the definition of Clean and Graphic? Let’s see…

  • clean lines (check)
  • simple treatment of text (check)
  • no frills (does this mean no Wink of Stella???)
  • bare boned (I think so?)
  • message is communicated quickly (check)

Please feel free to tell me how you think I did with the style guidelines…and I hope you think this is fun too and decide to play along! Please do hop over and see the lovely cards by the rest of The Card Concept‘s design team and let me know which style you think matches you the best! Or, trying stepping out of your box and try a different design style! It’s all up to you!! Have fun!

Wishing you joy and blessings!

Products Used:

Cardstock: Stamper’s Select White by Papertrey Ink

Pattern Paper: Joyous by Authentique (for envelope)

Ink: Green Apple by Simon Says Stamp and Tuxedo Black by Memento Ink

Stamps:   An Apple A Day & Teacher’s Pet by Clearly Besotted Stamps; Quilt Prints by Wplus9

Dies: Apple Die by Clearly Besotted Stamps and Envelope Liner Die by Stampin’ Up!

Tools:  MISTI by My Sweet Petunia

Embellishments: None

Chalk Sayings – SSSC265

Happy Hump Day!! I was able to do a bit of stamping this weekend and I thought that the Sweet Sunday Sketch Challenge would be a great way to showcase some new stamps I picked up on Saturday!

1-IMG_8186Aren’t they FUN?? I used a set from The Stamps of Life called morechalksayings2stamp. I chose this combination of sentiments so that this card would be able to cover a wide variety of situations…birthday of course, but also graduation, new job, making the team, passing the test, getting the promotion, LOTS of things, right? I used my MISTI to align the greeting up perfectly within my square, as well as the sentiment within the banner. Love that tool!

I also broke out some papers from The Stamps of Life April card kit. I love the cheerful squiggles and the green highlights them! I also used some of the twin from the card kit, I’m in love with the fact that it has THREE colors in it! Fun!!

I originally envisioned a clean white backdrop but ended up adding a few polka dots 🙂 They are actually a flower base stamp from a Simon Says Stamp set, but I really like the perfectly imperfect circles they create! I also added little confetti pops with a bit of sparkle in the center…such a happy card!

3-IMG_8188The Stamps of Life manufacturing facility is located relatively close to me, in Irvine, CA and several time a year they open their facility for a card class taught by the owner/designer Stephanie Bernard, as well opening a small shop located within their manufacturing facility. I was fortunate to attend both this weekend!! Here is a picture of the card class:

2-IMG_8172And here is a peek at their store and Stephanie mingling with the crowd:

1-IMG_8171It was quite crowded in there but I managed to acquire some fun new goodies to share with you, including the stamp set I used here today! I was also fortunate enough to be able to meet and chat with Stephanie one-on-one for a bit! She’s just as sweet in person as she is in her videos!

Thank you for stopping by!!

Wishing you joy and blessings!

Products Used:

Cardstock: Stamper’s Select White by Papertrey Ink

Pattern Paper: Wishes Collection by The Stamps of Life

Ink:  Raspberry Fizz, Orange Zest, New Leaf, Harvest Gold, Blueberry Sky by Papertrey Ink

Stamps:  morechalksayings2stamp by The Stamps of Life; Favorite Flowers by Simon Says Stamp

Dies: Banner Dies by The Stamps of Life

Tools:  None

Embellishments: Baker’s Twine by The Stamps of Life and Wink of Stella


Up in the Air – The Paper Players #227

It’s Sunday and that mean another fun challenge from The Paper Players! This week we have a color challenge from Ann…

pp227…such pretty colors to work with!

And here’s what I have created for you this week…

Watermarked Blog Posts_2-047 This week I went back to my super clean and simple style. I just love white space!!

I wanted to make sure I incorporated more of the Sahara Sand color than just the balloon basket so I pulled out my Time Holtz Distress Ink Applicator and sponged a layer of Sahara Sand ink to my card base. Next, I used the Simon Says Stamp Tiny Dots Stencil to add another of layer, also in Sahara Sand, just a heavier application of ink. What do you think? I love the way the color fades away with no edges…fun!

Watermarked Blog Posts_2-049

Next, I used my Stitched Traditional Tags STAX by My Favorite Things to die cut two tags, one in white and one in Lost Lagoon. Then I stamped my balloon from the Up in the Air Stamp Set by Clearly Besotted stamps and die cut it out as well, using the coordinating dies. After I stamped and die cut my balloon, I added the basket in Sahara Sand. That was a bit tricky but my MISTI tool came to my rescue!

Watermarked Blog Posts_2-050

I found a bit of twine in my drawer, left over from one kit or another and added a bow to the top of my tag with a mini glue dot. The glue dot is mini, but not mini enough for Baker’s Twine, so I actually just roll one off of the paper and then add the rolled dot to my card. Now it’s thin and wide, and easy to add a bow to!

I accidentally took a bit of liberty with my embellishments..the baker’s twine is actually Island Indigo and the sequins are Coastal Cabana…an honest mistake and lucky for me they are not close together so only you and I will ever know, shhhhh….

I hope you enjoy this color combination and my inspiration, please do visit The Paper Player’s blog to see what goodies the others designers have created for you…lots of beautiful projects!!!

Thank you so much for stopping by and

Wishing you joy and blessings!

Products Used:

Cardstock: Stamper’s Select White by Papertrey, Lost Lagoon by Stampin’ Up!

Pattern Paper: None

Ink:  Crisp Cantaloupe, Lost Lagoon and Sahara Sand by Stampin’ Up!

Stamps:  Up in the Air by Clearly Besotted Stamps

Dies: Stitched Mats: Stitched Trad Tags STAX by My Favorite Things and Envelope Liner Die by Stampin’ Up!

Tools:  MISTI by My Sweet Petunia

Embellishments: 2013-15 In Color Sequins by Stampin’ Up!

Thoughtful Holiday Gifts

Watermarked Blog Posts-053

It’s the season of gathering and celebrating…and gift giving! A box of beautiful handmade cards is the perfect gift for that holiday hostess and co-workers. How about that Secret Santa gift? You can be guaranteed it will be a unique and appreciated gift, that can be hard to come by! And don’t forget your hairdresser and manicurist who makes sure you always look your best!

There are so many ways to gift a package of handmade cards, I’m sure you are already adding to my list!

I am pleased to announce that gift packaging will be provided free with the purchase of any four cards in my Card Shoppe so make sure to stop by and start your holiday shopping to ensure timely delivery!

Watermarked Blog Posts-054

Simply add any four cards of your choice to your shopping cart in the Card Shoppe and then add the item “Gift Packaging” to your cart as well! If you are purchasing more than four cards to be gifted, I will contact you privately to determine which cards you would like packaged together.

Can it be any easier to give your friends unique and elegant gifts? Stop by the Card Shoppe today!

Thank you so much for stopping by!