My Blooming’ Garden – 30 Day Card Challenge, Day 12

**This is my second post today. Please scroll down to see Day 11 of the Card Challenge and please forgive me for posting twice as I am catching up on publishing my posts.**

Stampin Up Garden in Bloom Just Because Card Idea - Shannon Jaramillo Stampinup

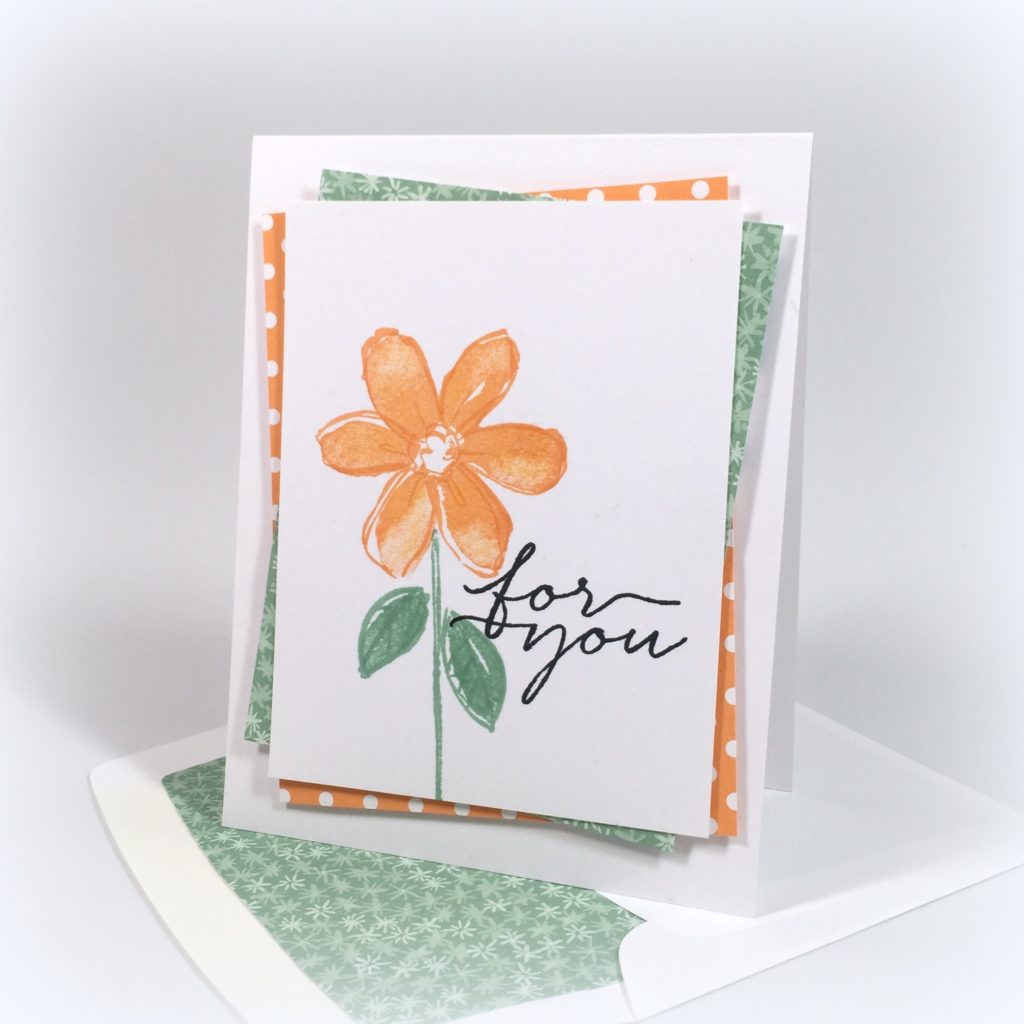
Ummm, yum! I can’t STAND how darling this color combination is!! This card may look clean and simple but it actually took about two hours and lots and lots of do overs until I was happy with the outcome, but man oh man am I happy with it! Worth every piece of card stock!!

The Details:

  • Base is Thick Whisper White card stock, cut at 4 1/4″ x 11″and scored at 5 1/2″
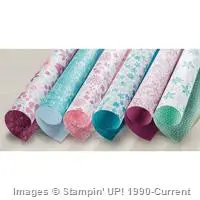
  • The Peekaboo Peach Designer Series paper is from the 2016-2018 In Color Designer Series Paper Stack and is cut to 3 5/8″ x 4 5/8″
  • The Mint Macaroon Designer Series Paper is from the Blooms & Bliss Designer Series Paper and is cut to 3 1/2″ x 4 1/2″
  • The top layer is Thick Whisper White, cut to 3 1/2″ x 4 1/2″
  • I felt that the Peekaboo Peach layer didn’t have quite enough impact, so I trimmed it to a slightly larger size than the other two layers

Stampin Up Garden in Bloom Just Because Cards Ideas - Shannon Jaramillo Stampinup

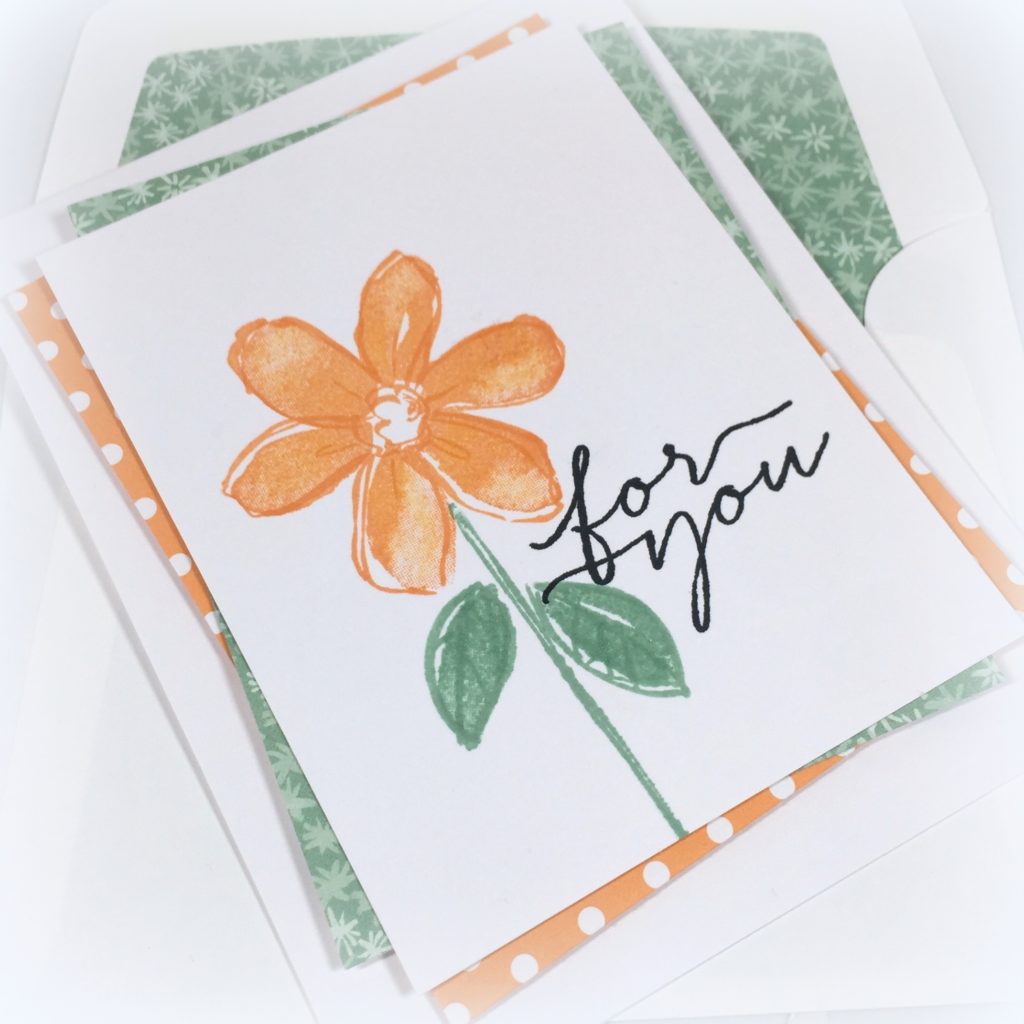
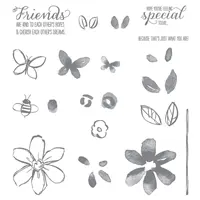
  • This darling flower is from another 3 layer stamp set called Garden in Bloom. I only used 2 layers though, the outline and the filler. I tried adding in the detail stamp but it just didn’t work for me today, so I left it out on both the flower and the leaves
  • This color combination of Peekaboo Peach and mint Macaron just blows me away…I LOVE it!!! I started with Pear Pizzazz but it wasn’t working for me either. Did I mention I stamped this a zillion times before I was happy?
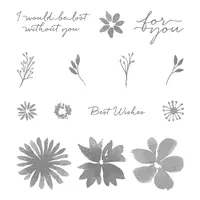
  • The sentiment is from Blooms & Wishes. This is the stamp set I started out with but just couldn’t make the flowers work for me today…so I changed the flowers but kept the sentiment. LOVE the font!!

Stampin Up Garden in Bloom Just Because Cards Idea - Shannon Jaramillo Stampinup

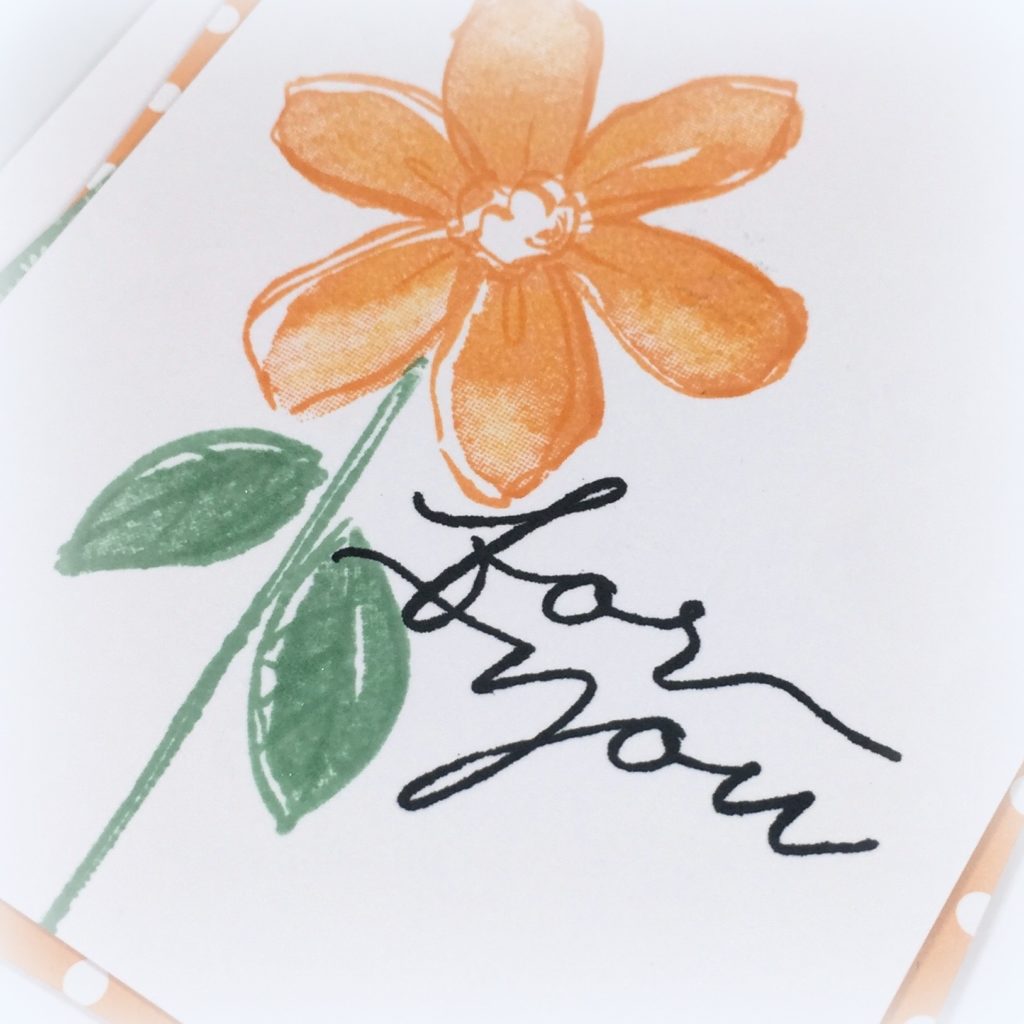
  • I tried adding Enamel Shapes. I tried adding Pearls. I tried adding Rhinestones. Nope. In the end I used only Wink of Stella. The card shimmers SO prettily! I wish I could capture it with my camera!

Super clean and simple. Super cheerful. I’m in love with the colors…what do yo think?

Supplies:

Birthday Banners – Freshly Made Sketches 240

Birthday Banners - Freshly Made Sketches 240

Believe it or not, the designer series paper I am showcasing today is from the same pack of paper that I used on my Wednesday card, Stampin’ Up’s Blooms & Bliss. I’m enjoying the wide range of colors available in each pack of 12′ x 12′ paper as I feel I can get more mileage from each pack of paper.

Birthday Banners - Freshly Made Sketches 240

The Details:

  • Once again, I let the paper do the hard part, coordination. I might not know what goes well with Mint Macaron right off the top of my head, but the detail in the flowered paper tells me that Island Indigo and Sahara Sand will pair well.
  • I typically will mat all of the elements on my project with the same color mat, however, as with many rules, there is always an exception, and this card is it! I mixed up the matting colors to make sure that each patterned paper would “pop”.
  • The Birthday Banners stamp set when paired with the Banners Framelits makes a quick banner simple! A second banner in Island Indigo provides a striking mat.
  • The Large Polka Dot Embossing Folder adds a subtle texture.

Birthday Banners - Freshly Made Sketches 240

  • Stampin’ Up’s gold metallic thread is perfect for adding “just a bit of something”. I love the texture it adds to my project. Applying Snail all over the back of the banner gives lots of sticky surface to adhere the gold thread to. Once finished, I popped the whole thing up on Stampin’ Dimensionals.

Birthday Banners - Freshly Made Sketches 240

The stamps I used on the inside of the card are from the Party with Cake stamp set. Because as you know, birthday and vacation calories don’t count…

My inspiration today came from the talented Freshly Made Sketches design team. They provide wonderful ideas each and every week!FMS Final 240-001

Thank you for visiting today!

Price: $110.00

Blooms, Bliss, and Wishes!

Blooms & Bliss

The Blooms and Bliss Suite of products in the new Stampin’ Up! annual catalog are amazing. The colors and flowers are so soft and whimsical and are a favorite new product of mine! If you would like to browse the catalog on-line, please follow this link. If you would like to turn the actual pages of the catalog (much better IMO), please shoot me an email with your snail mail address and I will get one right out to you.

Blooms & Bliss

The Details:

  • Let the beautiful paper do the work for you! I began with a 8 1/2″ x 5 1/2″ card base in new new Sweet Sugarplum card stock (Isn’t it yummy?!?), scored at 5 1/2″ and then added a layer of Rich Razzleberry card stock cut to 5″ x 3 3/4″. I just wanted a peek of the Rich Razzleberry showing, show I trimmed  4 7/8″ x 3 5/8″ piece of the new Blooms & Bliss Designer Series Paper to layer on top.
  • Simple is always good. I trimmed a 3 1/2″ x 1 1/4″ piece of Thick Whisper White card stock and used Sweet Sugarplum ink to stamp this sentiment from the (also new) Blooms & Wishes stamp set. I used my Banner Punch to quickly add a banner to the left end and adhered it to my DSP layer with SNAIL.

Blooms & Bliss

  • Sparkling embellishments! I stamped this tiny bloom from the Blooms & Wishes Stamp Set in Rich Razzleberry and quickly snipped the flowers out with my paper snips. I added a Stampin’ Dimensional to the back of each and adhered both of them to the end of my sentiment banner (promptly covering up the effect of the banner…oh well!). Once adhered, I added a simple Rhinestone Basic Jewel to the center of each and added more sparkle with the Wink of Stella Glitter Brush. I snipped off a short length of the coordinating 3/8″ Ruched Ribbon, folded it in half and adhered it to itself with a glue dot, added a glue dot to the back and slipped it under the flowers!

Blooms & Bliss

  • I was very sad to see the Envelope Liner Dies retire. But…Stampin’ Up! has come out with packs of the thin envelope paper in the beautiful 2015-17 and 2016-18 In-Colors so I added them both to my first order. I used the Envelope Punch Board to quickly create a perfectly coordinated envelope! A great feature of this new envelope paper is that there is pattern paper on one side and solid color on the other, perfect for a easily addressed envelope with a pretty liner!

I truly, truly am very excited with all of the new products and look forward to sharing them with you!

Thank you for stopping by today!