I have been slowly but surely working my way through the piles of things that accumulate in a craft room, those things that you think “Oh, I know what to use this for…someday“. I know you know what I’m talking about!! Well, I have actually whittled it down to just the bare minimum of things that I have really been putting off either doing something with or finding a home for. The last stack is a small collection of random pattern paper from a Stampin’ Up! Paper Pumpkin Kit from probably, oh, maybe two years ago? The kit was a 5″ x 5″ scrapbook with pressed cardboard covers and lots of fun papers to decorate the inside with. The kit sat forever and then I finally did something or another with most of it, only keeping a select few pattern papers because they were cute. But I couldn’t store them with all my other papers because they were a different size and my orderly mind just COULDN’T put two sizes together 🙂 Yes, I know you are shaking your head, but it’s the truth. I know that was a long story but that’s how these random pieces of paper have come to be sitting on my desk for months while I worked on everything around them.
And then tonight, I flipped one of them over and discovered the most ADORABLE pink polka dot paper ever, and that was it. I HAD to use it on a card, right there, right then. So I did! (Never argue with inspiration!)
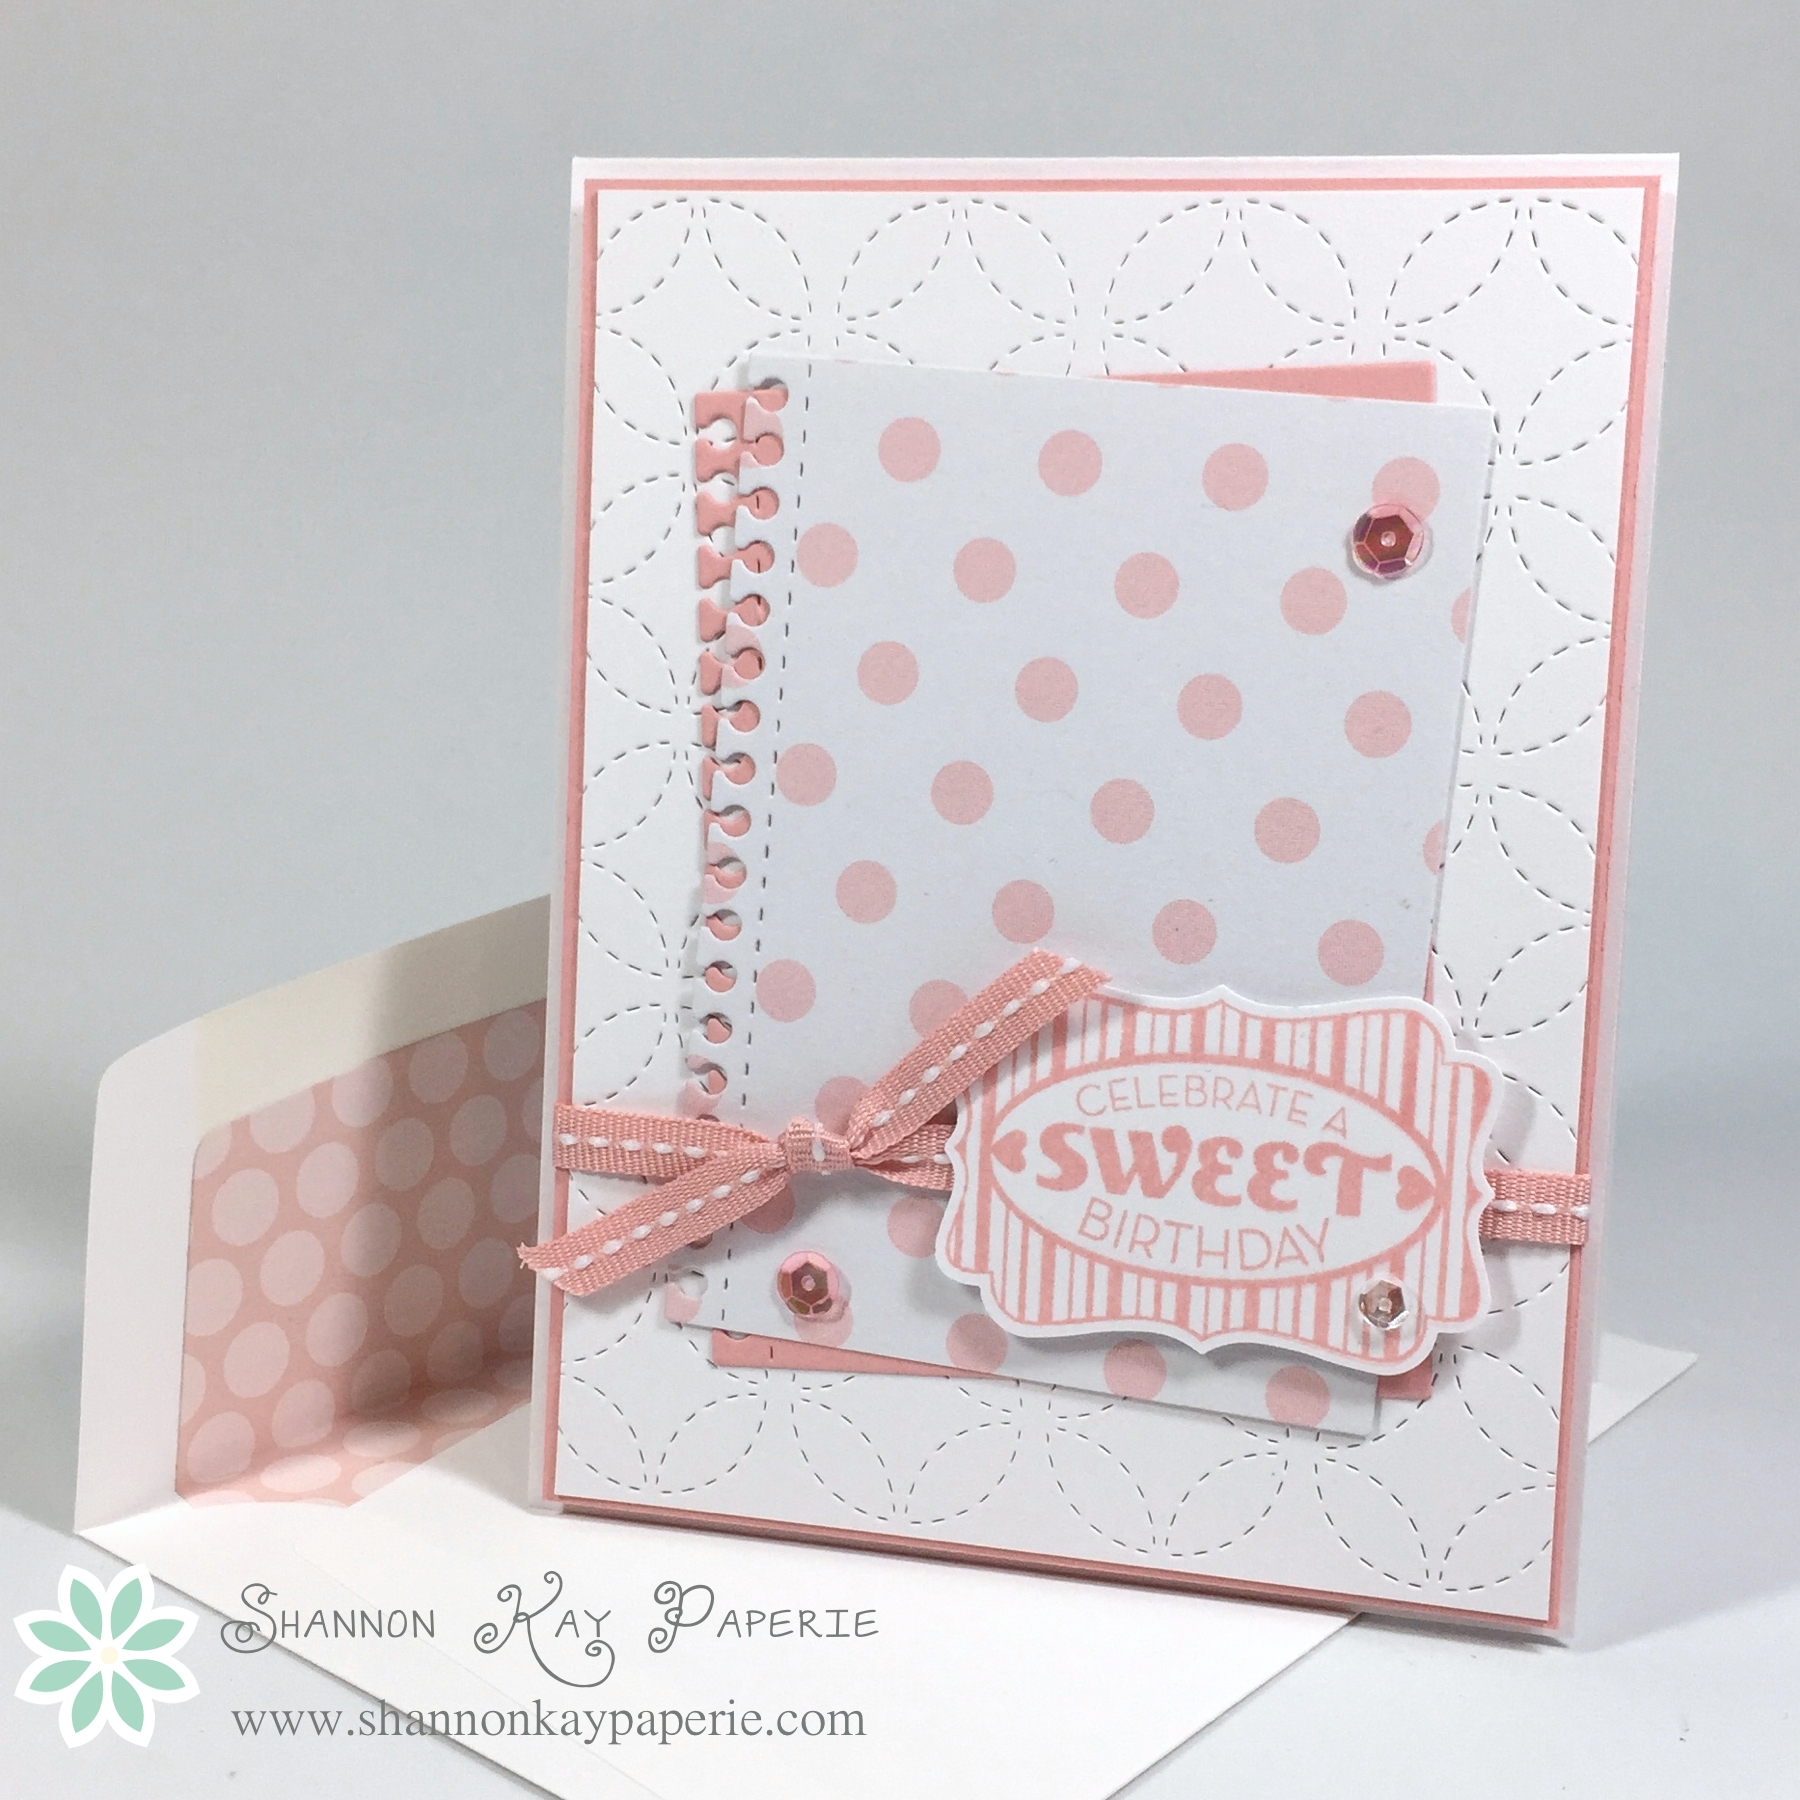 What do you think? Was I right about the paper?? A-D-O-R-A-B-L-E!!!
I also had this white background die cut laying around, cut for a card a few weeks ago and then discarded. So, I had my base, which I layered onto a piece of Blushing Bride card stock and then I used the PTI Monthly Moments: Spiral Notebook Die on my pink pattern paper as well as a piece of Blushing Bride card stock. Just layer them up!
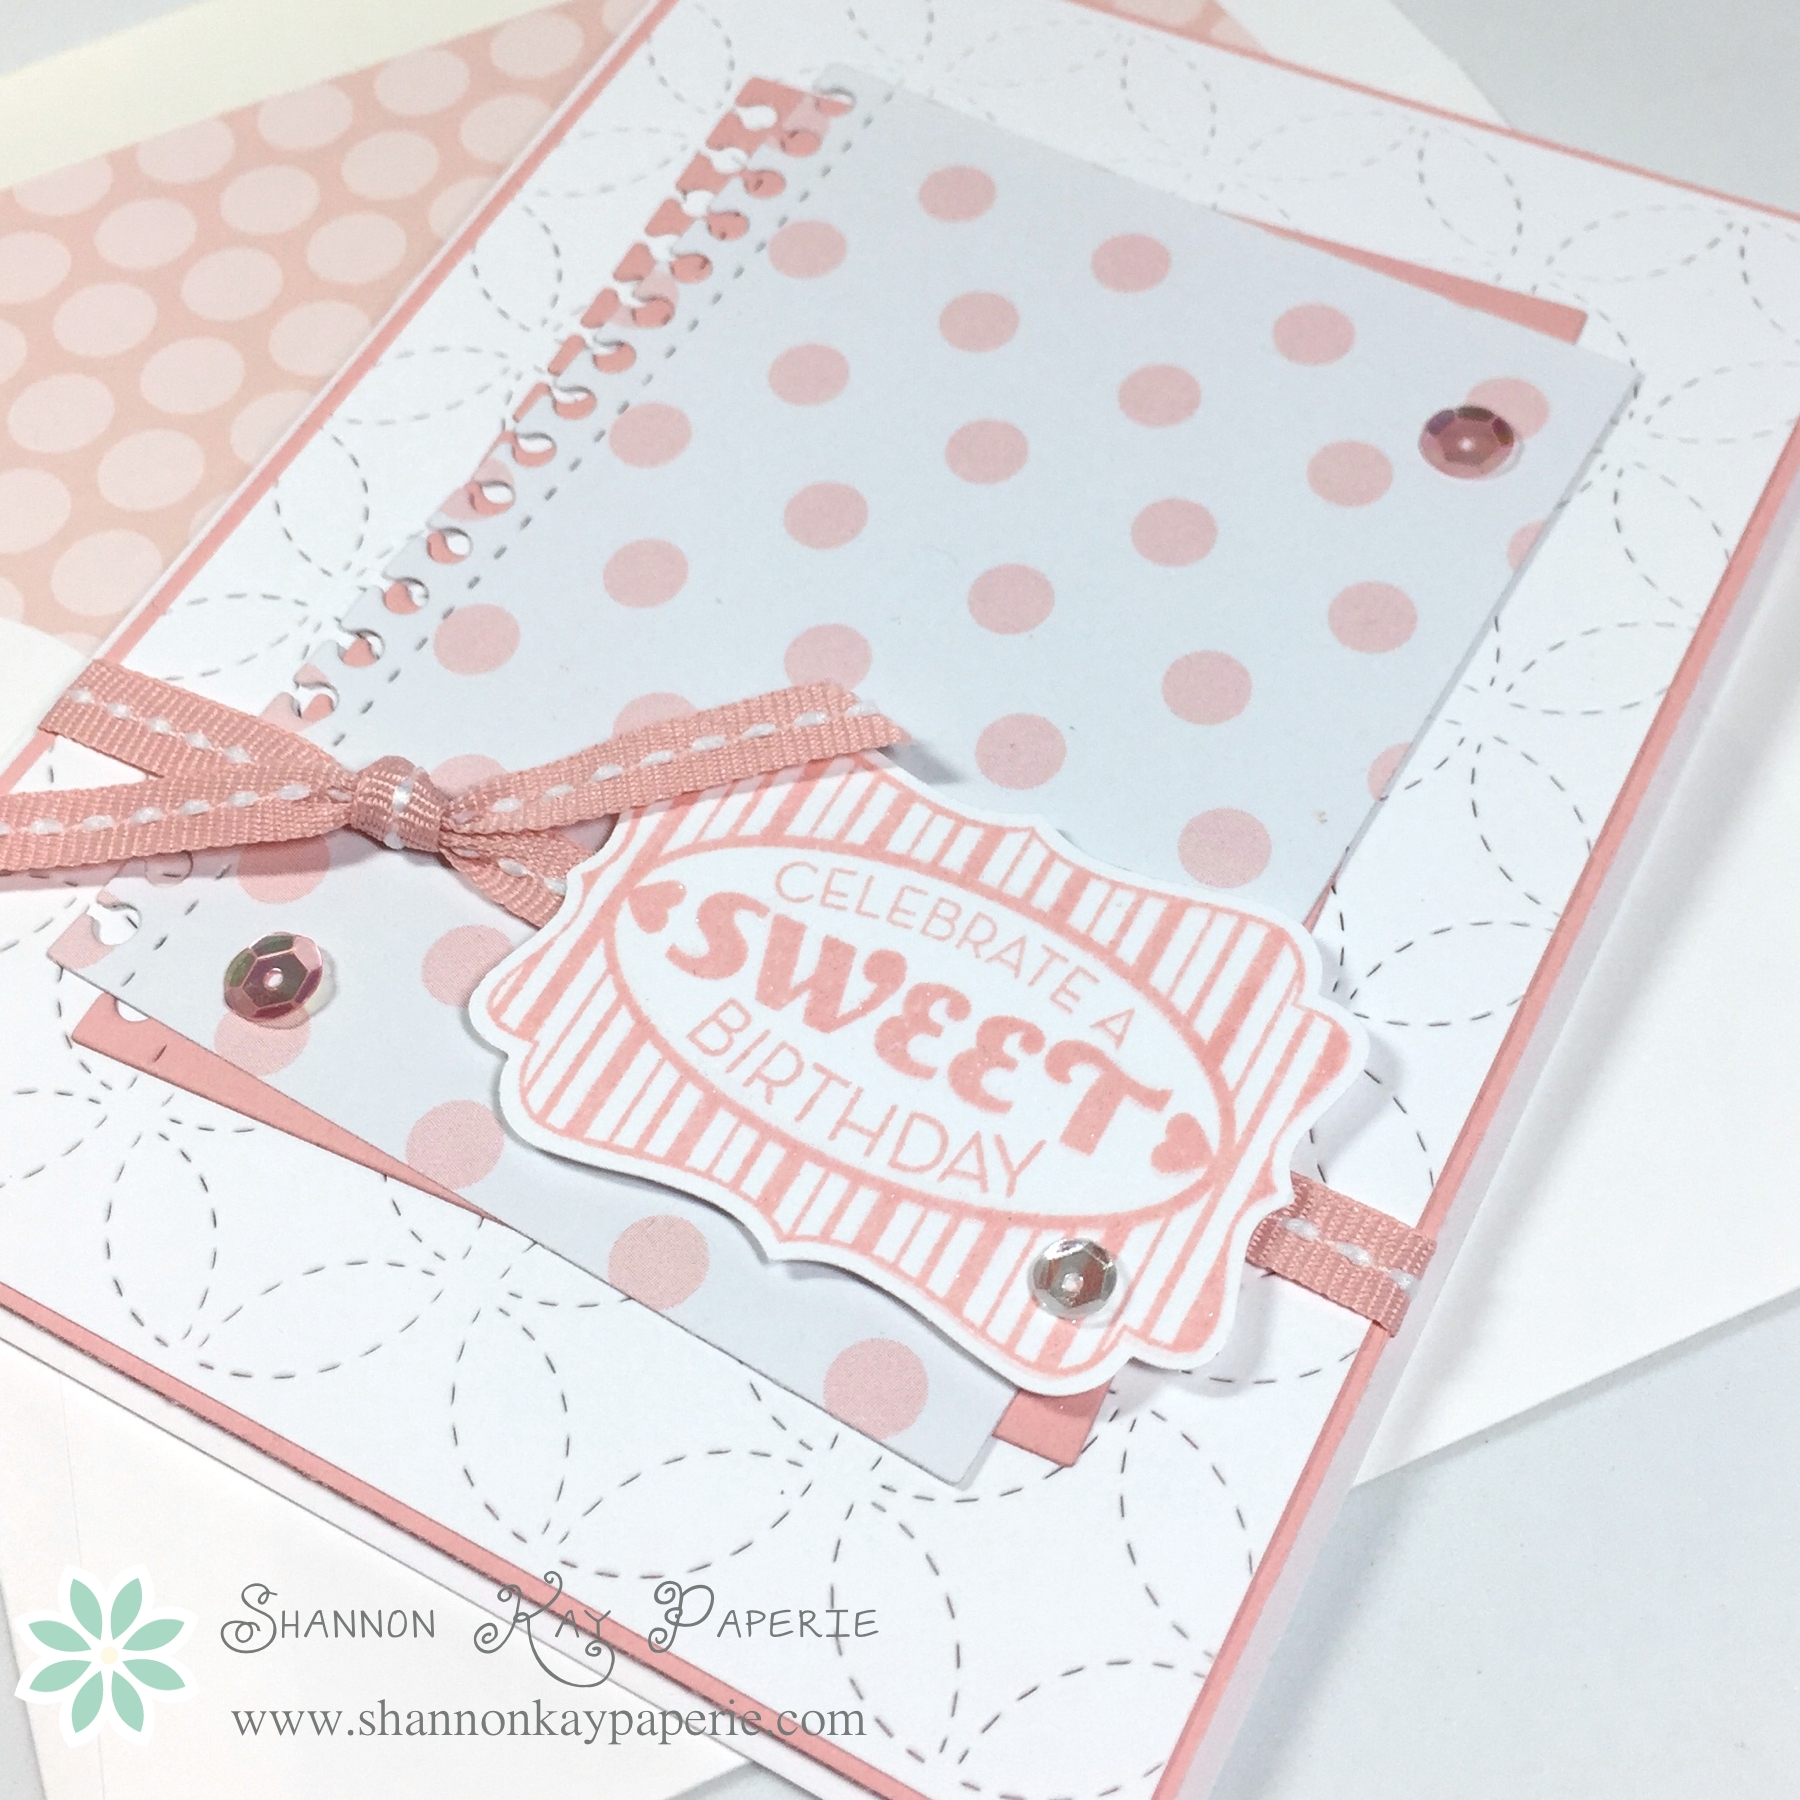
Then I pulled out this Stampin’ Up! stamp set, Cycle Celebration, and stamped it in Blushing Bride ink and punched it out with the coordinating punch. I wrapped it all up with a bit of retired ribbon and even lined my envelope with retired paper! I was on a ROLL!! I added LOTS of Wink of Stella to my sentiment, it just sparkles!
 And then the inside. I just want to say that the Papertrey Ink series of Inside & Out stamps has been a great investment. So many wonderful sentiments and fonts to choose from!
So what do you think? Pretty good for just scraps?? I think so, and had a ball putting it together. I made a second one, I will share that later in the week.
Now, I challenge you to look at your own pile of bits and pieces and see if you can’t create something lovely! (AND get it off your table, an added bonus!)
I would love to hear/see what you were inspired to create! Sometimes I feel like I’m talking to myself, I would really love to hear from you!!
Wishing you joy and blessings!
Products Used:
Cardstock: Stamper’s Select White by Papertrey Ink, Blushing Bride by Stampin’ Up!
Pattern Paper: My Paper Pumpkin by Stampin’ Up!
Ink: Blushing Bride by Stampin’ Up!
Stamps: Cycle Celebration by Stampin’ Up!
Dies: Monthly Moments: Spiral Notebook Die by Papertrey Ink and Envelope Liner Die by Stampin’ Up!
Punches: Decorative Label Punch by Stampin’ Up!
Tools: MISTI by My Sweet Petunia
Embellishments: Misc Sequins and Wink of Stella