Wrapping Up Christmas Part I

Stampin-Up-Season's-Greetings-Holiday-Card-Idea-Christmas-Shannon-Jaramillo-stampinup-SU

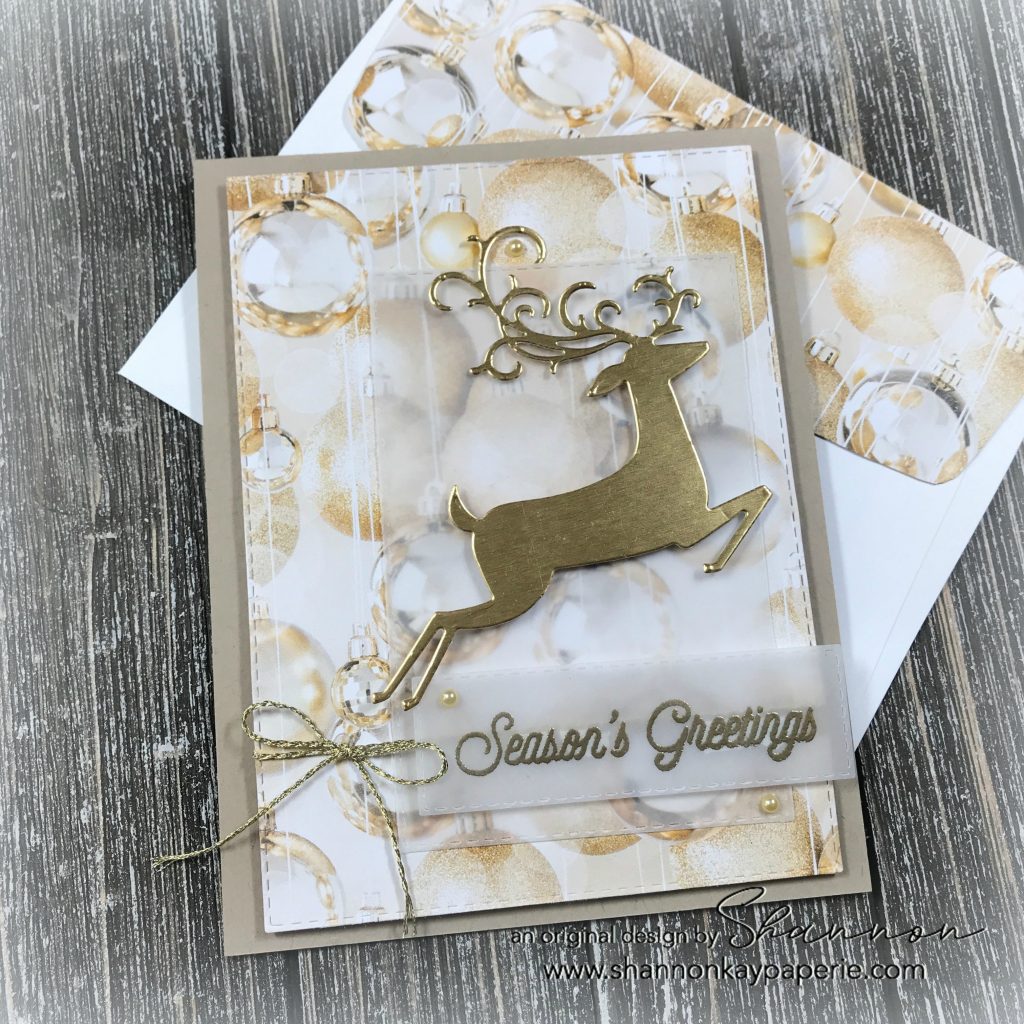
Hello everyone! I hope that the past few days have found you happy and surrounded by love! I created a few last minute cards and want to share with you even though the season is past. The layout and design could easily be converted into whatever type card you might want to make…including getting started on next year’s holiday cards!!

Measurements:

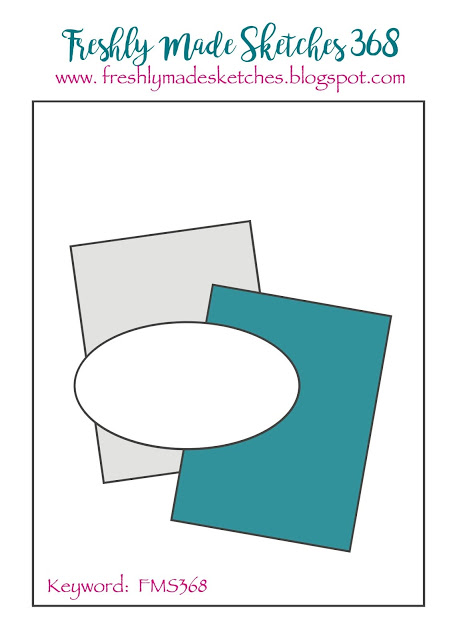
  • Crumb Cake Card Base 4 1/4″ x 11″ scored at 5 1/2″
  • Everything else is a die cut!!

Details:

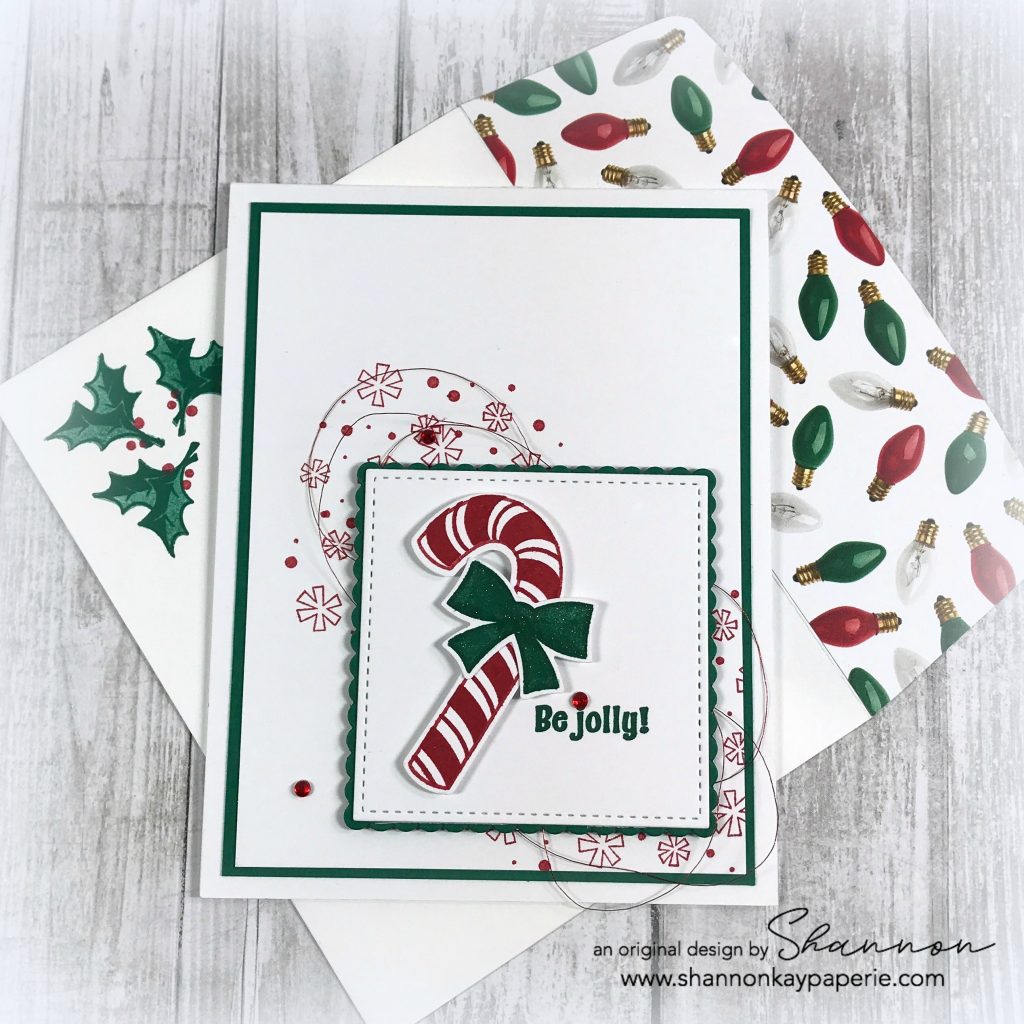
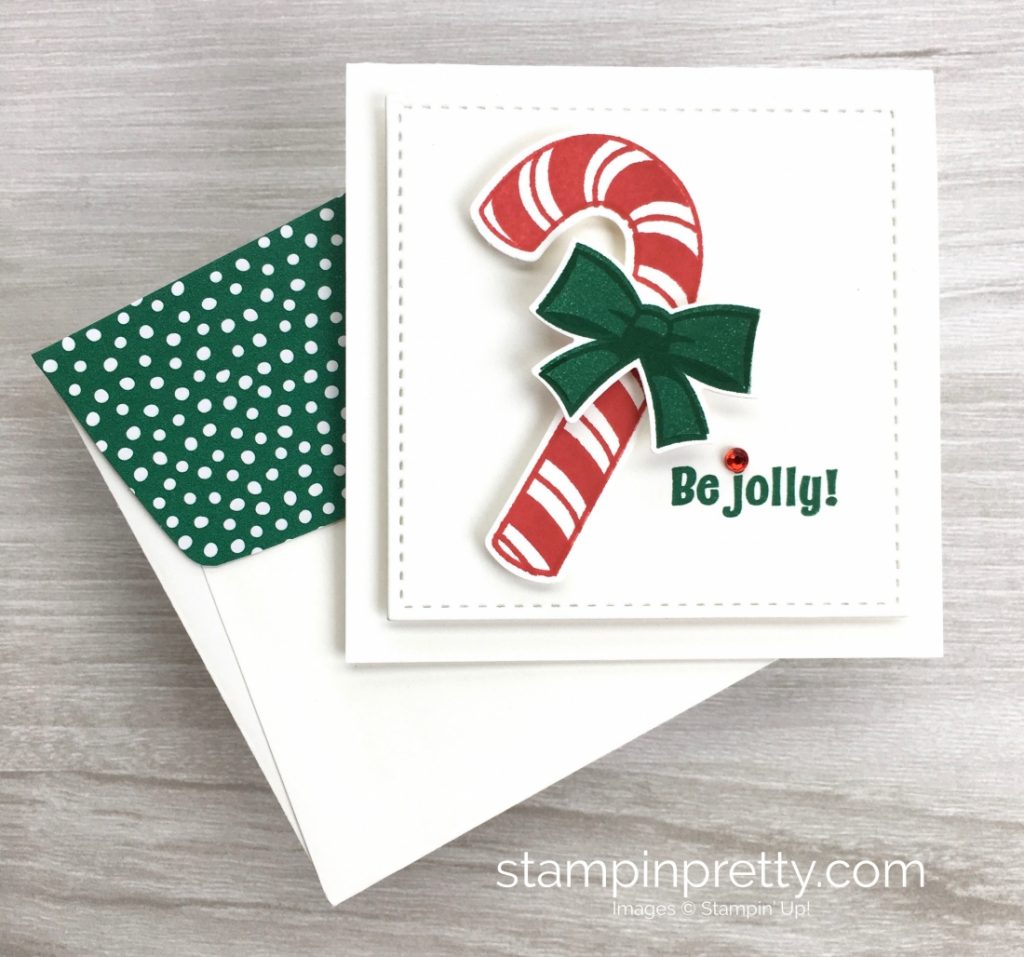
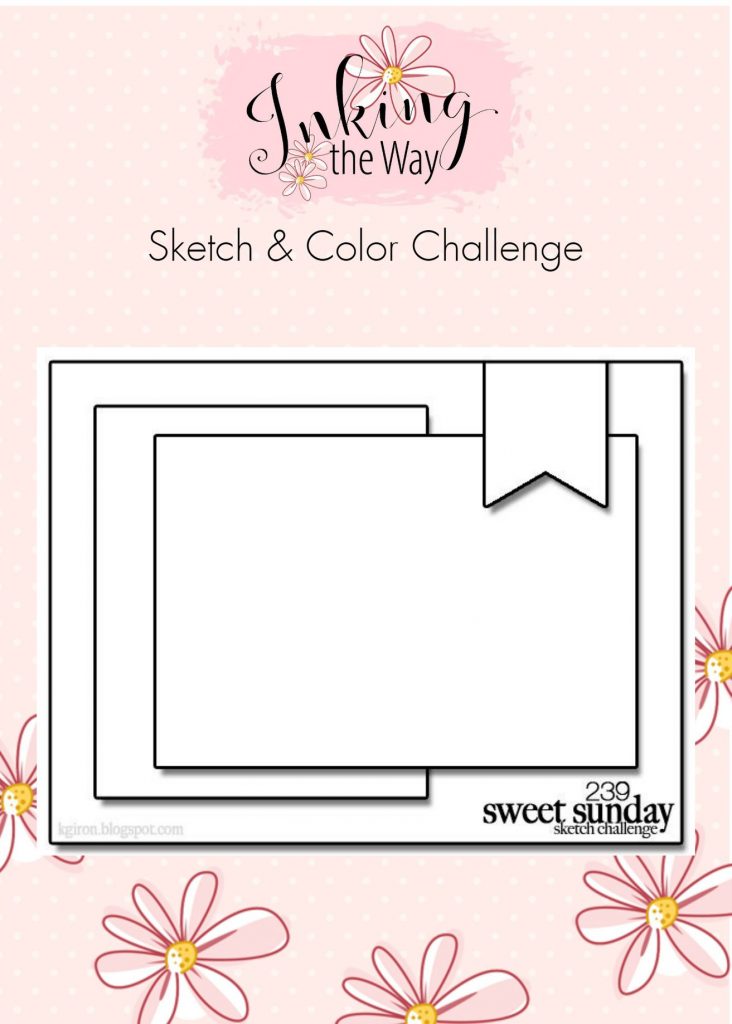
  • CASE (copy and share everything). We’ve talked about this recently, it’s perfect for inspiration because, if you are like me, the moment there is any pressure on me, my creativity flies right out of the window! So I save photos of cards I like for future reference and today’s project is based on one of those saved photos!

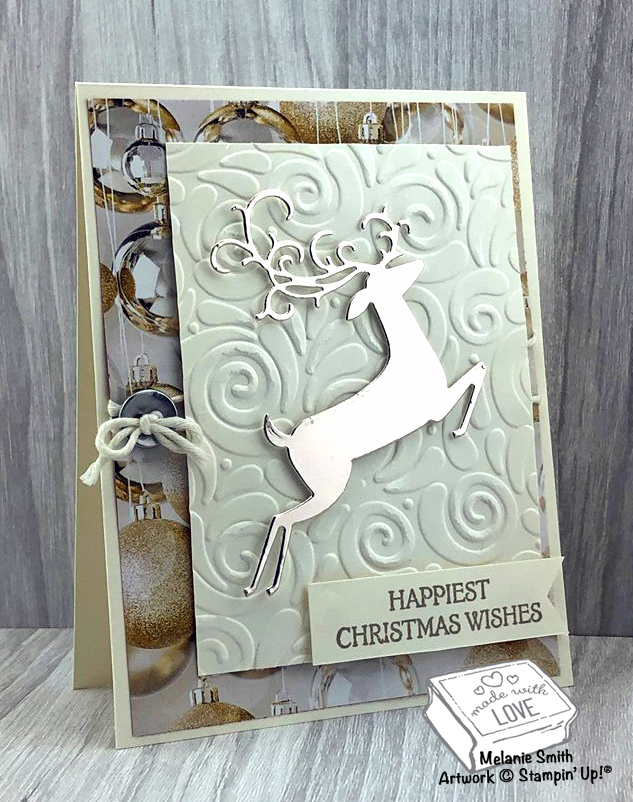
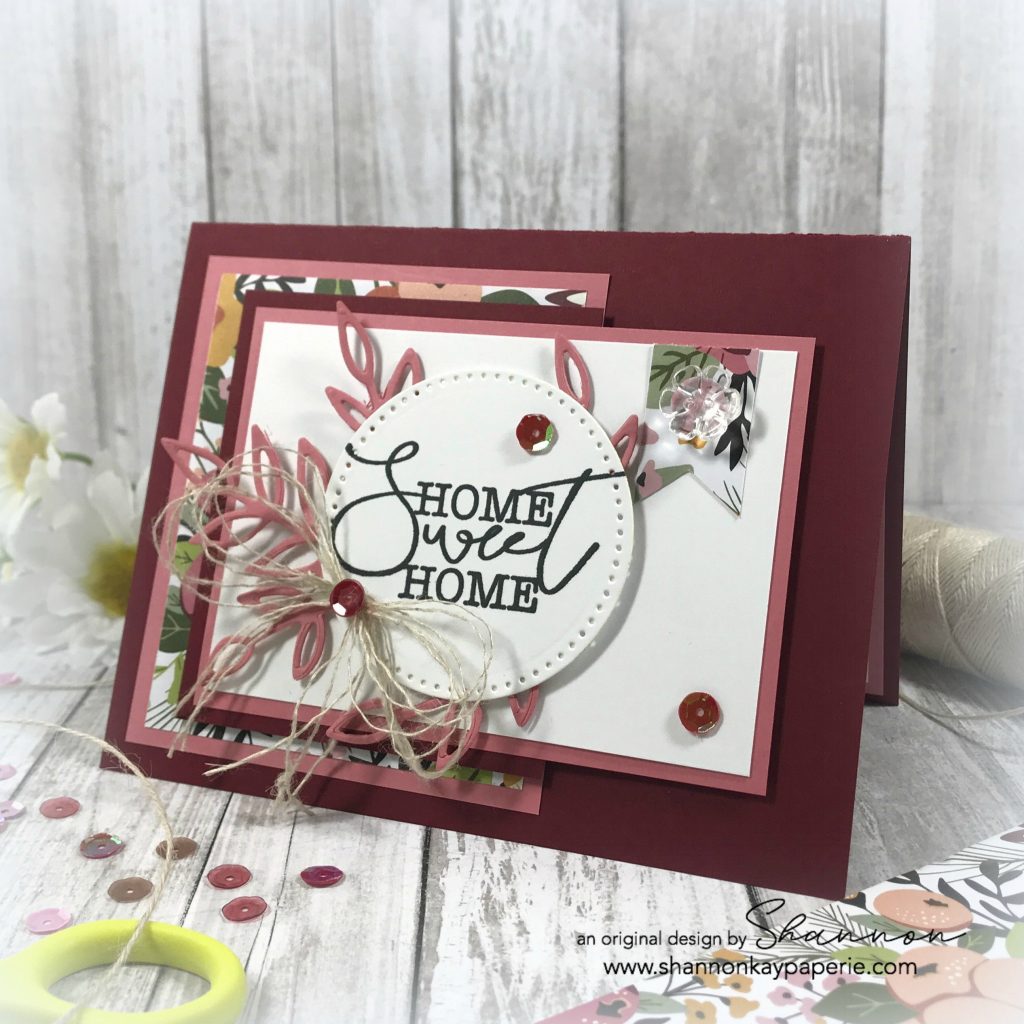
  • I intended to copy this lovely card exactly, but when reading the details of the card’s creation, realized that although the embossed cardstock behind the deer appears to be a soft green (which is what caught my eye), it is actually Very Vanilla. I prefer to create with other neutral colors so I switched gears and just used her lovely card as a jumping off point for mine!
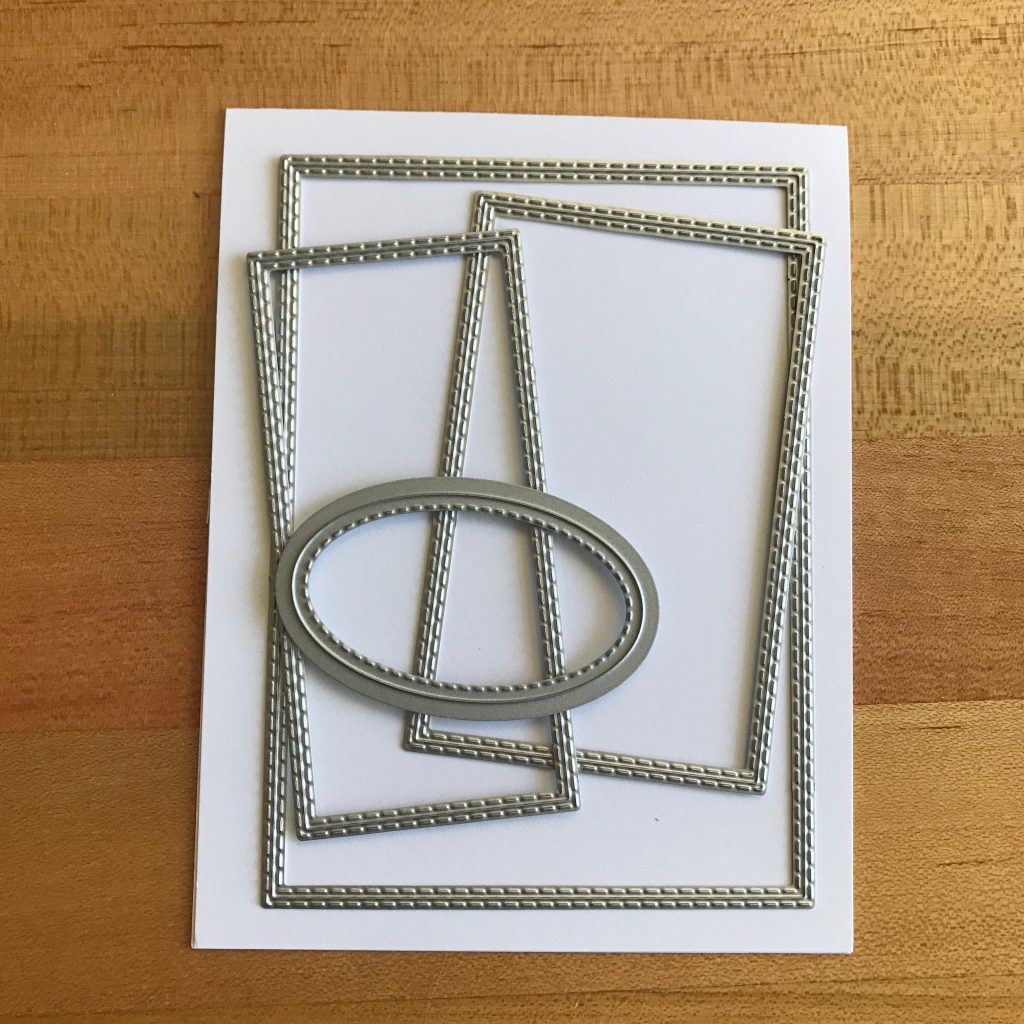
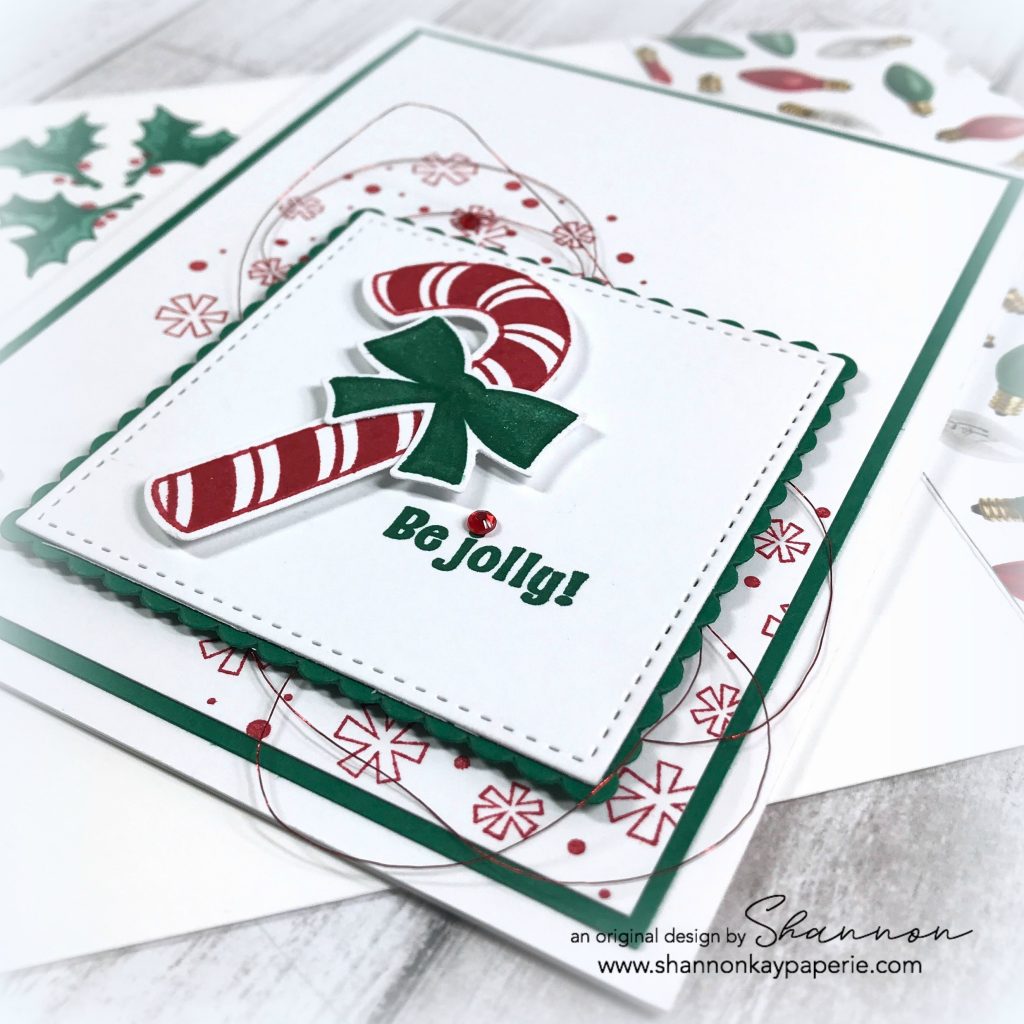
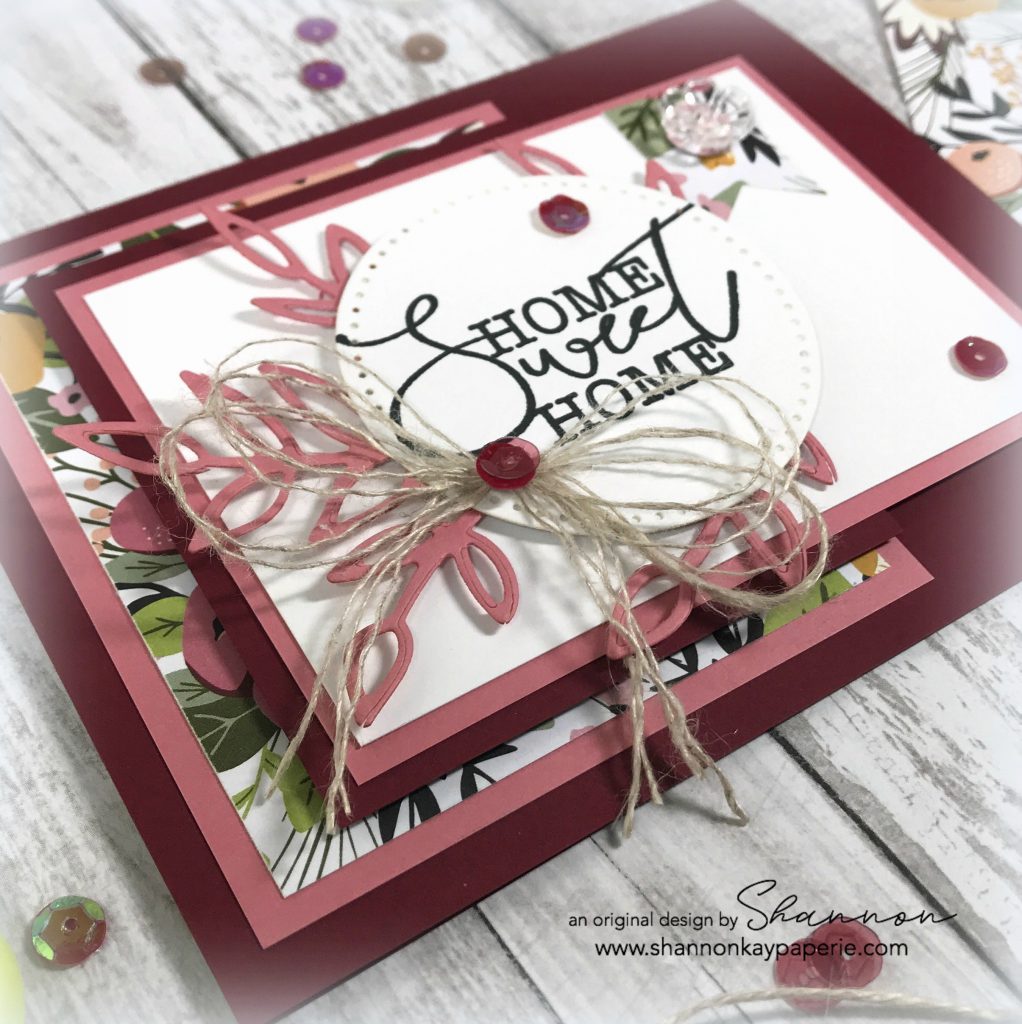
  • I used the upcoming rectangles dies to create all of my layers again! I LOVE having rectangle dies! (and ones that are so different from anything else out there on the market)

Stampin-Up-Season's-Greetings-Holiday-Cards-Idea-Christmas-Shannon-Jaramillo-stampinup-SU

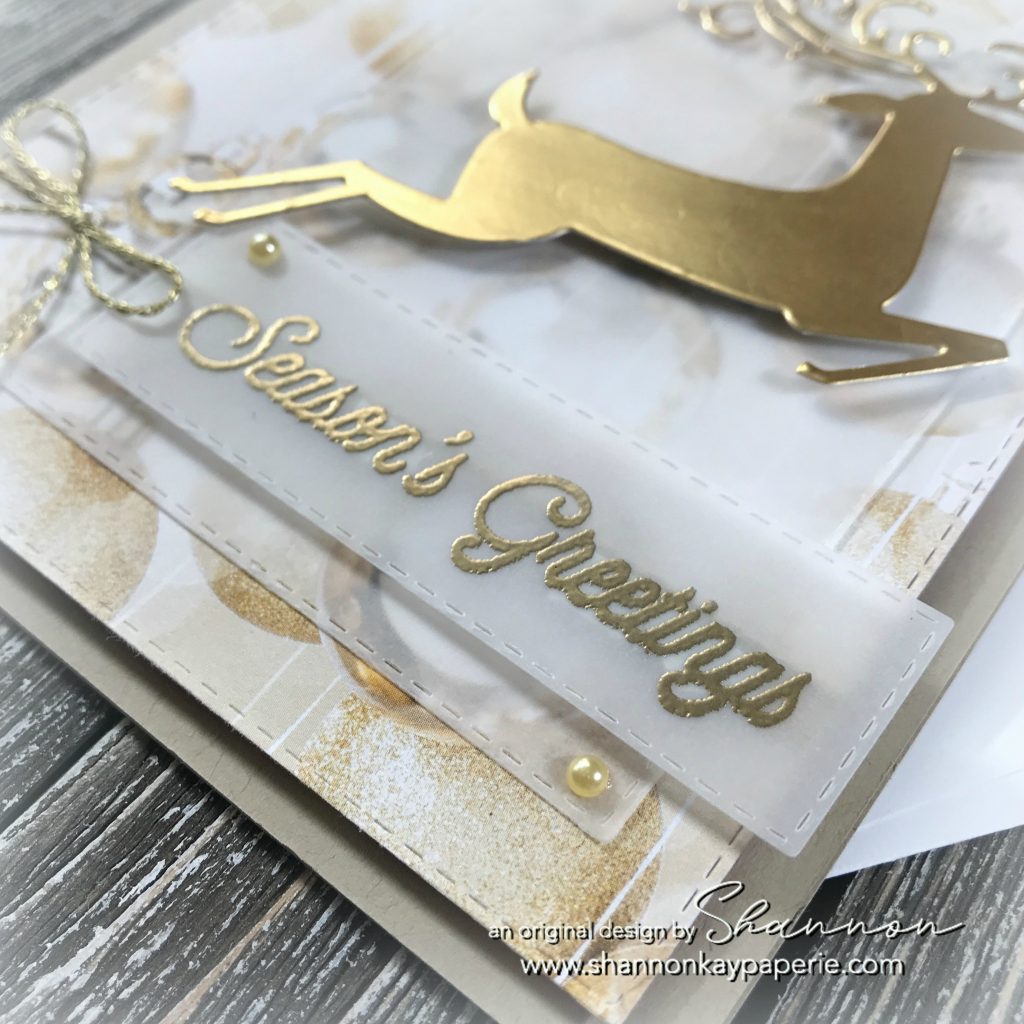
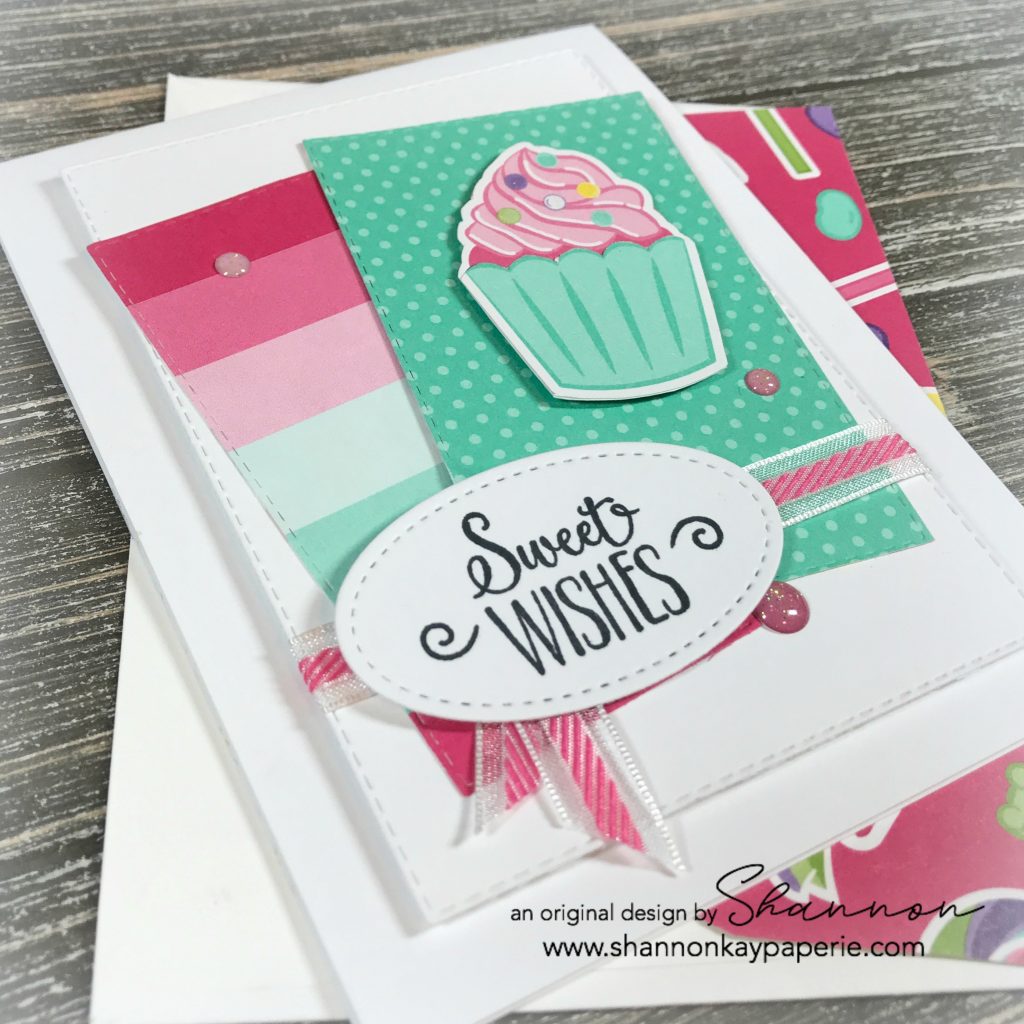
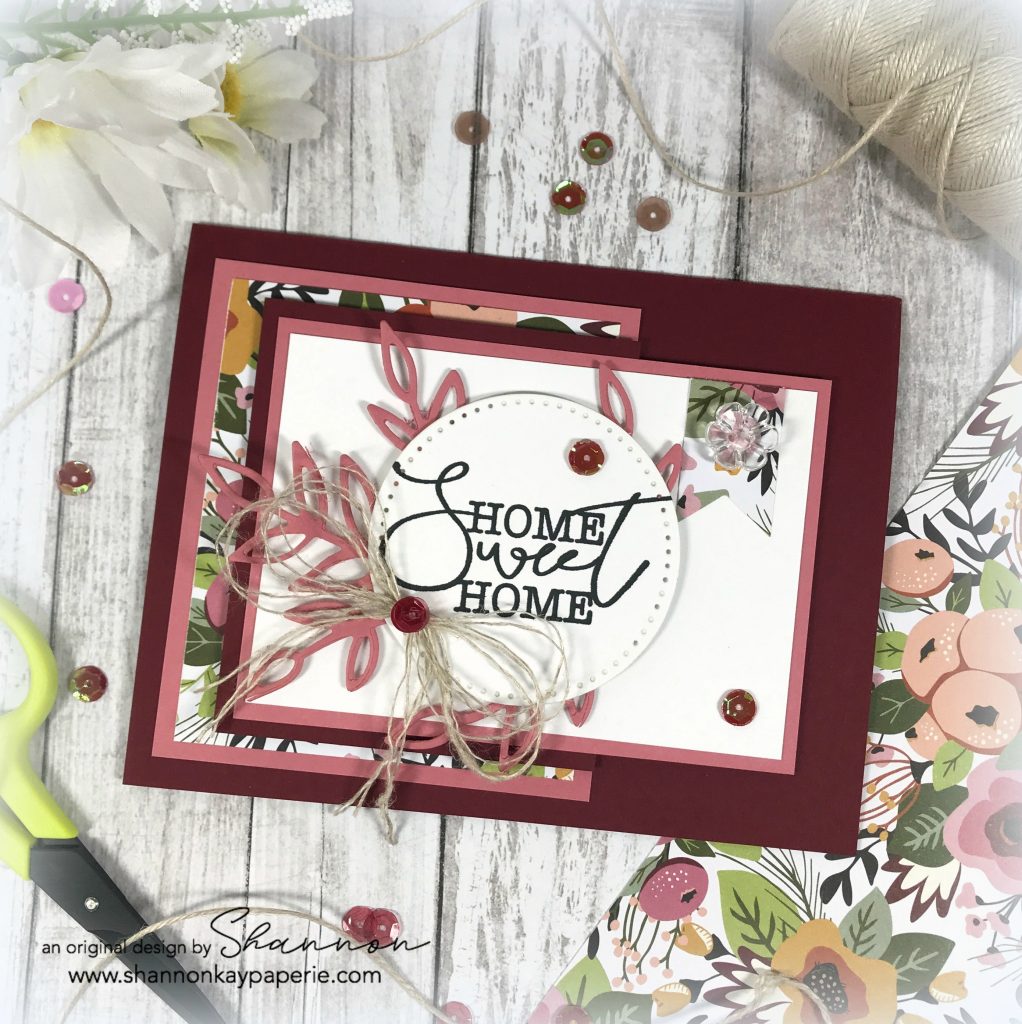
  • Here’s a close up of the large die used for the DSP, the smaller size for the vellum, and the long and skinny one used for the sentiment. They look lovely layered together!
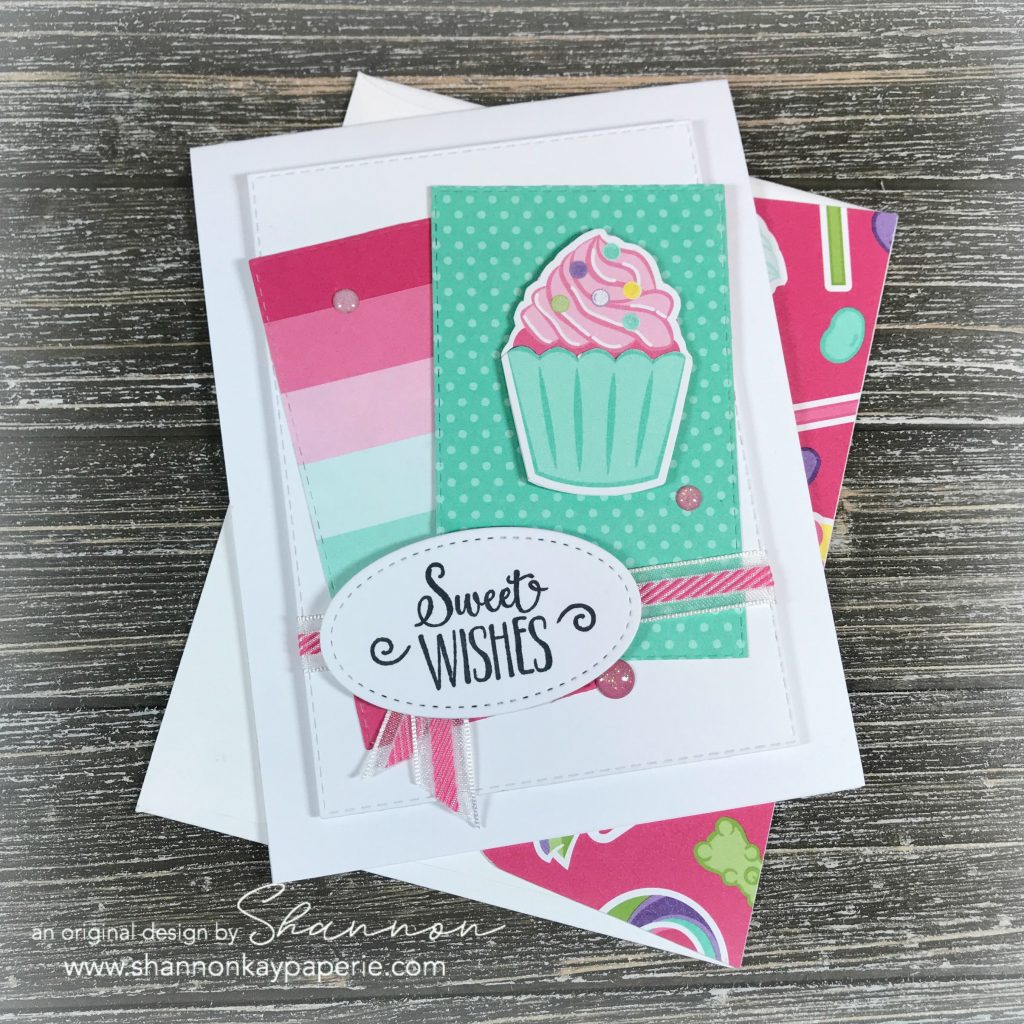
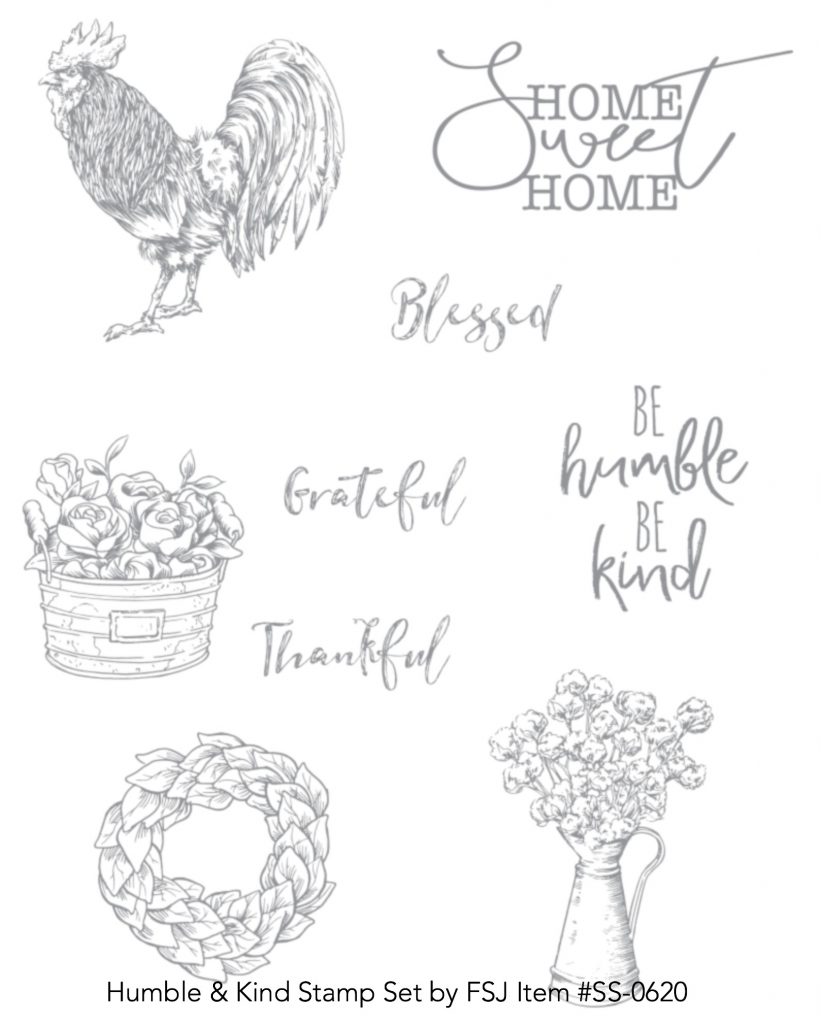
  • I inked up a sentiment from the Bring on the Presents stamp set with Versamark Ink and added gold embossing powder and then heat set it with my Heat Tool. Such a classic font!

Stampin-Up-Season's-Greetings-Holiday-Card-Ideas-Christmas-Shannon-Jaramillo-stampinup-SU

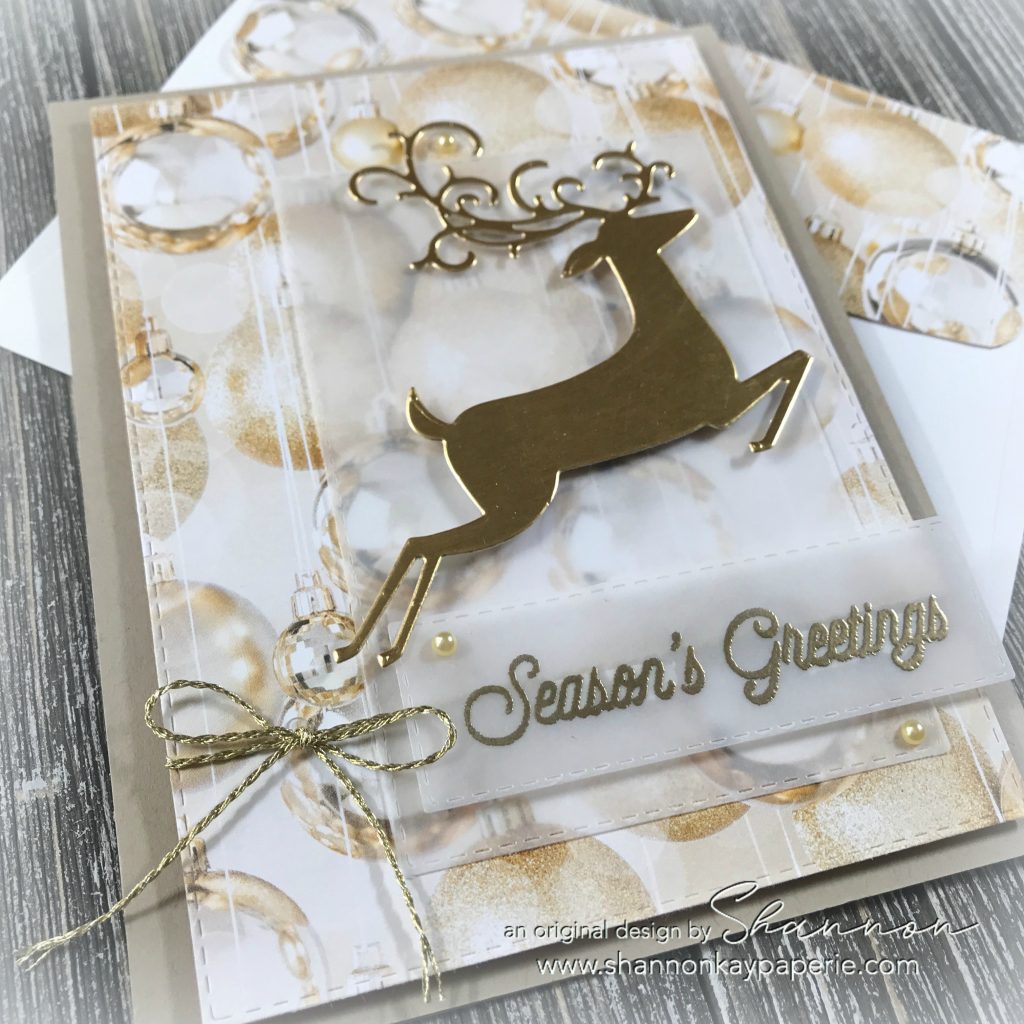
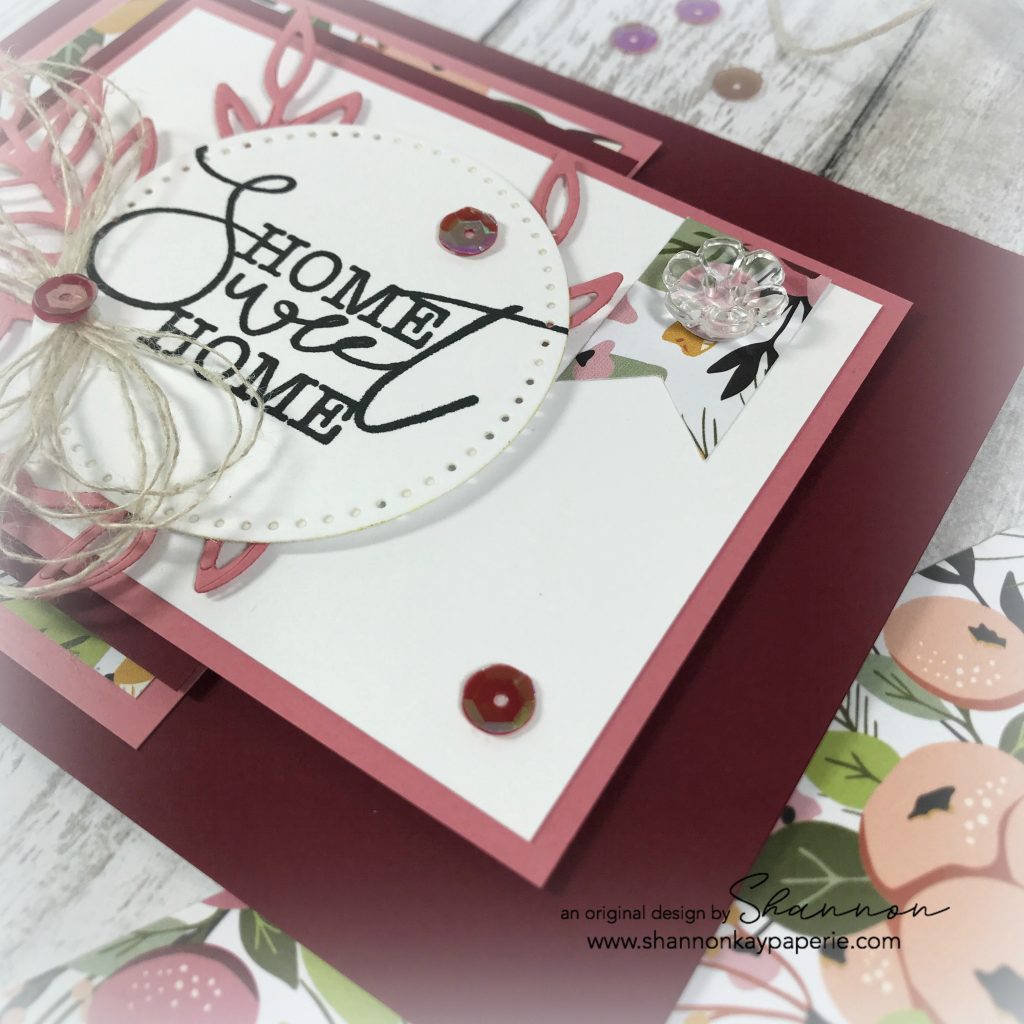
  • I’m enjoying working with patterns that I initially find overwhelmingly busy such as this pattern from the All is Bright DSP pack. I loved how my inspiration card exposed just a bit of it, adding layers really tones it down. I chose to use vellum rather than cover the pattern up completely. I think that all of the gold accents really showcase the beauty of the design.
  • A few strategically placed Artisan Pearls and some gorgeous gold metallic twine finish it off perfectly.
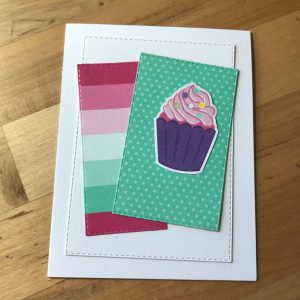
  • Note: I adhered the vellum to the DSP using glue dots placed underneath the deer so they wouldn’t been seen. I trimmed Stampin’ Dimensionals down and placed them behind the die cut deer to adhere him to the vellum as well as trimmed down Stampin’ Dimensionals behind the greeting to adhere that die cut to the card.

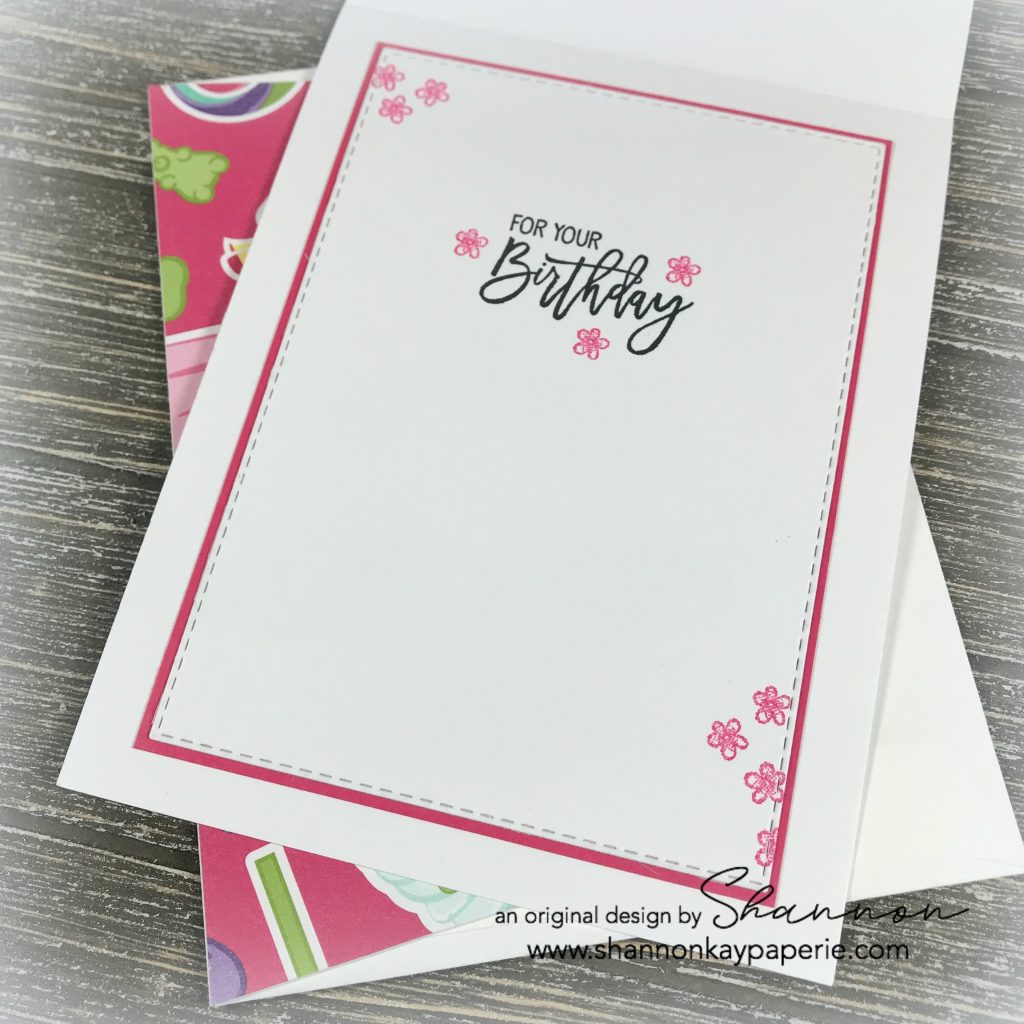
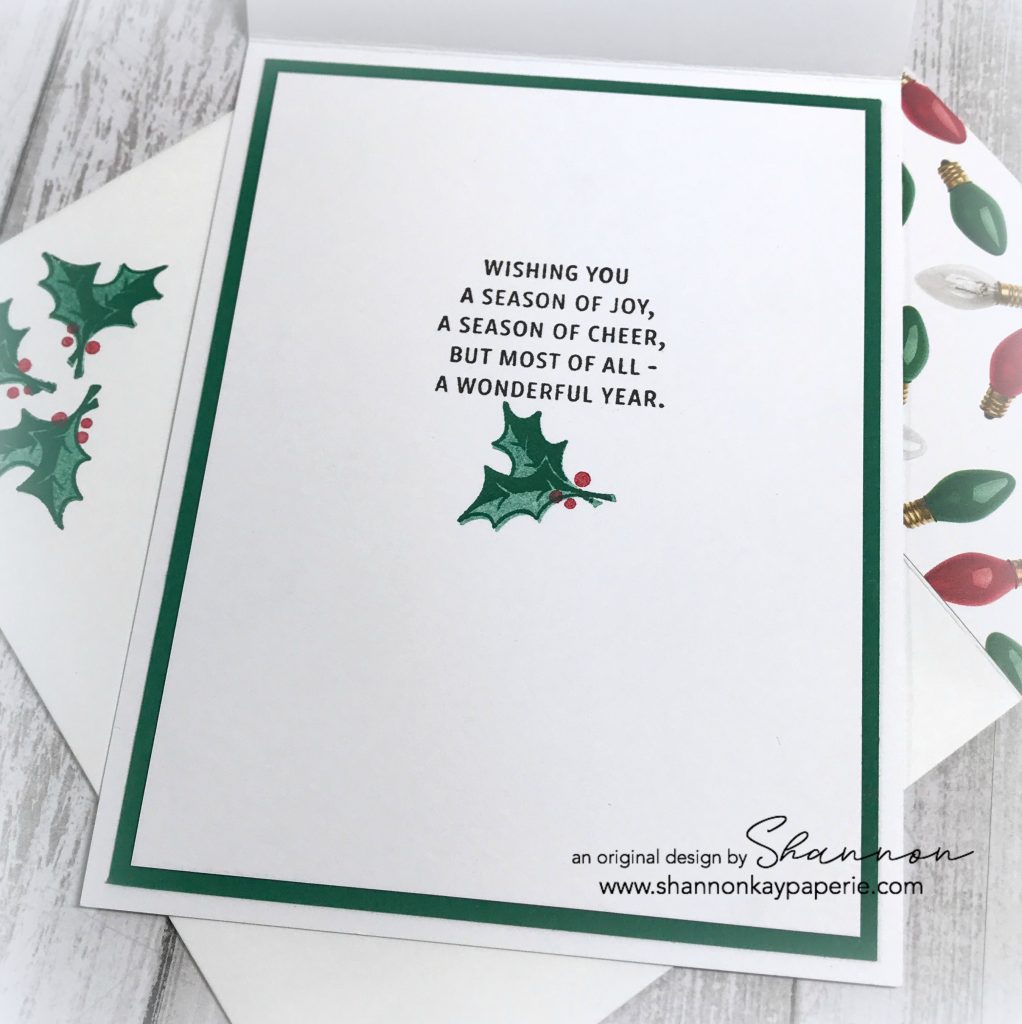
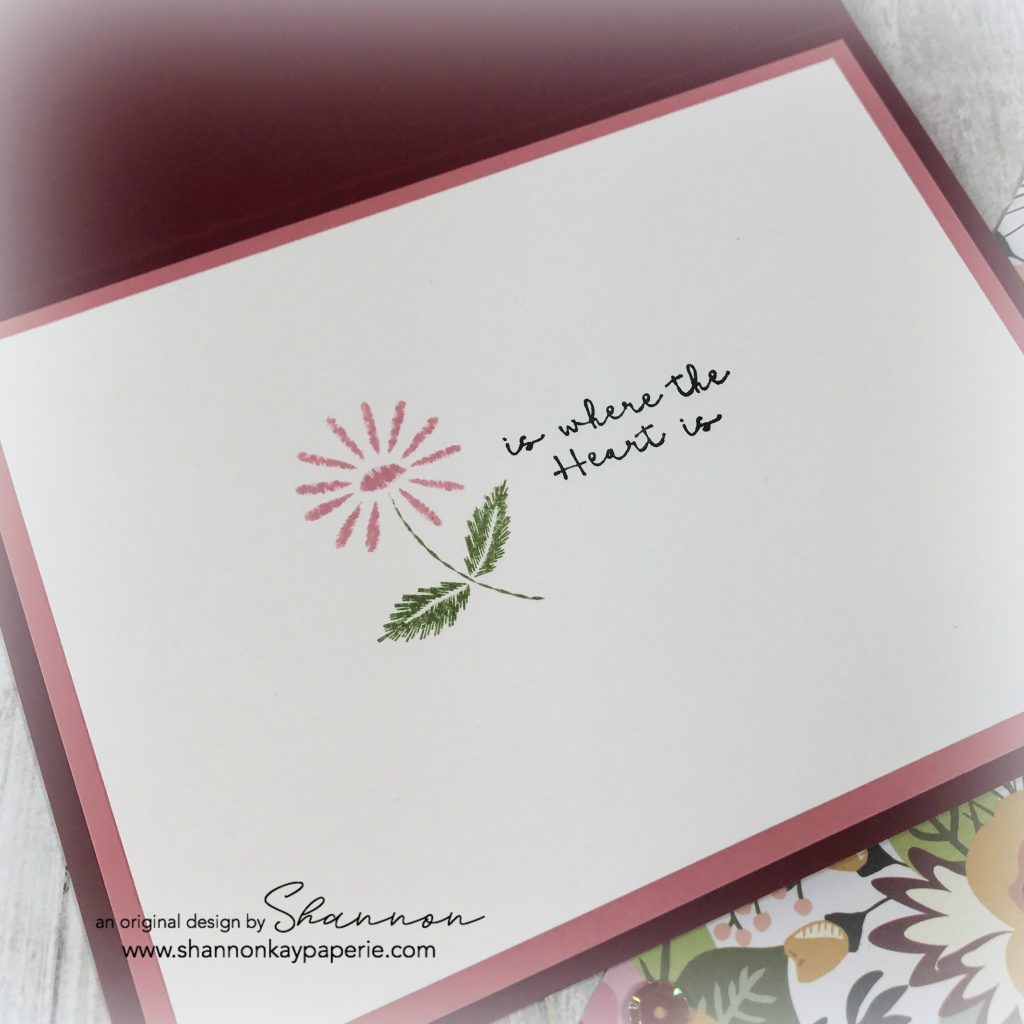
No photo of the inside of the card today as I used simple undecorated white card stock and chose to include a personal message rather than a stamped sentiment.

Thank you for stopping by today! I would love to hear from you and how you celebrated (or not) the holidays!

Blessings!

Supplies (all Stampin’ Up! unless otherwise noted):

Card Stock: Crumb Cake and Vellum

DSP: All is Bright

Ink: Versamark

Stamps: Bring on the Presents

Dies:  Rectangle Stitched Framelits Dies, Detailed Deer Thinlits Dies

Tools: Embossing Buddy, Heat Tool Big Shot

Embellishments: Artisan Pearls & retired gold metallic twine

Other: Whisper White Envelope

How Sweet It Is – Freshly Made Sketches 368

Stampin-Up-How-Sweet-It-Is-Holiday-Christmas-Card-Idea-Shannon-Jaramillo-stampinup-SU

Hello My Friends! Are you knee deep in holiday preparations and celebrations? Me too but when my Stampin’ Up! preorder of new goodies from the upcoming Occasions and Sale-A-Bration catalogs came in, I MADE time to play!

Measurements:

  • White Card Base 4 1/4″ x 11″ scored at 5 1/2″
  • Everything else is a die cut!!

Details:

  • My jumping off point for today’s card was the latest Freshly Made Sketches challenge. I loved the design and the opportunity to break in my brand new Stampin’ Up! Stitched Rectangle Dies! Yes! January 3, 2019 is the day they will be available for purchase!

  • I thought I would share with you a few process photos today, this one shows how I arrived at my basic layout – all with dies! And can you see how the rectangle on the left is more narrow than the other two? They have given us choices! Love it!
  • It just took a few minutes to decide which patterns to use for my layout – the new ‘How Sweet It Is’ DSP in the Occasions catalog made it very easy – AND provided me with these darling cupcakes to use as a die cut! The two cupcakes below were each hand cut out of one the patterns of the DSP (I used this pattern for the envelope flap as well).

  • I couldn’t decide which cupcake to use! The top cupcake used the color Gorgeous Grape for the cupcake liner but I didn’t have Gorgeous Grape anywhere else on my card so I felt that the color actually took away from my overall design. And the Coastal Cabana cupcake liner with the white frosting in the bottom photo blended too easily with the patterned paper behind it. WHAT TO DO???

Stampin-Up-How-Sweet-It-Is-Holiday-Christmas-Card-Ideas-Shannon-Jaramillo-stampinup-SU

  • I fussy cut the Coastal Cabana cupcake liner and adhered it right on top of the Gorgeous Grape cupcake liner to create my own custom combination! There are four different cupcakes in the patterned paper to create SO many custom options! And I love that the images already come white the white outline…SO simple to cut out!
  • This darling sentiment (love the font!) is from the ‘Hello Cupcake’ photopolymer stamp set that you will be able to get free with your $50 purchase of any product! Super cute stamp set, I’ll be back with more samples soon!
  • The embellishments are all retired. The super sparkly and scrumptious enamel dots retired with the last annual catalog but you could easily use whatever you have on hand. The darling ribbon is VERY retired…like maybe 7 years ago? It also came in Old Olive and Marina Mist and was quite unlike any ribbon I had seen before so I kept it, and I’m thrilled to have the opportunity to use it!!
  • The large white rectangle is popped up using white craft foam and the cupcake and sentiment are both popped up with Stampin’ Dimensionals.

Stampin-Up-How-Sweet-It-Is-Holiday-Christmas-Cards-Ideas-Shannon-Jaramillo-stampinup-SU

  • I die cut another rectangle for the inside the same size as the one on the outside and then trimmed it out with Melon Mambo card stock. These super sweet flowers are from the ‘Hello Cupcake’ stamp set again (they are just the perfect size for an accent!) and the sentiment is from a stamp set that you will be able to purchase from the Occasions catalog called ‘Birthday Cheer’. Super fun fonts in this set!!

Here is the sketch from the Freshly Made Sketches design team that inspired today’s project:

I had such a fun time using this sketch and all of the bright new products available Jan 3rd from the Occasions catalog – it’s always fun to play with brand new stuff!!

Thank you for taking the time to visit me today and I hope that you have a wonderful holiday! I will be back next week with new projects!

Blessing to you!

Supplies (all Stampin’ Up! unless otherwise noted):

Card Stock: Melon Mambo and Stamper’s Select White by Papertrey Ink

DSP: How Sweet It Is

Ink: Melon Mambo and Versafine Onyx Black

Stamps: Hello Cupcake (outside Greeting); Birthday Cheer (inside greeting)

Dies:  Rectangle Stitched and Stitched Shapes Framelits Dies; retired Envelope Liner Die

Tools: Candy Cane Builder Punch; Stampin’ Trimmer

Embellishments: Glitter Enamel Dots and 3/8″ Melon Mambo ribbon, both retired

Other: Whisper White Envelope

Candy Cane Season – CASEing Christmas

Stampin-Up-Candy-Cane-Season-Holiday-Christmas-Card-Idea-Shannon-Jaramillo-stampinup-SU

What exactly is ‘CASEing’? It’s an acronym that stands for ‘Copy and Share Everything’. If you struggle to come up with card layouts – stop! Card making is supposed to be FUN so let’s make it fun! Google the name of the stop set you want to use and scroll through the images until you find one you like and copy it! There is no shame in it! Or, scroll through Pinterest until you find something interesting and copy it! Or use it as a jumping off point for whatever it triggers in your head! I tend to save a photo of cards that inspire me and then scroll back through the photos for inspiration. DO IT!! My only caveat is that if you put your card out onto the web, please be sure to credit the original designer. That’s just proper etiquette. So, go for it!

Measurements:

  • White Card Base 4 1/4″ x 11″ scored at 5 1/2″
  • Shaded Spruce Card Stock Layer 5 1/8″ x 3 7/8″
  • White Stamped Layer 5″ x 3 3/4″

Details:

  • I adore the crisp and clean look of Mary Fish’s card (shown below) using the Candy Cane Season stamp set and couldn’t wait to recreate it. It’s perfect! I did however, want to make it in the A2 size rather than a gift tag size

  • Because I knew that I would be adding layers, I went ahead and added a scalloped square behind the stitched layer to add definition.
  • The candy cane and bow were SOOO easy to stamp and then punch out with the coordinating punch!!

Stampin-Up-Candy-Cane-Season-Holiday-Christmas-Cards-Ideas-Shannon-Jaramillo-stampinup-SU

  • I then pulled out a darling retro snowflake stamp from the same stamp set (totally reminds me of Frosty the Snowman) and my retired Stamp-A-Ma-Jig (which BTW is currently on the clearance rack at Stampin’ Up’s online store if you want to pop over and grab one) and added some carefully placed snowflakes. And, in my world, snowflakes can be red 😉
  • I added more Shaded Spruce behind the white stamped panel for extra ‘pop’ and then attached some retired red thread to the stitched square and popped everything up with Stampin’ Dimensionals! I think it’s so fun!
  • I made a boo-boo when stamping my red snowflakes and overlapped some, but not to panic!, I just added another red rhinestone to that spot and the rhinestone takes all the attention away from the mistake! Of course I had to add another red rhinestone to create a visual triangle!

Stampin-Up-Candy-Cane-Season-Holiday-Christmas-Cards-Idea-Shannon-Jaramillo-stampinup-SU

  • A bit of decorating on the inside and the envelope and this one’s ready to go!

I think would be an easy card to mass produce and will probably do so to get ahead for next year (yeah, right, don’t we say that every year?!? haha)

My Christmas shopping is pretty easy now the my kids are grown and I don’t have grand babies yet so I’m just stamping away over here!!

Have a wonderful rest of your week with all that that entails at this time of the year and I am looking forward to sharing new products with you after the holiday!

Blessings!

Supplies (all Stampin’ Up! unless otherwise noted):

Card Stock: Shaded Spruce and Stamper’s Select White by Papertrey Ink

DSP: All is Bright

Ink: Shaded Spruce, Real Red and Versafine Onyx Black

Stamps: Candy Cane Season and Snowflake Sentiments (inside greeting)

Dies:  Stitched Shapes and Layering Squares Framelits; retired Envelope Liner Die

Tools: Candy Cane Builder Punch; Stampin’ Trimmer

Embellishments: Red Rhinestone Basic Jewels

Other: Whisper White Envelope

Turning My Thoughts Toward Fall…

Yesterday was the 1st of September and seeing all of the “Fall” photos in my FB and Instagram feeds inspired me to give some of my fall themed stamps some love. We don’t really get “Fall” here in Southern California. We get hot, we get windy, and we get fires, but actual “Autumn” things, not so much. So we create our fall with fake decorations! I will be pulling mine out this next week but in the meantime, here’s a taste of fall:

Stampin-Up-Sunflower-Serenade-Love-&-Friendship-Card-Idea-Shannon-Jaramillo-stampinup

What do you think? I think it’s yummy and is inspiring me to go with a sunflower fall motif this year!

Measurements:

  • PTI Rustic White Card Base 4 1/4″ x 11″ scored at 5 1/2″
  • PTI Rustic White Layer 4″ x 5 1/4″
  • Soft Suede Layer 2 3/4″ x 5″
  • Old Olive Layer 2 1/2″ x 4 3/4″
  • PTI Rustic White Stamped Layer 2 1/4″ x 4 1/2″

Details:

  • I came across this Stampin’ Up! stamp set a few months ago on one of the FB resale groups I belong to and I was SO HAPPY to be able to claim it! The set is called “Sunflower Serenade” and it’s SU circa 2001. It’s 17 years old but the design is timeless!
  • I first stamped the image with Tuxedo Black Memento Ink and then used the Stampin’ Blends to color everything in. I like to layer color so I won’t lie to you, I colored this image probably five times, making mistakes along the way. But I didn’t worry about it too much as I’m learning the in’s and out’s of the Stampin’ Blends.
  • After all of my redos, I settled on using the Light Daffodil Delight Stampin’ Blends Marker and then followed it up with a layer of Dark Daffodil Delight. I learned to apply the light color and then wait for it to dry before applying the darker color, AND to not get too close to the edge! I kept having the ink bleed out because there was too much and the Color Lifter couldn’t push it back in because everything was still wet. It is important to note that I am NOT using Whisper White card stock. I’m sure I would not have had so many issues if I had used the proper paper, but Whisper White is too yellow of a white for me. So Papertrey Stampers’ Select or Papertrey Rustic White are my go to’s.

Stampin-Up-Sunflower-Serenade-Love-&-Friendship-Card-Ideas-Shannon-Jaramillo-stampinup

  • Something else that I tried and was very pleased with was that I colored all of the flowers, stems, and leaves with the Light Daffodil Delight color and then went over it with a coat of Light Old Olive. I love how the color turned out, the yellow and green work so well together!
  • I also used my Old Olive Stampin’ Write marker to define the leaf details and used Light Crumb Cake, Dark Crumb Cake and the the Bronze Stampin’ Blends for the flower centers. Probably overkill, but I think they look pretty 🙂
  • Did you see all of the shine on the flowers? I used Journey Glaze on them, just like I used on my last card, and I adore how it turned out! They REALLY pop!

Stampin-Up-Sunflower-Serenade-Love-&-Friendship-Cards-Ideas-Shannon-Jaramillo-stampinup

  • I have a tendency to keep adding “things” until I get the balance right. For this card I added Soft Suede ribbon (probably long retired) and Old Olive ribbon which was current as of last year. Then I went through my paper stash to find this adorable pattern in the “Moroccan” DSP pack from a few years back and die cut a stitched circle out of it to layer behind my stamped panel.
  • It still wasn’t enough so I pulled out my trusty Linen Thread, made a pretty bow and then topped it off with a long retired Soft Suede button. Yum!!

Stampin-Up-Sunflower-Serenade-Love-&-Friendship-Card-Idea-Shannon-Jaramillo-stampinup

  • As you can see, I had trouble stopping so I continued on and stamped and colored the envelope too. I should mention that I did add two of my “oops” pieces of cardstock in the envelope to protect the back side of the envelope from bleed thru from the markers. And of course, a pretty envelope flap!
  • But what about the inside? Yep, I decorated it as well but kept it simple:

Stampin-Up-Sunflower-Serenade-Love-and-Friendship-Card-Idea-Shannon-Jaramillo-stampinup

  • The little bumblebee is from the same stamp set but the sentiment is from a different set. It’s a very old set as well, I just don’t know the name of it at the moment. I think the bumblebee steals the show 🙂

So there you have it. I truly enjoyed creating this little card, I hope you’ve enjoyed seeing it.

Here is a look at the entire stamp set:

Stampin-Up-Sunflower-Serenade-Love-and-Friendship-Card-Ideas-Shannon-Jaramillo-stampinup

And if you are wondering, I’ve realized that I value the freedom of not worrying about which company something came from and just create what my heart thinks is pretty. I just want to enjoy the process and I love hearing your comments, they really encourage me so thank you for taking the time to comment when you do, I appreciate you!

Thank you,

Humble & Kind

Fun-Stampers-Journey-Humble-&-Kind-Love-&-Friendship-Card-Idea-Shannon-Jaramillo-funstampersjourney-fsj

Hello my stamping friends! I’m back today with another sampling of goodies from The Good Life collection. Today’s card is actually a Frankenstein card, meaning it was made from cast offs of other projects that didn’t turn out the way I wanted them to! The sentiment I’m using here turned out to be too big for my original idea, so I rearranged my thoughts and used this week’s team challenge sketch to make the sentiment a focal point!

Measurements:

  • Raspberry Berry Card Base 5 1/2″ x 8 1/2″, scored at 4 1/4″
  • Rustic Rose Card Stock Layer 3 1/4″ x 3 3/4″
  • Pattern Paper Background Layer 3″ x 3 1/2″
  • Raspberry Berry Card Stock Layer 2 3/4″ x 3 1/4″
  • Rustic Rose Card Stock Layer 4″ x 3″
  • Whip Cream Layer 3 3/4″ x 2 3/4″

Fun-Stampers-Journey-Humble-&-Kind-Love-&-Friendship-Cards-Idea-Shannon-Jaramillo-funstampersjourney-fsj

Details:

  • I love how layers of color really turn up the volume on an otherwise pretty simplistic card. If you look closely at the Whip Cream rectangle, it is frames by Rustic Rose and Raspberry Berry on the left side, but as you slide over to the right side of that layer you can see that I ended the Raspberry Berry layer right where it butts up against the card base. Doing this creates an optical illusion and keeps the top layer highlighted perfectly.

  • Being creative is easy when you have access to such beautiful stamps! I adore all of the images in this set but just had to focus on the wonderful font of the ‘Home Sweet Home’ sentiment. I think it evokes our fondest memories of home, even if they didn’t involve rolling fields, barns or farm animals! I stamped the sentiment with Black Licorice ink and then die cut it with the Journey Circles dies.

Fun-Stampers-Journey-Humble-&-Kind-Love-&-Friendship-Cards-Ideas-Shannon-Jaramillo-funstampersjourney-fsj

  • I popped my sentiment up and added the beautiful Detailed Foliage die cut in Rustic Rose to help frame the sentiment and just HAD to add a messy bow! I then went a little wild with these yummy sequins from the new Sunrise Mix sequins, aren’t they pretty and they match the Raspberry Berry card stock so well!

Fun-Stampers-Journey-Humble-and-Kind-Love-&-Friendship-Card-Idea-Shannon-Jaramillo-funstampersjourney-fsj

  • The sketch called for a small banner in the upper right hand corner so I snipped it out of a piece of the same lovely floral pattern from the Good Life pattern paper pack that I used in the background. But it was too plain compared to my fussy bow and sequins, so I dressed it up with this amazing Clear Blooms Accent! It’s a curved, not flat, bloom button and is the real deal! I’m not usually a fan of accents that require extra postage, but this card can be a hand delivered kind of card, enclosed in a hand crafted Envelo-Box – which is a die that FSJ sells to create an envelope that has depth to it. I’m obviously going to need to order it! lol
  • But really, it’s a sweet sentiment and all, but what kind of card is this?? Yes, I can hear you thinking that, so let me show me show you what kind of card that sentiment would work on:

Fun-Stampers-Journey-Humble-and-Kind-Love-&-Friendship-Card-Ideas-Shannon-Jaramillo-funstampersjourney-fsj

  • Yep, love and friendship. What a great way to show that someone special that they have a special piece of your heart.

Here’s the sketch challenge photo that inspired today’s card! What a fun inspiration it is and I actually think I played along with this sketch challenge when it was used the first time over at Sweet Sunday!

That’s all for today folks! I hope you are inspired to pull out your stamps and inks and maybe create your own unique interpretation of this sketch! Or maybe to do some shopping…lol! Speaking of shopping, I want to let you all know that catalogs went out in the mail today so if you requested one and received an email stating that a package was coming but you didn’t know what it was, now you do! I have two people who requested catalogs but didn’t leave me their address or respond to my emails. Please let me know if you are still interested!

If you are interested in receiving a clog of all the yummy FSJ products, please email me to order yours for only $6, which goes toward the cost of shipping the catalog to you. Hurry, the sooner you order, the sooner you can be inspired!

Thank you and have an awesome week!

Supplies: (All Fun Stampers Journey products unless noted differently below)

Card Stock: Raspberry Berry, Rustic Rose,and Whip Cream

Printed Paper: Good Life Prints

Ink: Black Licorice 

Stamps: Humble & Kind, Dreams Follow (inside flower), Build-a-Wreath (inside sentiment)

Dies:  Journey Circles, Detailed Foliage

Tools:  Journey Blooms Paper Trimmer, Details Pro Shears

Embellishments: Journey Twine Natural, Sunrise Mix Sequins, Clear Blooms Accents

Other: None